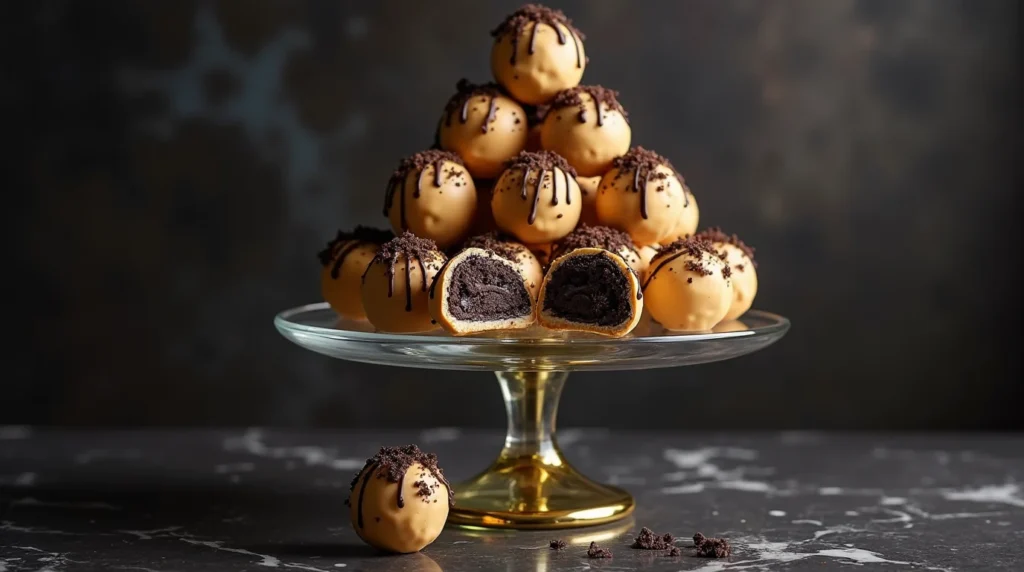
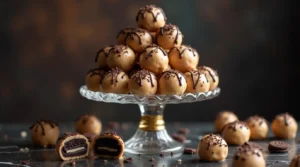
How to make Irresistible Peanut Butter Oreo Balls at home
Share this recipe
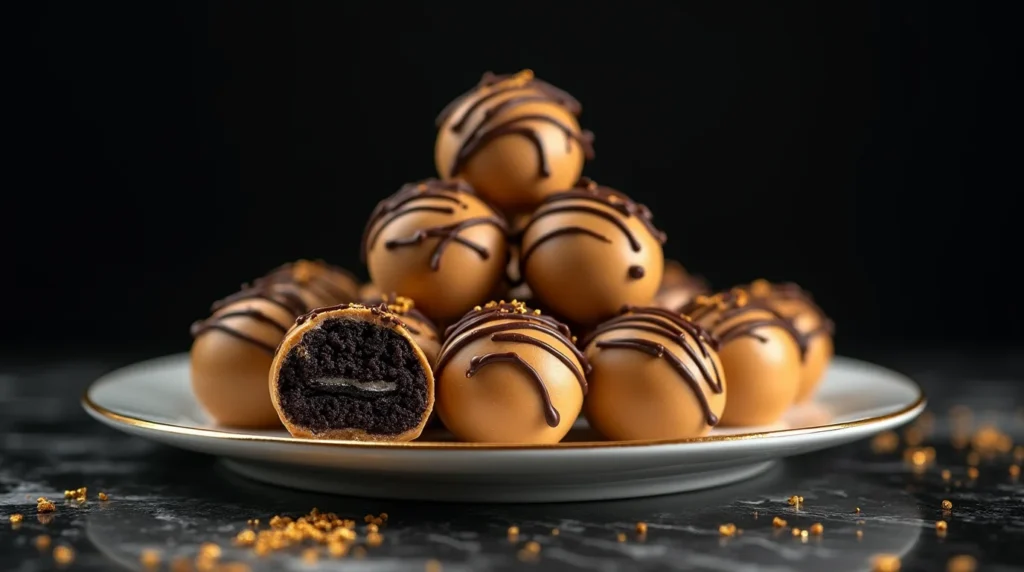
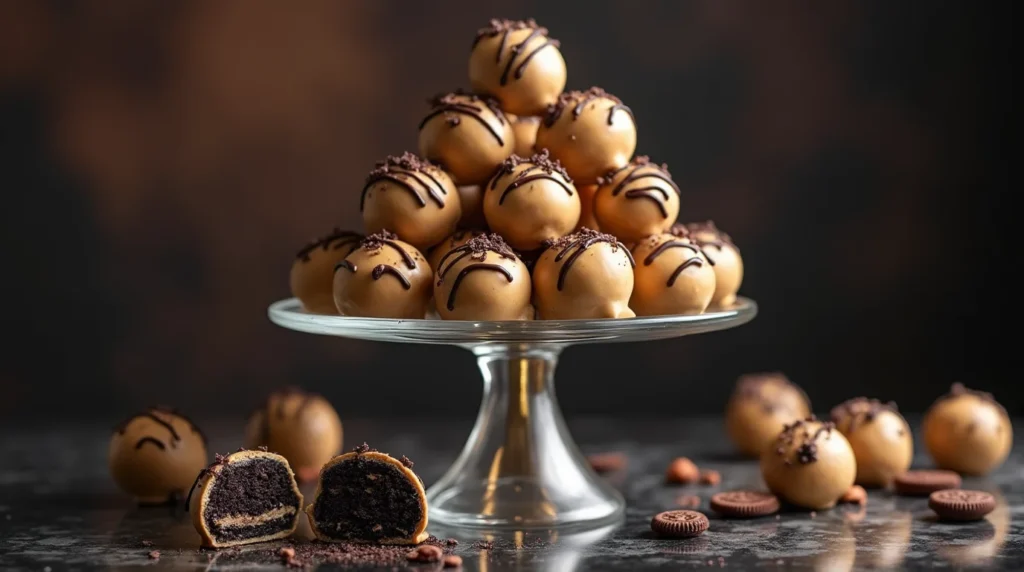
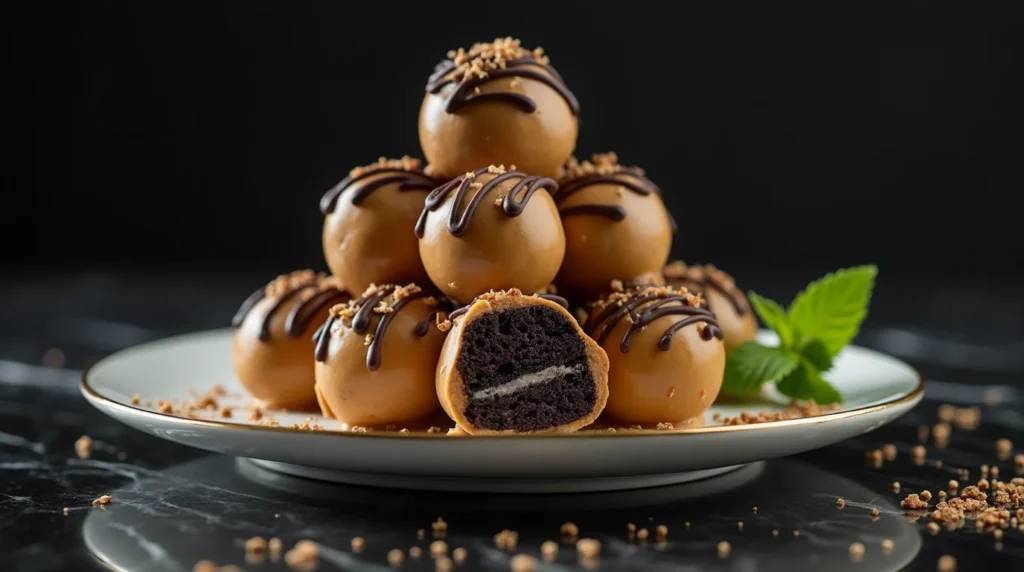
Ever had a craving for something sweet and creamy? That’s when our peanut butter Oreo balls come in! They’re the perfect no-bake treat that will become your new favorite dessert.
Picture biting into a chocolate-coated treat with Oreos and peanut butter. It’s like magic in your kitchen. Our recipe makes these peanut butter dessert balls easy to make and hard to resist.
These Oreo balls are great for anyone, whether you’re new to baking or a pro. They’re perfect for any time, from family gatherings to late-night cravings. They’re a simple, delightful treat that everyone will enjoy!
Key Takeaways
- No-bake recipe perfect for all skill levels
- Requires minimal ingredients and preparation time
- Versatile dessert for parties and personal treats
- Can be customized with different coatings and toppings
- Stores easily in refrigerator for quick snacking
What Are Peanut Butter Oreo Balls?
Peanut butter Oreo truffles are small desserts that everyone loves. They mix Oreo cookies with peanut butter and chocolate. It’s a tasty mix that’s easy to make.
These truffles are more than just a snack. They’re a mix of flavors that you’ll love. You’ll crush Oreos, mix them with peanut butter, and shape them into balls. It’s a treat that’s both fun and delicious!
The Sweet Origins of Oreo Truffles
Oreo truffles started as a fun twist on desserts. People found that mixing crushed Oreos with cream cheese made tasty treats. Soon, people started trying new flavors, making them even more popular.
- Originated from classic no-bake dessert techniques
- Inspired by creative home baker experiments
- Quickly became a popular party and potluck favorite
Why These Treats Are Irresistible
Our peanut butter Oreo truffles are loved for many reasons:
- Super easy to make with just a few ingredients
- No baking needed – perfect for quick treats
- Customizable with different chocolate coatings
- Portable and perfect for sharing
Pro tip: These oreo cookie balls are so addictive, you might want to make a double batch!
Essential Ingredients for Perfect Peanut Butter Oreo Balls
Making tasty peanut butter and oreo treats starts with picking the right ingredients! Our no-bake peanut butter balls need a few key parts. These will turn your kitchen into a sweet paradise. 🍪
Here are the must-have ingredients for these yummy peanut butter oreo bites:
- Oreo Cookies: Go for classic original Oreos for the best taste and texture
- Creamy Peanut Butter: Pick smooth, room-temperature peanut butter
- Powdered Sugar: It helps the mixture stick together and adds sweetness
- Chocolate for Coating: Dark, milk, or white chocolate works great
Quality is key when making these treats! Use well-known brands for the best taste. The right mix will make your no-bake peanut butter balls amazing.
Pro Tip: Always use fresh ingredients for the best flavor!
Want to make your peanut butter and oreo treats even better? Try these extra flavor boosters:
- Vanilla extract
- Sea salt
- Crushed nuts for garnish
Get ready to wow your friends and family with these incredible peanut butter oreo bites. They’re sure to be a hit!
Kitchen Tools and Equipment Needed
Getting ready to make chocolate covered oreo balls? You’ll need the right tools! We’ll guide you through the steps to make delicious holiday oreo truffles. The first step is to gather the right equipment for these tasty peanut butter oreo recipes.
Essential Utensils for Truffle Making
- Food processor – Great for crushing oreos into fine crumbs
- Large mixing bowl – For mixing ingredients together
- Measuring cups and spoons – For accurate ingredient amounts
- Rubber spatula – Smoothly mixes ingredients
- Baking sheet – Chills and sets your oreo balls
- Parchment paper – Prevents sticking and makes cleanup simple
Optional Decorating Tools
Want to make your chocolate covered oreo balls even more special? Here are some fun optional tools:
- Decorative piping bags – For beautiful chocolate drizzles
- Sprinkle shakers – Adds festive holiday touches
- Chocolate melting pot – For smooth chocolate coating
- Dipping tools – Creates professional-looking truffles
With these tools, you’ll be all set to make amazing holiday oreo truffles. They’ll look as good as they taste!
Tips for Choosing the Best Chocolate Coating
Choosing the right chocolate coating can make your quick peanut butter desserts amazing! When you make oreo balls with cream cheese and peanut butter, the chocolate coating is key. It affects both taste and looks.
Let’s explore the world of chocolate coatings for your peanut butter oreo holiday treats. We’ll cover the main points to think about:
- Chocolate Quality: Always choose high-quality chocolate for the best results
- Consider different chocolate types:
- Milk chocolate (sweeter option)
- Dark chocolate (rich, intense flavor)
- White chocolate (great for decorative touches)
- Look for chocolate with a smooth melting consistency
Pro tip for perfect coating: Use chocolate melting wafers or high-quality chocolate bars. Avoid chocolate chips, as they’re designed to hold their shape and won’t create the smooth finish you want.
The secret to amazing peanut butter oreo balls is in the chocolate coating – smooth, glossy, and perfectly tempered!
When preparing your chocolate coating, remember these key techniques:
- Melt chocolate slowly using a double boiler
- Stir continuously to prevent burning
- Keep temperature consistent
- Use a dipping tool for even coating
Get creative with your chocolate coating! Mix different types of chocolate, add sprinkles, or drizzle contrasting chocolate for a professional touch. Your homemade oreo balls will look absolutely stunning!
Step-by-Step Preparation Process
Get ready to make magical no bake desserts that will impress everyone! Our easy snack recipes are great for holidays or any time. We’ll show you how to make delicious Peanut Butter Oreo Balls. It’s easy, even for beginners.
Crushing the Oreos Like a Pro
Start by crushing Oreos just right for the base of your treats. You want a fine texture that makes them stick together well. Here’s how to crush them:
- Place Oreos in a sealed plastic bag
- Use a rolling pin to crush into fine crumbs
- Aim for a sand-like consistency
Mixing Magic with Peanut Butter
The key to amazing holiday desserts is the right mix. Mix crushed Oreos with creamy peanut butter until it’s dough-like. This makes it easy to shape.
- Use room temperature peanut butter
- Mix gradually to control moisture
- Stop mixing when the mixture is moldable
Forming Perfect Oreo Balls
Now, the fun part! Roll the mix into balls, about one inch in diameter. Wet your hands a bit to avoid sticking and get smoother balls.
Quick trick: Use a small cookie scoop for consistent sizing!
Chocolate Coating Techniques and Tips
Creating the perfect chocolate coating for your peanut butter chocolate balls is an art. It can turn simple treats into stunning homemade chocolate truffles. Let’s explore some professional coating techniques to boost your dessert skills!
Melting chocolate might seem tricky, but we’ve got foolproof methods. These will help you get a smooth, glossy finish. The secret is using the right temperature and technique.
- Double Boiler Method: Gently melt chocolate using indirect heat to prevent burning
- Use high-quality chocolate for best results in your peanut butter chocolate balls
- Maintain a consistent chocolate temperature around 90°F for perfect coating
Dipping tools are crucial for your coating technique. A classic fork works well for creating professional-looking treats. Lightly tap the fork against the side of the bowl to let any extra chocolate drip off. This ensures a thin, even layer.
Pro tip: Chill your peanut butter balls before coating to help the chocolate set quickly and create a crisp shell!
For those wanting to get creative, try these decoration ideas:
- Drizzle contrasting chocolate colors
- Sprinkle crushed nuts or cookie crumbs
- Add colorful sugar crystals for extra sparkle
With these techniques, your homemade chocolate truffles will look like they came straight from a professional bakery!
Creative Decoration Ideas
Turn your peanut butter oreo balls into stunning desserts with these decoration tips! Our no bake oreo balls are perfect for showing off your creativity. You can make beautiful sweet treats.
Delightful Topping Options
Make your peanut butter oreo truffles stand out with these topping ideas:
- Crushed candy canes for a festive winter look
- Colorful sprinkles for a fun, playful appearance
- Drizzled white and dark chocolate for elegant contrast
- Chopped nuts for added texture and crunch
- Edible glitter for a touch of sparkle
Seasonal Holiday Variations
Change your no bake oreo balls for any holiday! Whether it’s Christmas, Valentine’s Day, or a birthday, these treats can fit any theme.
- Christmas: Red and green sprinkles, candy cane pieces
- Valentine’s Day: Pink and red chocolate drizzle, heart-shaped decorations
- Halloween: Orange and black sprinkles, chocolate spider web designs
- Fourth of July: Red, white, and blue color schemes
Be creative and enjoy making these irresistible treats. They’re sure to wow your friends and family!
Storage and Shelf Life Guidelines
Keeping your easy oreo truffles fresh is key to enjoying them at their best. We have expert tips to help you keep your homemade treats tasty and fresh.
Refrigeration is essential for keeping your peanut butter dessert balls in top shape. Here’s how to store them right:
- Store in an airtight container to prevent moisture and odors
- Place a layer of parchment paper between each row of truffles
- Keep refrigerated at 40°F or below
The shelf life of these treats depends on how you store them:
- Refrigerated: Up to 2 weeks
- Frozen: Up to 3 months
- Room temperature: 3-4 days maximum
Freezing tip: Wrap each truffle in plastic wrap before freezing. This keeps them from getting freezer burn and keeps their flavor amazing!
Always let refrigerated or frozen truffles sit at room temperature for 10-15 minutes before serving. This helps them regain their perfect texture and taste.
Proper storage keeps your homemade oreo truffles as delicious as when you first made them. Enjoy your sweet treat!
Common Mistakes to Avoid
Making the perfect oreo cookie balls can be tricky, even for experts. Check out our guide so you can skip the usual mistakes. This way, you can make delicious treats that will wow everyone.
No bake peanut butter balls might seem easy, but small mistakes can ruin your dessert. Let’s look at the most common problems and how to fix them!
Texture Troubles to Watch Out For
Texture is key for your oreo cookie balls. Here are some issues to watch out for:
- Crumbly Mixture: If it falls apart, add more binding agent (like cream cheese or peanut butter)
- Too Soft Balls: Chill the mixture for 15-20 minutes to help them shape up
- Dense Centers: Make sure to mix crushed oreos and peanut butter well
Chocolate Coating Challenges
Getting a smooth chocolate coating needs some finesse. Here are common coating problems:
- Chocolate that won’t set right
- Uneven coating
- Chocolate cracking after cooling
Tip for perfect no bake peanut butter balls: Keep your chocolate at the right temperature. Work fast when dipping your oreo cookie balls!
Remember, practice makes perfect with these delightful peanut butter and oreo treats!
Variations and Recipe Adaptations
Ready to elevate your chocolate covered oreo balls? Let’s dive into some fun ways to make our classic peanut butter oreo bites into unique treats. These will surely impress your friends and family!
Flavor experimentation is key to making unforgettable holiday oreo truffles. Here are some tasty variations to spark your creativity:
- Flavor Swap Options:
- Try different Oreo flavors like mint, birthday cake, or peanut butter Oreos
- Experiment with alternative nut butters like almond or cashew butter
- Replace traditional chocolate coating with white chocolate or colored candy melts
For those with dietary restrictions, we’ve got amazing adaptations:
- Special Diet Modifications:
- Gluten-free version: Use gluten-free sandwich cookies
- Vegan option: Substitute dairy-free chocolate and vegan cream cheese
- Low-sugar alternative: Use sugar-free Oreos and dark chocolate
Seasonal creativity can turn these peanut butter oreo bites into festive treats! Try these holiday-themed twists:
- Christmas: Sprinkle with red and green sugar crystals
- Halloween: Decorate with orange and black sprinkles
- Valentine’s Day: Use heart-shaped decorations or pink chocolate coating
Pro tip: Always chill your truffles between steps to maintain the perfect texture!
The beauty of these chocolate covered oreo balls is their incredible versatility. Don’t be afraid to get creative and make the recipe your own!
Make-Ahead and Freezing Instructions
Want to prep your favorite peanut butter Oreo recipes ahead of time? Great news! These quick peanut butter desserts are perfect for make-ahead magic. We’ll show you how to store and freeze oreo balls with cream cheese and peanut butter so you can enjoy them whenever a sweet craving strikes!
Freezing these delectable treats is super simple. Follow our easy steps to keep your Oreo balls fresh and delicious:
- Prepare the Oreo balls as per the original recipe
- Place them on a parchment-lined baking sheet
- Freeze for about 30 minutes until firm
- Transfer to an airtight container
When it comes to storage, these peanut butter Oreo recipes can be kept in the freezer for up to 3 months. Pro tip: Layer the Oreo balls between sheets of parchment paper to prevent sticking.
Thawing is a breeze! Simply transfer your frozen Oreo balls to the refrigerator about 1 hour before serving. This gradual warming helps maintain their perfect texture and prevents condensation.
Pro Freezing Hack: Wrap individual Oreo balls in plastic wrap before placing in the container for extra protection!
No more stress about last-minute desserts! With these make-ahead instructions, you’ll always have a delicious treat ready to impress your friends and family.
Serving Suggestions and Presentation Ideas
Make your no bake desserts stand out with our creative tips! Peanut butter oreo holiday treats are perfect for any event. We’ll show you how to make them look as good as they taste.
Turning your holiday desserts into stunning displays is simple. We’ll share exciting ways to present these tasty oreo balls. They’ll wow your guests and make your dessert table unforgettable.
Party Plating Techniques
- Use tiered cake stands for dramatic height and visual appeal
- Create color-coordinated display arrangements matching holiday themes
- Arrange treats on elegant white platters for a clean, sophisticated look
- Incorporate festive garnishes like mint leaves or edible glitter
Gift-Giving Packaging Ideas
Packaging your peanut butter oreo holiday treats makes them thoughtful gifts. Here are some creative ideas:
- Clear cellophane bags with decorative ribbons
- Vintage-style bakery boxes with custom labels
- Mason jars with festive fabric toppers
- Mini holiday-themed gift boxes
Pro tip: Add a personal touch with a handwritten note or custom recipe card. These small touches can make your holiday treats into cherished gifts!
Conclusion
We’ve shown you how to make delicious peanut butter Oreo balls. These treats are great for easy snacks and will wow your guests. They turn simple ingredients into amazing homemade chocolate truffles.
These Oreo balls are perfect for kids’ parties or a sweet treat for yourself. Learning to make them is more than a recipe. It’s a chance to get creative in the kitchen and share yummy desserts with others.
Cooking is all about trying new things and having fun! Every batch of Oreo balls you make will be special, showing off your unique style. Don’t be afraid to try different coatings, decorations, and flavors. Your kitchen is your playground, and these treats are your canvas!
So, get your ingredients ready, become your own pastry chef, and start making some amazing Oreo ball magic. Your taste buds and friends will love you for it!
Peanut Butter Oreo Balls Recipe
Sweet, creamy, and chocolatey – these no-bake peanut butter Oreo balls are the ultimate bite-sized dessert. Perfect for parties, holidays, or late-night cravings!
- Serving Size: 2 balls
- Prep Time: 20 minutes
- Cook Time: 0 minutes
- Total Time: 20 minutes + chilling time
Ingredients (Per Serving)
- 4 Oreo cookies (crushed into fine crumbs)
- 1 tbsp creamy peanut butter (room temperature)
- 1 tsp powdered sugar
- 1 oz chocolate (dark, milk, or white), for coating
Nutritional Facts (Approx. per serving of 2 balls)
- Calories: 210
- Protein: 3g
- Carbohydrates: 22g
- Total Fat: 13g
- Fiber: 1g
- Sodium: 120mg
- Sugar: 15g
Instructions
Step 1: Crush the Oreos
Place Oreo cookies in a zip-top bag and crush using a rolling pin, or pulse them in a food processor until finely ground.
Step 2: Mix with Peanut Butter
In a mixing bowl, combine the crushed Oreos, creamy peanut butter, and powdered sugar. Mix until a soft dough forms.
Step 3: Form the Balls
Using a small cookie scoop or your hands, roll the mixture into 1-inch balls. Place them on a parchment-lined baking sheet.
Step 4: Chill
Refrigerate the balls for at least 30 minutes to firm up.
Step 5: Melt the Chocolate
Melt chocolate in a microwave-safe bowl in 30-second intervals, stirring between each, or use a double boiler for a smoother finish.
Step 6: Coat the Balls
Dip each chilled ball into the melted chocolate using a fork or dipping tool. Let excess chocolate drip off before placing back on parchment paper.
Step 7: Optional Decoration
Drizzle with contrasting chocolate, or top with sprinkles, crushed Oreos, or sea salt for added flair.
Step 8: Chill Again
Refrigerate the coated truffles for another 10–15 minutes or until the chocolate is fully set.
Pro Tips
- Use high-quality chocolate for a smoother, glossier coating.
- Chill the balls well before dipping to avoid cracking.
- Get creative with coatings and toppings – try white chocolate, nuts, or themed sprinkles!
Storage
- Refrigerator: Store in an airtight container for up to 2 weeks.
- Freezer: Freeze in layers separated by parchment paper for up to 3 months. Thaw in the fridge before serving.