How to Make irresistible No-Bake Reese’s Oreo Balls Everyone Raves About
Share this recipe
Imagine a dessert so good, it makes everyone stop and smile. These no-bake Reese’s Oreo balls are more than a treat. They’re a fun adventure in your kitchen!
They’re perfect for anyone, whether you’re new to baking or a pro. This easy recipe will make you a hero at any gathering.
As a kid, I loved when a simple recipe could make a day special. These no-bake Reese’s Oreo balls do just that. They’re easy, tasty, and make everyone happy!
Key Takeaways
- Super easy no-bake dessert that requires minimal cooking skills
- Perfect for parties, gatherings, or quick sweet cravings
- Combines the classic flavors of Oreos and Reese’s peanut butter cups
- Can be prepared in under 30 minutes
- Great make-ahead dessert that impresses everyone
Why These No-Bake Reese's Oreo Balls Are Internet Famous
Social media has changed how we find tasty treats. Peanut butter Oreo truffles are now a viral hit! These no-bake Reese’s dessert recipe balls have won over food lovers everywhere. They’ve caused a huge online buzz that’s hard to miss.
So, what’s so special about these truffles? Let’s look at their internet-breaking qualities:
- Minimal Effort, Maximum Flavor: Just a few ingredients make an amazing dessert
- Perfect mix of Oreo cookies and Reese’s peanut butter
- They look so good on Instagram, like they were made by a pro
- They’re quick to make (under 30 minutes)
The Viral Sensation Explained
These peanut butter Oreo truffles are a social media star because they’re super shareable. Food bloggers and home cooks love how easy yet impressive they look. The chocolate outside and creamy inside make them a hit online.
What Makes Them Irresistible
The secret of these Reese’s dessert recipe balls is their perfect flavor mix. The Oreo crunch, peanut butter, and chocolate coating are a dream. They’re a crowd-pleaser for any event!
Essential Ingredients for Perfect Peanut Butter Oreo Truffles

Making the perfect oreo ball recipe with Reese’s starts with the right ingredients. These treats need a mix of simple yet tasty pantry items. They will take your dessert to the next level!
Let’s look at the main parts of our delicious truffles:
- Oreo Cookies: One full package of classic chocolate sandwich cookies
- Cream Cheese: 8 ounces of softened Philadelphia cream cheese
- Reese’s Peanut Butter Cups: 4-5 full-sized cups, chopped finely
- Peanut Butter: 1/2 cup of creamy Jif or Skippy
- Chocolate for Coating: Milk or dark chocolate melting wafers
Our treats need the right ingredients. Cream cheese makes them smooth, and Reese’s cups add rich peanut butter taste. Tip: Use room temperature ingredients for better mixing!
The secret to perfect Oreo balls is balancing texture and flavor!
Prep time is short, making this recipe great for sudden sweet cravings or quick gatherings. With these ingredients, you’re set to make a treat everyone will love!
Kitchen Tools and Equipment You'll Need
Making delicious 3-ingredient Oreo balls is easy without a fancy kitchen. We’ll show you the basic tools needed to make tasty chocolate peanut butter balls.

Before you start making your treats, let’s look at the important tools. They will help make your chocolate peanut butter balls easy to make and fun.
Must-Have Tools for Delicious Results
- Food processor or rolling pin for crushing Oreo cookies
- Large mixing bowl for combining ingredients
- Measuring cups and spoons
- Rubber spatula for mixing
- Baking sheet or flat tray
- Parchment paper for easy cleanup
Optional Equipment for Professional Touch
- Digital kitchen scale for precise measurements
- Cookie scoop for uniform 3-ingredient Oreo balls
- Dipping tools for smooth chocolate coating
- Cooling rack for chocolate peanut butter balls
- Decorative sprinkles or piping bags
Even if you’re missing some tools, you can still make great Oreo balls with what you have. The most important thing is to have fun and be creative!
Step-by-Step Guide to Making No-Bake Reese's Oreo Balls
Want to make some tasty holiday treats that will impress everyone? Our easy Reese’s Oreo Balls recipe is great for beginners and experts alike!
Let’s make it simple. These no-bake treats are not only yummy but also super fun to make.
- Crush the Oreos: Use a food processor or place cookies in a sealed bag and crush with a rolling pin until you have fine crumbs
- Mix cream cheese and crushed Oreos in a large bowl until well combined
- Add peanut butter and mix thoroughly
- Chill the mixture for 15-20 minutes to make rolling easier
- Roll mixture into small, uniform balls
- Freeze balls for 10 minutes before coating
Pro tip: Keep your hands slightly damp while rolling to prevent the mixture from sticking. This trick works wonders for creating smooth, perfectly shaped holiday no-bake desserts!
The key to great no-bake party treats is patience and precision in each step.
Follow these easy steps, and you’ll have Reese’s Oreo Balls that look and taste amazing. Get ready to wow everyone at your next party!
Tips for Crushing Oreos to the Perfect Consistency
Turning Oreos into a sweet treat with Reese’s is all about cookie-crushing magic! Our kid-friendly dessert recipe needs that perfect cookie texture. Whether you’re new to cooking or experienced, crushing Oreos is simpler than you think.
Our top methods for achieving cookie perfection include two main approaches:
Manual Crushing Techniques
- Place Oreos in a sealed plastic bag
- Use a rolling pin to crush cookies
- Work in gentle, consistent motions
- Aim for a mix of fine crumbs and small chunks
Food Processor Magic
For those who love kitchen gadgets, a food processor is a game-changer. Pro tip: Pulse in short bursts to avoid over-processing. You want a texture that’s not too fine, not too chunky – just right for your Reese’s Oreo balls!
“The secret is in the texture – not too fine, not too chunky!” – Dessert Experts
The ideal consistency should be like coarse sand with some small cookie pieces. This ensures your sweet snack with Reese’s and Oreos has the perfect bite and mouthfeel.
Mixing and Combining Your Ingredients
Making delicious no-bake truffle balls is all about the right mix. We’re going to turn simple ingredients into tasty Reese’s Oreo truffles. Everyone will want to know your secret.
When mixing, it’s important to get it right. Start by grinding your Oreo crumbs finely for a smooth feel. Here’s how to mix:
- Crush Oreo cookies until they’re fine and even
- Add creamy peanut butter slowly
- Mix until the mixture holds together like dough
You want a dough-like consistency that’s not too dry or too wet. Pro tip: Add peanut butter slowly to keep the right moisture. This way, your truffles will hold their shape well.
Perfect mixing means perfect truffles!
Use a spatula or your hands to mix well. Your warm hands can help the mixture stick together. This makes shaping your truffle balls easier. Remember, the more you practice, the better you’ll get!
Proper Rolling and Shaping Techniques
Making perfect peanut butter Oreo balls is an art. It needs precision and practice. Our method will help you make treats that look great and taste amazing!
The key to great peanut butter Oreo balls is in the rolling and shaping. We’ll guide you through each step. This way, your dessert will look perfect.
Size Guide for Perfect Portions
Consistency is crucial when making your dessert. Here’s how to get uniform balls:
- Use a small cookie scoop for precise measurements
- Aim for 1-inch diameter balls
- Keep a bowl of cold water nearby to prevent sticking
Troubleshooting Shaping Issues
Having trouble with crumbly or sticky mixtures? Don’t worry! Here are some tips to help:
- If mixture is too dry, add a teaspoon of melted butter
- For sticky mixtures, chill in refrigerator for 15 minutes
- Use disposable gloves to prevent hands from getting messy
- Roll balls quickly with gentle, light pressure
Remember, the more you practice, the better you’ll get. Each batch will be easier and tastier!
Chocolate Coating Methods and Tips
Turning your easy Oreo dessert recipe into a showstopper requires mastering chocolate coating. The right technique can make your no-bake chocolate truffles look amazing!
There are three main ways to coat your Oreo balls:
- Classic Dipping Method: Melt high-quality chocolate and use a fork to fully cover each Oreo ball
- Drizzling Technique: Make fancy zigzag patterns with melted chocolate for a gourmet look
- Partial Coating: Coat only half the Oreo ball for a unique presentation
Getting the chocolate temperature right is key. Aim for 86-90°F for a glossy finish. A digital thermometer can help you get it just right.
Pro tip: Always let excess chocolate drip off before placing your truffles on parchment paper to cool!
For the best taste, use chocolate with at least 60% cocoa content. Dark, milk, or white chocolate all work great. So, try different types to find your favorite!
Creative Decoration Ideas and Toppings
Make your no-bake peanut butter treats look amazing with creative decorating! Our chocolate Reese’s balls can turn into stunning works of art with a few extra steps.
Seasonal Sprinkle Magic
Seasonal decorations can elevate your chocolate Reese’s balls. Here are some festive ideas:
- Halloween: Orange and black sprinkles
- Christmas: Red and green sugar crystals
- Valentine’s Day: Heart-shaped candy pieces
- Fourth of July: Red, white, and blue nonpareils
Professional Finishing Touches
Take your no-bake peanut butter treats to the next level with these pro tips:
- Drizzle contrasting chocolate in elegant patterns
- Use edible metallic dust for shimmer
- Create color-coordinated chocolate coatings
- Add delicate chocolate swirls
With these ideas, your chocolate Reese’s balls will look like they’re from a fancy bakery!
Storage and Make-Ahead Instructions
Storing your no-bake Reese’s Oreo balls is easy! These desserts stay fresh with the right storage. Here are some tips to keep them looking and tasting great!
Refrigeration is key for the perfect texture. Here are our top storage tips:
- Store in an airtight container
- Place parchment paper between layers to prevent sticking
- Keep refrigerated for up to 5-7 days
Freezing is great for long-term storage! Follow these steps to freeze your treats for up to 3 months:
- Arrange balls on a baking sheet
- Freeze until solid (about 1 hour)
- Transfer to a freezer-safe container
- Separate layers with wax paper
Pro tip: When ready to serve, thaw in the fridge for 30 minutes. This keeps their texture and flavor perfect!
Quick Serve Hack: Room temperature treats taste best, so remove from the fridge 10-15 minutes before serving!
To keep your dessert looking amazing, store in a cool, dark place. Avoid direct sunlight or warm temperatures to keep the chocolatey goodness intact!
Variations and Flavor Combinations
Ready to elevate your Reese’s dessert recipe? Our peanut butter Oreo truffles are perfect for trying new flavors. They will surprise and delight your taste buds!
- Mint Chocolate Sensation: Mix in crushed mint chocolate Oreos and add peppermint extract for a cool taste
- Caramel Sea Salt Surprise: Drizzle caramel and sprinkle sea salt on top for a gourmet flavor
- Nutella Dream: Add Nutella to the truffle mix for an extra chocolatey kick
- Cookies and Cream Delight: Coat with white chocolate and sprinkle crushed white Oreo cookies on top
Remember, balance is key when making these truffles. Start with small changes and taste as you go. Each mix offers a unique twist on our classic Reese’s dessert.
“Creativity is the secret ingredient in transforming a good dessert into an unforgettable experience!” – Dessert Enthusiast
Pro tip: Try different chocolate coatings and toppings to make your own truffle style. The possibilities are endless!
Serving Suggestions and Presentation Ideas
Turning your oreo ball recipe with Reese’s into a stunning dessert centerpiece is easy. These quick no-bake treats can make any gathering special with the right presentation.
Let’s look at some creative ways to show off these tasty bites. They’ll impress your guests and make your dessert table stand out!
Party Plating Techniques
When serving these delightful Oreo balls, presentation matters a lot. Here are some eye-catching plating ideas:
- Use a tiered cake stand for elegant height and visual appeal
- Create a circular arrangement on a marble or wooden board
- Alternate between chocolate and white-coated Oreo balls for color contrast
- Sprinkle edible glitter or crushed Reese’s pieces around the display
Gift Packaging Options
Turn your homemade Oreo balls into thoughtful gifts with these packaging ideas:
- Clear gift boxes with ribbon ties
- Mason jars with personalized labels
- Decorative cellophane bags with themed twist ties
- Small bakery-style boxes for a professional touch
Pro tip: Always refrigerate your Oreo balls before packaging to maintain their perfect shape and texture!
Common Mistakes to Avoid
Making the perfect 3-ingredient Oreo balls can be tricky! We’ve listed common mistakes that can ruin your chocolate peanut butter balls. These mistakes can stop them from being perfect.
To make delicious chocolate peanut butter balls, you need to pay close attention. Here are the most common mistakes home bakers make:
- Crushing Oreos Too Finely or Roughly: Aim for a consistent, medium-fine crumb texture. Overly fine crumbs can make your balls dense, while large chunks prevent proper binding.
- Incorrect Moisture Balance: Adding too much or too little cream cheese can ruin the texture of your 3-ingredient Oreo balls. The mixture should hold together without being sticky or crumbly.
- Chocolate Coating Challenges: Melting chocolate requires patience. Use low heat and stir constantly to prevent burning or seizing.
“Precision is key when creating the perfect no-bake treat!” – Baking Experts
Temperature is key to your chocolate peanut butter balls’ success. Room temperature ingredients blend more smoothly, creating a more consistent mixture.
- Chill ingredients before mixing
- Use room temperature cream cheese
- Work quickly during the rolling process
By avoiding these common mistakes, you’ll turn your 3-ingredient Oreo balls into crowd-pleasing delights!
Enjoyed these No-Bake Reese’s Oreo Balls?
Discover more easy and irresistible no-bake dessert recipes from Top Creative Recipes, like our Chocolate Coconut Truffles and No-Bake Pumpkin Cheesecake Balls—perfect for satisfying your sweet tooth!
Conclusion
You’ve discovered the secret to making irresistible holiday no-bake desserts. Reese’s Oreo balls are more than treats; they’re a joy to share. You’ll be the star of every party with these no-bake treats.
Creating these bites takes practice. Don’t worry if your first batch isn’t perfect. With each try, you’ll get better. These desserts are simple and easy to customize for any event.
Our last tip? Have fun and be creative! Making these treats is a great way to bond with loved ones. They’re perfect for any celebration, bringing smiles and memories. So, get your ingredients ready and start making!
Get ready to be the dessert hero for your friends and family. Your no-bake journey begins now. Enjoy every delicious moment!

No-Bake Reese’s Oreo Balls Recipe
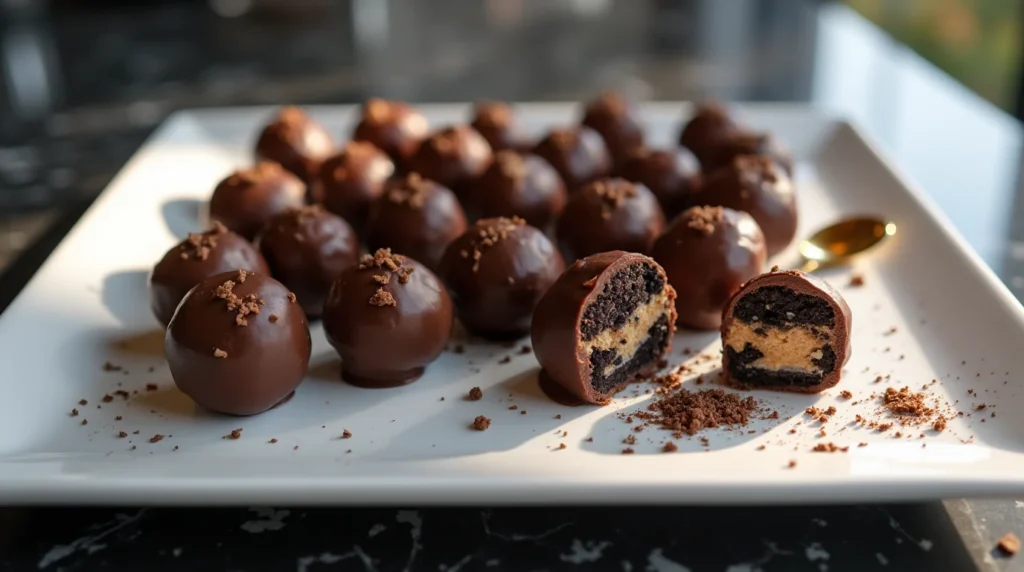
Imagine a dessert so easy and delicious, it makes everyone smile. These No-Bake Reese’s Oreo Balls combine Oreo cookies, Reese’s peanut butter cups, and rich chocolate for a treat that’s irresistibly creamy and crunchy. No baking needed, just fun and flavor in every bite!
Recipe Info
- Serving Size: 1 ball (recipe makes about 24)
- Prep Time: 20 minutes
- Cook Time: 0 minutes
- Total Time: 1 hour (includes chilling)
Ingredients (Per Serving)
- 2 Oreo cookies, crushed
- 1.5 tsp cream cheese, softened
- 1/5 of a Reese’s peanut butter cup, finely chopped
- 1 tsp creamy peanut butter
- 1/2 oz chocolate (milk or dark), for coating
Nutritional Facts (Per Ball, Approximate)
- Calories: 120
- Protein: 2g
- Carbohydrates: 12g
- Sugars: 9g
- Fat: 7g
- Saturated Fat: 3g
- Fiber: 1g
- Sodium: 75mg
Instructions
- Crush the Oreos: Use a food processor or crush in a zip-top bag with a rolling pin until fine crumbs form.
- Mix Base: In a large bowl, mix crushed Oreos with softened cream cheese until well combined.
- Add Reese’s & Peanut Butter: Stir in chopped Reese’s cups and creamy peanut butter. Mix until fully incorporated and dough-like.
- Chill the Mixture: Place the mixture in the fridge for 15–20 minutes to firm up for rolling.
- Shape the Balls: Roll into 1-inch balls using a cookie scoop or spoon. Place on a parchment-lined tray.
- Freeze: Freeze the balls for about 10 minutes to firm them before dipping.
- Melt Chocolate: Gently melt chocolate in the microwave or over a double boiler. Stir until smooth.
- Coat the Balls: Dip each ball into melted chocolate, allowing excess to drip off. Place back on parchment paper.
- Chill Again: Refrigerate for 30 minutes or until chocolate is set.
- Serve or Store: Enjoy immediately or store in an airtight container in the fridge.
Tips & Variations
- For smoother rolling, slightly dampen your hands or wear gloves.
- Try white chocolate, colored melts, or drizzle extra chocolate for decoration.
- Add a pinch of sea salt or crushed nuts on top for added texture.
- Store refrigerated up to 1 week or freeze for up to 3 months.
Serving Suggestions
- Arrange on a tiered dessert stand for parties.
- Gift in decorated boxes or jars with ribbon for holidays.
- Use festive sprinkles or edible glitter for themed events.