Growing up in a kitchen filled with sizzling sounds and irresistible aromas, I learned that some recipes are more than just food—they’re memories on a plate. Today, I’m excited to share a beef milanesa recipe that has been a cherished favorite in many Latin American households. This crispy beef milanesa recipe is more than just a meal; it’s a culinary journey that brings families together!
If you love exploring Latin American classics, you might also enjoy making our Chicken Lomo Saltado for a delicious Peruvian twist on comfort food.
Imagine a perfectly golden-brown piece of beef, crisp on the outside and tender on the inside, that transforms an ordinary dinner into an extraordinary experience. Our easy beef milanesa recipe will guide you through creating a dish that’s both comforting and exciting. Get ready to impress your family and friends with a classic that never fails to delight!
Key Takeaways
- Discover an authentic crispy beef milanesa recipe that’s simple to prepare
- Learn the secrets to achieving the perfect golden-brown crust
- Understand the cultural significance behind this beloved dish
- Master techniques that ensure tender and flavorful meat every time
- Transform your home cooking with a restaurant-quality beef milanesa
Understanding the Traditional Beef Milanesa: A Latin American Classic
The traditional beef milanesa is a tasty journey across continents and cultures. It’s a dish from Latin American cuisine that turns simple meat into a crispy, golden delight. It’s loved by food fans everywhere!

The authentic milanesa de res comes from Italian immigrants in South America. They shared their cooking skills with their families. Over time, these recipes evolved into local favorites.
Origins in Latin American Cuisine
Beef milanesa became famous in places like Argentina, Brazil, and Mexico. Italian immigrants introduced the idea of breading and frying thin meat. This idea quickly mixed with local tastes and ingredients.
- Argentina: Known for thick, generously sized milanesas
- Mexico: Often served with lime and salsa
- Uruguay: Frequently accompanied by mashed potatoes
Regional Variations and Cultural Significance
Every region has its own twist on the traditional beef milanesa. Some use certain beef cuts, while others try different breading methods. It’s more than food; it’s a way to connect with culture and family.
“Milanesa is not just a meal, it’s a celebration of heritage and home cooking.” – Latin American Food Historian
What Makes a Perfect Milanesa
Making a real milanesa de res needs careful attention. The best milanesa has a crispy outside and a tender inside. Getting the meat right, seasoning it well, and frying it just right is key.
- Thin, even meat cut
- Perfectly seasoned breading
- Golden-brown crispy texture
Essential Ingredients for Authentic Beef Milanesa

Starting a beef milanesa breaded cutlet means getting the right ingredients! We choose top-notch parts to turn a simple steak into a tasty dish. Let’s look at what makes a beef milanesa truly great!
For a real beef milanesa steak, you need these key ingredients:
- Beef cuts: Thin, tender cuts like top round or sirloin
- Fresh breadcrumbs (traditional or panko)
- High-quality eggs for coating
- Seasonings: Salt, black pepper, garlic powder
- Vegetable or olive oil for frying
The secret to a delicious beef milanesa is in the ingredients. Pick fresh, high-grade beef for tenderness and taste. Choose fine, even breadcrumbs for a crispy outside and a juicy inside.
Pro tip: For an extra crispy beef milanesa breaded cutlet, consider mixing regular breadcrumbs with panko for a perfect texture!
Preparation is key! Make sure your ingredients are at room temperature and your seasonings are fresh. Each part is important for a tasty milanesa that will wow everyone.
Selecting and Preparing the Perfect Cut of Beef
Creating a great beef milanesa starts with picking the right meat. We explore how to turn regular beef into a delicious thin cut recipe. It’s sure to wow your family!

Let’s explore the world of tenderized beef cutlets that make milanesa a true culinary delight!
Best Beef Cuts for Milanesa
For a beef milanesa steak, try these top cuts:
- Top round: Lean and perfect for thin cuts
- Sirloin: Tender and flavorful
- Bottom round: Budget-friendly option
- Flank steak: Lean and quick to cook
Proper Tenderizing Techniques
“The secret to a great milanesa is in the tenderizing!” – Chef Maria Rodriguez
Tenderizing makes tough cuts tender and delicious. Here are some professional tips:
- Pound meat with a meat mallet
- Use a sharp knife for even cuts
- Apply gentle pressure while pounding
- Aim for uniform 1/4 inch thickness
Thickness and Size Considerations
The perfect beef milanesa steak needs precision. Cut your meat to about 1/4 inch thick. This is thin enough to cook fast but still juicy.
Pro tip: Always slice against the meat’s natural grain for maximum tenderness in your thin cut beef recipe.
The Ultimate Crispy Beef Milanesa Recipe
Ready to make a crispy beef milanesa that will impress everyone? Our recipe is easy to follow and promises restaurant-quality results in your kitchen!
Let’s dive into the steps for a delicious beef milanesa. It’s all about choosing the right beef, tenderizing it, making the perfect breading, and getting it crispy.
- Selecting the right cut of beef
- Proper meat tenderizing
- Creating the perfect breading
- Achieving golden-brown crispiness
For our recipe, you’ll need a few ingredients:
- Thin beef cutlets (preferably sirloin or round steak)
- Fresh breadcrumbs
- Eggs for coating
- Salt and pepper
- Vegetable oil for frying
“The secret to a perfect milanesa is in the technique, not just the ingredients!” – Culinary Experts
Our method is perfect for beginners. Pound the meat thin, season well, and make a crispy, golden crust that everyone will love.
Impress your dinner guests with this authentic homemade beef milanesa. It brings the flavors of Latin America right to your table!
Mastering the Breading Process
Crispy, golden, and delicious – that’s what a perfectly breaded beef milanesa is. We’re going to share secrets to make the most mouthwatering panko breaded beef. It will have everyone wanting more.
Breading is an art that turns an ordinary beef steak into a masterpiece. We’ll explore techniques to make your beef milanesa with panko breadcrumbs perfect, like in a restaurant!
Traditional vs. Panko Breadcrumbs
When it comes to breaded beef steak, not all breadcrumbs are the same. Let’s look at the main differences:
- Traditional breadcrumbs: Dense and fine-textured
- Panko breadcrumbs: Light, airy, and extra crispy
“Panko is the secret weapon for achieving that perfect golden crunch!” – Professional Chefs
Seasoning Secrets
The right seasoning can make your panko breaded beef irresistible. Our favorite mix includes:
- Garlic powder
- Dried oregano
- Smoked paprika
- Sea salt
- Freshly ground black pepper
Double-Breading Technique
Want the crispiest beef milanesa with panko breadcrumbs? Our double-breading technique is a game-changer! Here’s how we do it:
- First coating: Seasoned flour
- Second coating: Egg wash
- Final coating: Seasoned panko breadcrumbs
If crispy, golden recipes are your thing, don’t miss out on our homestyle Chicken-Fried Steak—it’s a Southern staple you’ll want to put on repeat in your kitchen.
Pro tip: Press the panko breadcrumbs firmly to ensure a thick, even coating. This will give you that ultimate crispy texture!
Perfect Pan-Frying Methods for Golden Brown Results
Learning to pan fry beef cutlets is key to making tasty mexican style beef milanesa. The right method can turn your dish from great to amazing!
Here are the main steps for getting those golden brown beef cutlets every time:
- Choose a heavy-bottomed skillet for even heat distribution
- Select the right oil with a high smoke point, like vegetable or canola oil
- Maintain oil temperature between 350-375°F for optimal crispiness
When frying your pan fried beef schnitzel, keeping the temperature right is important. Start by heating your oil until it shimmers but doesn’t smoke. This helps get a crispy outside without burning the breading.
Pro tip: Test oil readiness by dropping a breadcrumb into the pan – it should sizzle immediately!
To get the best results, don’t overcrowd the pan. Fry your beef cutlets in batches, giving each piece enough space to get that beautiful golden-brown crust. Then, drain on paper towels to remove excess oil and keep it crispy.
- Flip only once to prevent breaking the delicate breading
- Cook each side for 2-3 minutes until golden brown
- Use a meat thermometer to ensure proper internal temperature
With these tips, you’ll make restaurant-quality mexican style beef milanesa in your own kitchen!
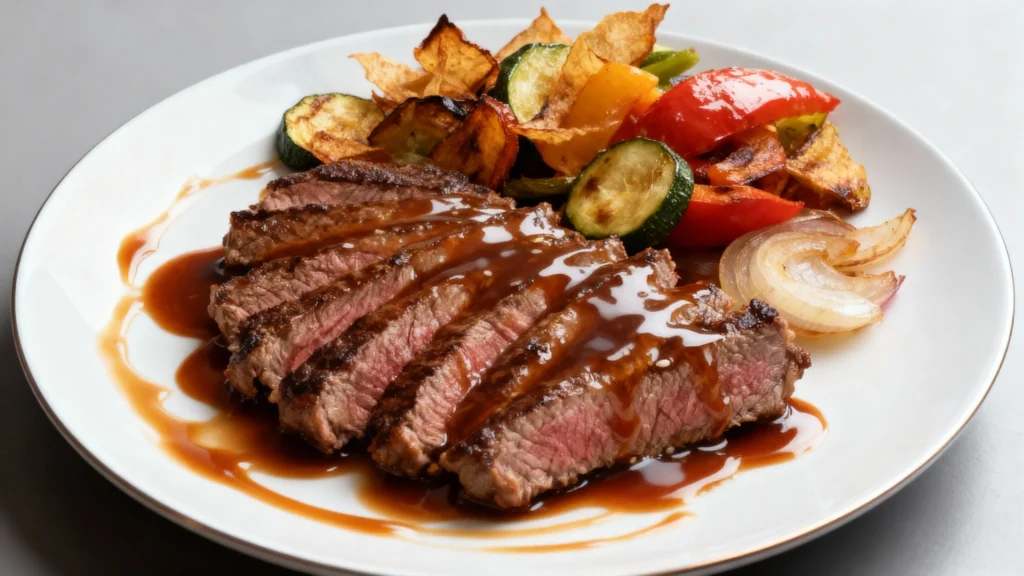
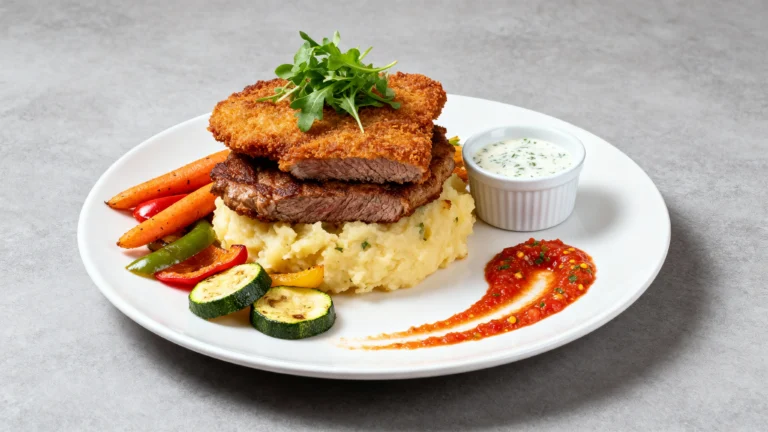
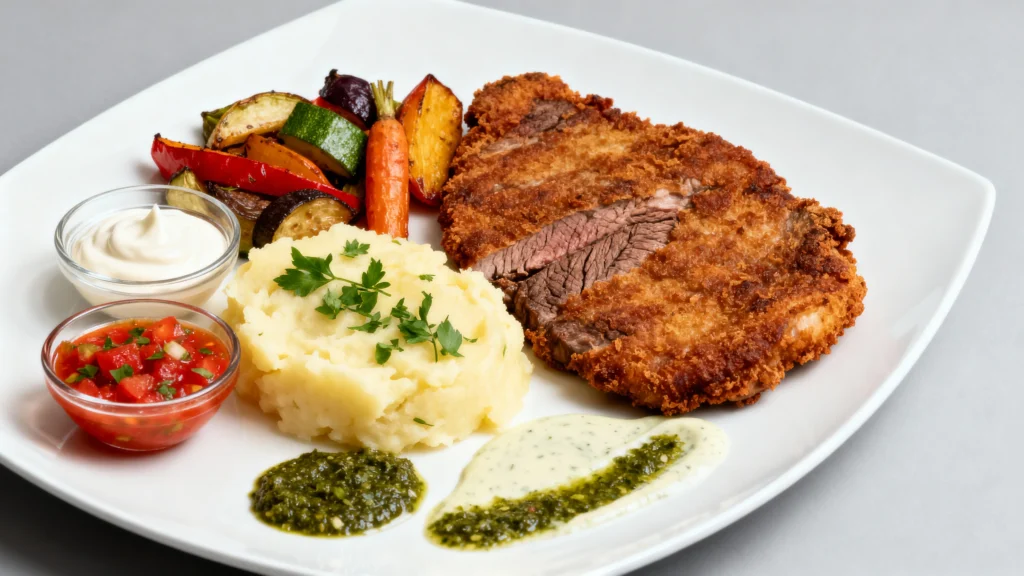
Serving Suggestions and Side Dishes
Turning a simple beef milanesa into a full meal is an art we love! Whether it’s an Argentinian beef milanesa or something new, the right sides can make all the difference.
Let’s explore some tasty ways to serve your crispy beef dish. It’s sure to wow your family and friends!
Traditional Accompaniments
Classic beef milanesa with garlic pairs well with these traditional sides:
- Crisp garden salad with fresh tomatoes
- Mashed potatoes with herbs
- White rice with parsley
- Roasted seasonal vegetables
Looking for a quick and satisfying rice recipe to level up your dinner? Try our flavorful Shrimp Fried Rice for an easy, protein-packed side that’s ready in no time.
Modern Pairing Ideas
For a modern twist, try these innovative serving styles:
- Beef milanesa sandwich with homemade chimichurri
- Milanesa served over quinoa salad
- Topped with fresh micro-greens
- Alongside sweet potato fries
Sauce Options
Enhance your crispy beef milanesa with these tasty sauces:
- Classic garlic aioli
- Spicy tomato salsa
- Creamy herb dressing
- Argentine chimichurri
Pro tip: A beef milanesa sandwich is unforgettable with the right sauce and fresh bread!
Tips for Making Ahead and Storage
Getting a tasty beef milanesa ready for busy weeknights is easy with smart storage tips! We’ve got great advice to make your favorite crispy dish stress-free.
Storing your homemade beef milanesa needs some kitchen smarts. The goal is to keep it crispy and the meat tender and tasty.
Refrigeration and Freezing Techniques
- Refrigerate uncooked breaded milanesa for up to 24 hours before cooking
- Wrap individual portions in plastic wrap for easy freezing
- Store cooked beef milanesa in airtight containers for 3-4 days. Additional tips on keeping your food safe and fresh are available through Nutrition.gov’s food safety resources.
Pro tip: For the best results, freeze uncooked breaded milanesa between parchment paper layers. This stops sticking and makes prep easy! For more advice on safe food handling and storage, check out these USDA freezer and refrigerator guidelines.
Reheating Like a Pro
- Use an oven at 375°F to restore crispiness
- Avoid microwave reheating to prevent soggy breading
- Place on a wire rack for even heating
Quick freezing tip: Your homemade beef milanesa can last up to 2 months in the freezer when properly wrapped!
With these storage tips, you’ll always have a tasty meal ready. Meal prep just got a lot easier!
Troubleshooting Common Milanesa Problems
Making the perfect crispy beef milanesa recipe can be tough. But don’t worry, we’ve got you covered with expert solutions to common cooking issues. To make authentic milanesa, you need practice and a few key techniques for delicious results every time.
Mastering your milanesa takes skill, but with these professional tips, you’ll be cooking like a pro in no time!
Preventing Breading Separation
Breading falling off can be frustrating when making your crispy beef milanesa recipe. Here are some foolproof strategies:
- Pat the beef dry before breading
- Use cold eggs for better coating adhesion
- Press breadcrumbs firmly onto the meat
- Let breaded meat rest for 10-15 minutes before cooking
Achieving Even Cooking
Uneven cooking can ruin an authentic milanesa preparation. Follow these tips to ensure perfect results:
- Pound meat to consistent thickness (about 1/4 inch). When it comes to nutrition, see how different beef cuts stack up by visiting USDA’s Nutrient Data Set for Retail Beef Cuts.
- Use a heavy-bottomed skillet
- Cook on medium-high heat
- Flip only once during cooking
Oil Temperature Control
The secret to a crispy exterior and juicy interior lies in proper oil temperature. Aim for 350-375°F (175-190°C) for the best results. Use a cooking thermometer to check, or try the bread cube test – if it browns in 10-15 seconds, your oil is ready!
Pro tip: Never overcrowd the pan, as this drops the oil temperature and leads to soggy milanesa.
Variations and Creative Twists
Ready to elevate your traditional beef milanesa recipe? We’ve got exciting variations to turn this classic into a culinary journey!
Let’s dive into some thrilling twists on the authentic beef milanesa. These will amaze and delight your taste buds:
- Garlic Lover’s Beef Milanesa: Mix minced garlic into the breadcrumb coating. This boosts the flavor of the traditional recipe.
- Cheese-Stuffed Milanesa: Stuff the beef with your favorite cheese for a gooey surprise.
- Spicy Southwestern Twist: Add chili powder and cumin to the breadcrumb mixture for a zesty kick.
- Mediterranean-Inspired Version: Mix dried herbs like oregano and thyme into the breading.
“Cooking is about passion, creativity, and love. Don’t be afraid to experiment!” – Chef Maria Rodriguez
Beef milanesa with garlic is a hit in many Latin American homes. The secret is to balance flavors and keep the crispy exterior.
Pro tip: Try different coatings like crushed cornflakes or panko breadcrumbs for unique textures. Each twist adds its own flair to the classic recipe, letting you explore in your kitchen!
Conclusion
Learning to make crispy beef milanesa is more than just following steps. It’s about creating a delicious experience in your kitchen. Our homemade recipe combines tradition and creativity, turning simple meat into a dish that wows everyone.
Our recipe is easy enough for anyone to try, no matter your cooking level. With each attempt, you’ll get better and find your own way of doing things. Just remember to be patient, focus on the details, and enjoy the journey.
We suggest trying new seasonings and sides to make the recipe your own. Whether it’s for a quick dinner or a special occasion, your beef milanesa will be a hit. You’ll become the go-to milanesa maker in your home!
Great cooking is about passion, practice, and sharing meals with loved ones. Now, go ahead and make your own culinary magic!

By following this Crispy Beef Milanesa Recipe, you can enjoy its delicious flavor and explore its tasty variations.
Crispy Beef Milanesa Recipe
Short Description
Discover how to make perfectly crispy beef milanesa at home! This classic Latin American breaded beef cutlet features a golden crust and deliciously tender inside. Easy enough for beginners, it’s a crowd-pleaser for family dinners or special occasions.
Recipe Details
- Serving Size: 1 cutlet (multiply for more servings)
- Prep Time: 15 minutes
- Cook Time: 10 minutes
- Total Time: 25 minutes
Ingredients per Serving
- 1 thin beef cutlet (sirloin or top round, about 1/4 inch thick)
- 1 egg
- 1/2 cup breadcrumbs (regular or panko)
- 1/4 teaspoon garlic powder
- 1/4 teaspoon dried oregano
- Pinch of salt and black pepper
- Vegetable oil or olive oil for frying
Nutritional Facts
- Calories: ~320
- Protein: ~22g
- Carbohydrates: ~14g
- Fats: ~17g
- Fiber: ~1g
- Sodium: ~320mg
- Sugar: ~1g
Instructions
Step 1
Pound the beef cutlet gently with a mallet until it’s about 1/4 inch thick for even cooking and tenderness.
Step 2
Season both sides with garlic powder, oregano, salt, and black pepper.
Step 3
Set up three shallow dishes: flour (optional), beaten egg, and breadcrumbs. Dredge the beef in flour (if using), dip in egg, then coat thoroughly in breadcrumbs. Press the breadcrumbs to help them stick.
Step 4
Heat about 1/2-inch of oil in a heavy skillet over medium-high. When the oil shimmers, carefully add the breaded cutlet.
Step 5
Fry each side for 2–3 minutes until golden brown and crispy. Avoid overcrowding the pan.
Step 6
Drain the cooked milanesa on paper towels to remove extra oil. Serve hot, with a fresh salad or mashed potatoes!