Ice Cream Cake With Chocolate Stripes: The Ultimate Treat For Chocolate Lovers
Share this recipe
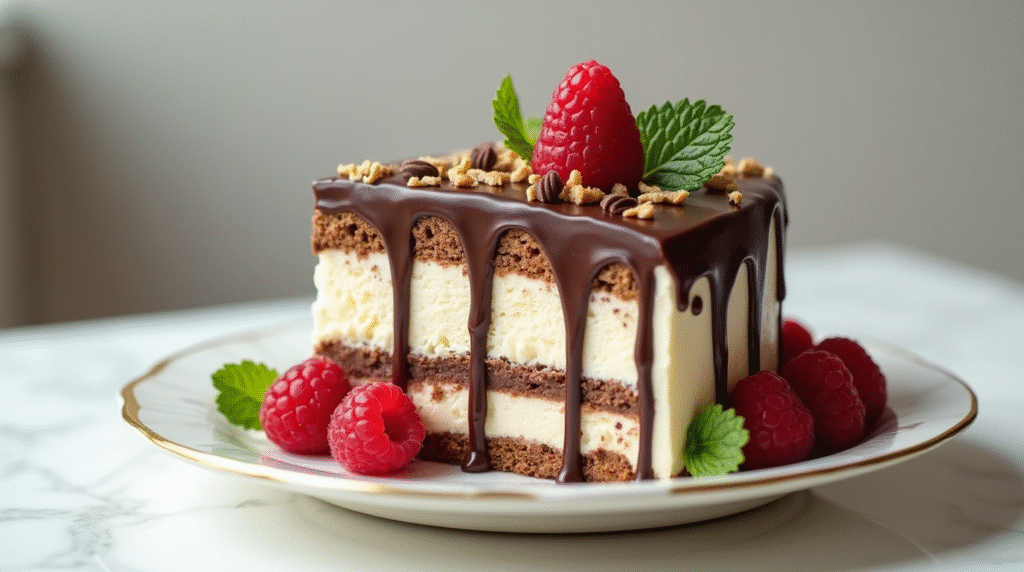
Every time I slice into a homemade ice cream cake with chocolate stripes, summer memories come flooding back. The rich, velvety layers tell stories of family gatherings and sweet celebrations. It’s more than just a dessert; it’s an experience that turns ordinary moments into unforgettable memories!
Imagine making a chocolate ice cream cake that looks like it came from a pro bakery, but you made it yourself. Our recipe combines creamy ice cream and rich chocolate in a way that will make chocolate lovers’ hearts race.
Whether it’s for a birthday or just a treat for yourself, this homemade ice cream cake with chocolate stripes is the key to dessert perfection. Get ready to become the ultimate dessert hero in your kitchen!
Key Takeaways
- Master the art of creating stunning chocolate striped ice cream cake
- Learn professional-level dessert decoration techniques
- Discover how to balance flavors and textures perfectly
- Impress friends and family with a show-stopping dessert
- Create memories through delicious homemade treats
Introduction to Ice Cream Cake With Chocolate Stripes

Get ready for a sweet adventure! Our chocolate striped ice cream cake is a treat you’ll love. It turns a simple dessert into a special experience that everyone will want more of.
Making a layered ice cream cake might seem hard, but we make it easy. You’ll mix creamy ice cream with rich chocolate stripes. This creates a dessert that looks and tastes amazing.
- Perfect for birthday celebrations
- Impressive dinner party dessert
- Fun weekend baking project
What makes our cake special? It’s all about technique and creativity. We’ll show you how to pick the best ingredients, temper chocolate, and make layers that look like they’re from a bakery.
Baking is an art, and this ice cream cake is your canvas!
Whether you’re an experienced baker or new to the kitchen, this recipe is fun. It brings joy, excitement, and tasty memories to your table. Let’s start this sweet journey together!
Essential Ingredients for the Perfect Chocolate Striped Ice Cream Cake
Making the best ice cream cake begins with top-notch ingredients. Our recipe uses the finest parts to give you a dessert you’ll never forget.

To make an amazing ice cream cake, focus on quality and detail. Here are the key ingredients that will take your dessert to the next level!
Premium Chocolate Selection Guide
Choosing the right chocolate is crucial for a stunning ice cream cake. Here are some top picks:
- Belgian dark chocolate (70% cocoa content)
- High-quality couverture chocolate
- Single-origin chocolate bars
“The secret to an amazing ice cream cake is using chocolate that melts smoothly and tastes incredible!” – Professional Pastry Chef
Ice Cream Varieties and Combinations
Try exciting ice cream flavors with your chocolate stripes:
- Classic vanilla bean with dark chocolate
- Salted caramel with milk chocolate
- Mint chocolate chip with white chocolate stripes
If you love experimenting with frozen treats, you’ll definitely want to check out our chocolate marshmallow ice cream recipe for another creamy, dreamy dessert idea-It’s a fun way to play with flavors and textures, just like with your homemade ice cream cake!
Additional Toppings and Decorative Elements
Make your ice cream cake truly special with these creative toppings:
- Crushed chocolate cookies
- Toasted nuts
- Fresh berries
- Chocolate shavings
- Edible gold leaf (for extra luxury)
Follow these tips to make an ice cream cake that will wow your guests!
For even more inspiration on creative toppings, take a peek at our homemade peach icebox cake. The combination of fresh fruit and creamy layers will give you plenty of ideas for making your ice cream cake extra special.
Kitchen Tools and Equipment You'll Need
Making an amazing ice cream cake with chocolate drizzle needs more than just great ingredients. You also need the right kitchen tools to make it shine! Let’s explore the essential equipment that turns your kitchen into a pro dessert workshop.
Before you start making your ice cream cake with chocolate swirls, get these must-have tools:
- Springform pan (9-inch recommended for most recipes)
- Offset spatula for smooth layering
- Digital kitchen scale for precise measurements
- Chocolate melting pot or double boiler
- Instant-read thermometer
- Parchment paper
- Pastry brush for chocolate drizzling
Professional bakers say the right equipment is key to a great dessert. You don’t need all the tools, but a few important ones will make a big difference in your ice cream cake.
“The right tools are like secret weapons in the kitchen – they turn good recipes into extraordinary experiences!” – Professional Pastry Chef
If you’re missing a tool, don’t worry. Home bakers often make stunning desserts with creative solutions. A regular whisk can be a substitute for a chocolate melting pot. And a standard cake pan can work like a springform pan with some parchment paper.
Pro tip: Always make sure your tools are clean and dry before starting. Moisture can mess up chocolate tempering and affect your cake’s texture!
Step-by-Step Guide to Creating Perfect Chocolate Stripes
Making the perfect ice cream cake with chocolate decoration is all about precision and passion. Our expert techniques will turn your chocolate desserts into stunning visual masterpieces. And they’ll taste amazing too.
Creating beautiful chocolate stripes is an art form. We’ll show you the essential steps to get professional-looking results. These will impress everyone at your next gathering.
Melting and Tempering Chocolate Like a Pro
Chocolate tempering is key for that perfect glossy finish. Follow these steps:
- Use high-quality dark or milk chocolate
- Chop chocolate into uniform small pieces
- Melt slowly using a double boiler
- Maintain precise temperature between 88-90°F
If you’re a chocolate enthusiast, you’ll love our 2-ingredient chocolate truffles recipe. It’s a simple yet decadent treat that pairs perfectly with your ice cream cake for a chocolate lover’s dream dessert table!
Stripe Pattern Techniques
Try different chocolate stripe techniques to make your ice cream cake stand out:
- Drizzle Method: Use a piping bag for thin, elegant lines
- Zigzag Technique: Create dynamic visual patterns
- Crosshatch Design: Add complexity to your chocolate desserts
Timing and Temperature Control
Working with chocolate needs precision. Keep your workspace cool and work fast to avoid chocolate hardening too soon. Use an instant-read thermometer to check chocolate temperature during decorating.
Pro Tip: Always let your ice cream cake slightly soften before applying chocolate stripes for the smoothest application!
Layering Techniques for a Professional Finish
Making a stunning party ice cream cake is more than just mixing ingredients. It’s about mastering layering techniques. These techniques turn a simple dessert into a showstopper for summer.
Now, let’s explore the art of layering a cake perfectly! Professional bakers focus on precision. Begin with a clean, flat surface and the right tools for even layers.
- Use a rotating cake stand for smooth, consistent layering
- Invest in an offset spatula for precise spreading
- Chill each layer before adding the next to prevent melting
Temperature control is key when layering ice cream. Partially freeze each layer for 15-20 minutes between additions. This keeps edges crisp and prevents layers from blending.
Pro tip: Always work quickly and keep your workspace cold to maintain the perfect ice cream cake structure!
For a professional finish, follow these layering tips:
- Start with a stable base layer of cake or cookie crumb
- Spread ice cream evenly using a gentle, consistent motion
- Create visual interest with alternating colors and textures
- Use a warm knife to smooth sides for a polished look
With these techniques, your ice cream cake will look like it was made by a pro. It’s sure to wow at any party!
Tips for Achieving the Perfect Ice Cream Consistency
Making the ultimate frozen dessert is more than just mixing ingredients. To create a chocolate ice cream cake with a silky-smooth texture, you need precision and careful technique. Let’s explore the secrets to making your frozen treat perfect!
The secret to a great frozen dessert is understanding temperature and texture. Ice crystals can turn your delicious chocolate ice cream cake from creamy to grainy.
Proper Freezing Fundamentals
- Pre-chill all mixing bowls and utensils
- Use a high-quality freezer set to consistent temperature
- Avoid temperature fluctuations during preparation
Temperature Management Strategies
Keeping the right temperature is key for your frozen dessert. Aim for a steady 0°F (-18°C) to keep your chocolate ice cream cake smooth.
- Allow minimal time between mixing and freezing
- Use an instant-read thermometer for precision
- Cover the cake completely to prevent freezer burn
Preventing Ice Crystal Formation
“The difference between a good and great frozen dessert is in the details.” – Professional Pastry Chef
To avoid ice crystals, try these pro tips: • Add a small amount of alcohol or corn syrup • Churn the mixture thoroughly • Store in an airtight container
With these techniques, you’ll make a chocolate ice cream cake that’s creamy, smooth, and irresistible!
Creative Chocolate Stripe Patterns and Designs
Turning an ordinary ice cream cake into a masterpiece is all about creativity. Our tips will show you how to make your cake stand out!
When making chocolate stripes for your ice cream cake, try these cool patterns:
- Classic Straight Lines: Clean, elegant parallel stripes
- Zigzag Patterns: Playful and dynamic visual interest
- Swirl Techniques: Graceful, curved chocolate decorations
- Geometric Designs: Structured, modern chocolate arrangements
Professional bakers focus on precision for chocolate stripes. Use a piping bag with a fine tip for detailed designs. Temperature control is crucial – your chocolate must be perfectly tempered for smooth, glossy stripes.
Advanced techniques include:
- Chocolate Curl Creation
- Cocoa Butter Painting
- Marbled Chocolate Effects
- Textured Chocolate Patterns
Don’t be afraid to try new designs. Each attempt brings you closer to a unique ice cream cake. It will impress your guests and satisfy chocolate lovers!
Common Mistakes to Avoid When Making Ice Cream Cake
Making the perfect ice cream cake can be tricky, even for pros. But don’t worry, we’re here to help you avoid common mistakes. This way, your dessert will be a hit every time!
When you’re learning to make ice cream cake, you might face some challenges. We’ll cover the most common mistakes and how to fix them.
Ice Cream Consistency Challenges
- Melting Mishap: Always work with partially softened ice cream. Take it out of the freezer 5-10 minutes before you start. This will make it spreadable.
- Freezing Frustrations: Use a springform pan and line it with parchment paper. This makes it easy to remove and get clean layers.
- Texture Troubles: To avoid ice crystals, cover the cake tightly with plastic wrap before freezing.
Chocolate Stripe Secrets
Chocolate stripes are crucial for your ice cream cake. The secret is patience and controlling the temperature. Make sure your chocolate is melted smoothly but not too hot. A double boiler is the best tool for this.
Pro Tips for Success
- Chill your mixing tools and workspace before starting
- Work quickly when layering to prevent excessive melting
- Use a hot knife for clean, smooth cake cutting
With these expert tips, you’ll turn potential disasters into amazing desserts. They’ll impress everyone!
Storage and Serving Recommendations
Keeping your frozen dessert fresh is key. A well-made ice cream cake needs special care to stay tasty. For more expert tips on safe freezing and food storage, check out the helpful guidelines from the USDA Food Safety and Inspection Service:
USDA’s guide on freezing and food safety is a fantastic resource for making sure your desserts stay fresh and delicious.
Follow these tips to keep it perfect!
Here’s how to store your ice cream cake right:
- Place it in the coldest part of your freezer
- Use a tight-fitting container or wrap it in plastic wrap
- Keep the freezer at 0°F (-18°C) all the time
It’s important to avoid freezer burn. Wrap the cake well to keep it dry. Use lots of plastic wrap or a cake storage container.
Timing is everything when you serve. Take the cake out of the freezer 10-15 minutes before serving. This makes it scoopable and impresses your guests.
Pro tip: Always use a sharp, clean knife heated under hot water for clean, beautiful slices!
Here are tips for moving your ice cream cake:
- Use an insulated cooler
- Include frozen gel packs
- Keep it in the freezer as much as possible
Follow these steps, and your homemade ice cream cake will be a hit. It will impress everyone from the first bite to the last!
Variations and Flavor Combinations
Ready to elevate your chocolate ice cream cake recipe? We’re about to explore a world of tasty creativity. This will turn your dessert into a showstopper! Mixing different flavors can make a simple ice cream cake into a culinary journey.
Let’s explore some exciting ways to reinvent your favorite ice cream cake recipe:
Seasonal Flavor Inspirations
- Summer Delight: Mix tropical fruit sorbets with a light coconut cake base
- Autumn Warmth: Layer spiced pumpkin ice cream with cinnamon cake
- Winter Indulgence: Create a peppermint chocolate ice cream cake with crushed candy cane topping
- Spring Freshness: Layer strawberry and lavender ice cream
Dietary-Friendly Alternatives
Dietary restrictions shouldn’t limit anyone from enjoying a tasty chocolate ice cream cake. If you’re interested in learning more about healthy swaps and dietary guidelines, the Harvard Nutrition Source’s tips for healthy eating (navigate to “Healthy Eating Plate” or search for “desserts” in their search bar) offer great advice for making your treats both delicious and nutritious. (Note: As of now, Harvard Nutrition Source does not have a specific “healthy desserts” page, but their main nutrition page is highly trusted and covers healthy food choices.)
Here are some amazing alternatives:
- Dairy-free coconut milk ice cream layers
- Vegan chocolate cake base with almond milk ice cream
- Gluten-free cake options using almond or coconut flour
- Sugar-free ice cream alternatives for health-conscious dessert lovers
The secret to an amazing ice cream cake is to experiment and have fun! Don’t hesitate to mix unexpected flavors. Create your unique dessert that will impress your friends and family.
Decorating Tips for Special Occasions
Turn your party ice cream cake into a stunning centerpiece with our expert chocolate decoration tips! Celebrating a special moment is not just about tasty flavors. It’s also about creating visual magic that impresses your guests.
Here are some creative decorating ideas for your ice cream cake with chocolate decoration:
- Create elegant chocolate shavings around the cake’s perimeter
- Craft intricate chocolate flowers as stunning toppers
- Write personalized messages using melted chocolate
- Design themed patterns matching your celebration
When working with chocolate decorations, temperature control is key. Chill your tools and work in a cool kitchen to avoid melting. Pro tip: Use a piping bag with a fine tip for precise chocolate writing!
“A beautifully decorated cake tells a story before the first bite is taken” – Pastry Chef Recommendation
For birthdays, anniversaries, or any festive gathering, your party ice cream cake can become an unforgettable masterpiece. Try different chocolate drizzling techniques and experiment with color contrasts to make your dessert truly unique.
Remember, the most important thing is to have fun and let your creativity shine through each delicious chocolate decoration!
Make-Ahead and Preparation Timeline
Planning ahead is key to making stunning summer desserts without stress! Our timeline makes your homemade ice cream cake prep smooth and fun.
Breaking down the steps makes baking easier and more confident. We’ve created a plan that saves time and avoids last-minute stress.
- 3-4 Days Before: Prepare cake layers and store in airtight containers
- 2 Days Before: Make chocolate ganache and refrigerate
- 1 Day Before: Begin layering and initial freezing of ice cream cake
- Day of Event: Final decorating and serving
Strategic prep is essential for a perfect homemade ice cream cake. Spreading tasks over days reduces stress and ensures a stunning dessert.
Pro Tip: Always keep your ingredients and tools at the recommended temperatures for best results!
Our timeline turns complex desserts into fun projects. With planning, anyone can make an impressive ice cream cake that wows everyone.
Conclusion
We’ve reached the end of our journey to make the ultimate layered ice cream cake! Making a chocolate striped ice cream cake might seem hard at first. But with the tips we’ve shared, you can turn your kitchen into a dessert paradise.
Every chocolate striped ice cream cake has its own story. Your first try might not be perfect, but it’s a step towards mastering this art. With practice, you’ll get better and make desserts that wow everyone.
The beauty of a homemade layered ice cream cake is more than its looks. It’s about the love and creativity you put into it. Whether it’s for a special event or just a treat, your cake will make everyone happy. So, get ready to enjoy every bite!
Keep trying new things, stay excited about baking, and most importantly, have fun. Your baking skills are about to soar to new heights!
Ice Cream Cake With Chocolate Stripes Recipe
Short Description
Every slice of this homemade ice cream cake with chocolate stripes is a celebration! Combining creamy ice cream and rich chocolate in stunning layers, this dessert is perfect for birthdays, parties, or just treating yourself. Simple techniques and top-quality ingredients make it a showstopper for any occasion.
Recipe Details
- Serving Size: 10-12 slices
- Prep Time: 30 minutes (plus freezing)
- Cook Time: 0 minutes (no-bake)
- Total Time: 4 hours (includes freezing)
Ingredients per Serving
- 1 chocolate cake layer (store-bought or homemade)
- 2 pints (about 4 cups) vanilla ice cream, softened
- 1 cup dark chocolate (70% cocoa), chopped
- 1/2 cup heavy cream
- 1/2 cup cookie crumbs (optional, for base)
- Whipped cream and fresh berries (optional, for garnish)
Nutritional Facts
- Calories: 380 per serving
- Protein: 6g
- Carbohydrates: 45g
- Fats: 20g
- Fiber: 3g
- Sodium: 220mg
- Sugar: 32g
Instructions
Step 1: Prepare the Pan
Line a 9-inch springform pan with parchment paper. If using cookie crumbs, press them into the bottom of the pan for a crunchy base.
Step 2: Layer the Cake
Place the chocolate cake layer at the bottom of the pan. Spread softened vanilla ice cream over the cake, smoothing the top with an offset spatula. Freeze for 15-20 minutes.
Step 3: Make the Chocolate Ganache
Heat the heavy cream until just simmering, then pour over the chopped chocolate. Let sit for 1 minute, then stir until smooth. Let cool slightly.
Step 4: Add Chocolate Stripes
Drizzle the chocolate ganache over the ice cream layer in stripes or swirls using a piping bag or spoon. Freeze for another 10 minutes.
Step 5: Repeat Layers (Optional)
For extra layers, repeat with another cake and ice cream layer, then top with more chocolate stripes. Freeze for at least 3 hours or overnight.
Step 6: Serve and Enjoy
Let the cake soften at room temperature for 10-15 minutes before slicing. Garnish with whipped cream and fresh berries if desired. Serve and enjoy your stunning homemade ice cream cake!