Remember the first time you fried chicken recipe at home? The sizzling oil, the nervous peek, and the joy of that first crunchy, juicy bite. That moment made you believe you could make perfect fried chicken at home.
In this guide, we offer a clear path to that victory. We cover everything from ingredients and equipment to brining, marinating, and frying. We also share oven and air fryer methods for a crispy, tender result.
This guide is for everyone. Whether you’re a beginner, a home cook looking to beat takeout, or an experienced chef wanting new ideas, we’ve got you covered. We provide timing charts, safety tips, and options for gluten-free or lower-oil recipes. Let’s cook together and make Homemade Fried Chicken Recipe that makes you proud!
Key Takeaways
- We’ll teach step-by-step methods for crispy, juicy fried chicken at home.
- Key techniques: buttermilk soak, double-dredge, and correct oil temperature.
- The guide covers tools, timing charts, and safety tips for all skill levels.
- We offer variations: Southern, Nashville hot, Korean, gluten-free, oven and air fryer options.
- Practical troubleshooting helps fix soggy crust, undercooking, and seasoning issues.
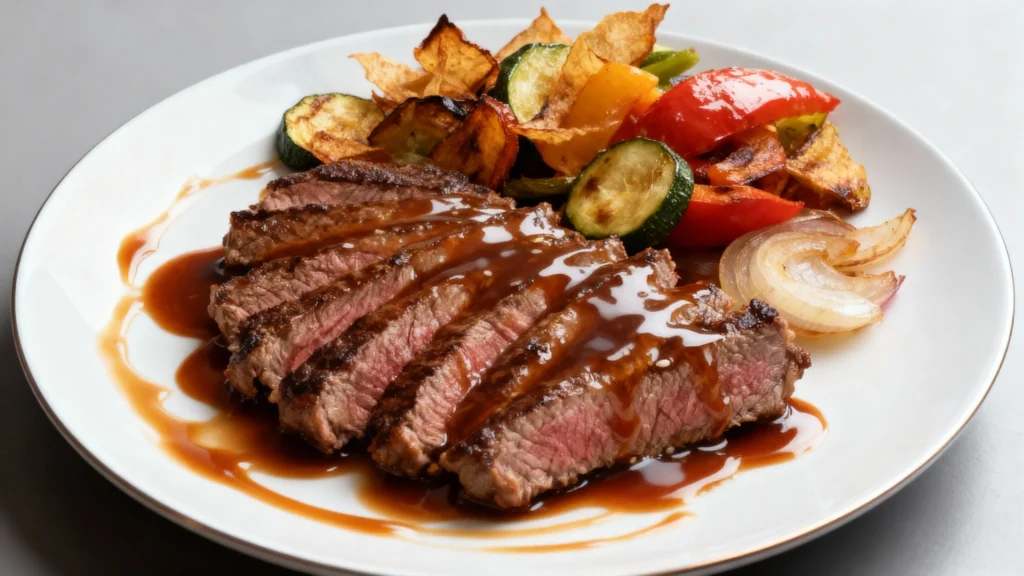
Homemade Fried Chicken Recipe
We love making fried chicken at home because it’s easy and delicious. This Homemade Fried Chicken Recipe combines science and simple steps for a crispy crust and juicy meat. We’ll explain why it works, what you’ll taste, and how it compares to store-bought versions.

Why this recipe works
The secret is tenderizing the chicken. Soaking it in buttermilk or a salt brine makes the meat tender. Salt also helps keep the chicken juicy during cooking.
For the crust, we use a mix of seasoned flour, cornstarch, or potato starch. Double-dredging the chicken helps the crust stick better. Cooking in oil between 325–350°F ensures the inside cooks without burning the crust. Balancing your meal with sufficient protein and other nutrients is important; learn more about chicken’s nutritional profile and healthy eating from the Harvard T.H. Chan School of Public Health Nutrition Source on protein.
Key flavors and textures to expect
- Crunch: a shatter-crisp exterior that flakes when bitten.
- Juiciness: dark cuts like thighs and drumsticks will show visible juices and stay tender.
- Breast care: breasts need steady heat and careful timing to avoid dryness.
- Seasoning: balanced salt, cracked black pepper, garlic powder, and a pinch of cayenne for heat when wanted.
Texture changes with the cut. Thighs are rich and slightly gelatinous. Drumsticks are moist and chewy. Breasts are lean and tender if cooked right.
How this Homemade Fried Chicken Recipe compares to restaurant and KFC-style fried chicken
Restaurants and chains like KFC use pressure fryers and special spice blends for uniform crunch. These methods work well at scale.
At home, we trade scale for control and freshness. Mixing up a custom seasoned flour blend at home gives you those crave-worthy flavors with even more control over the taste. Double-frying or resting the chicken helps achieve that extra crunch. Experiment with your favorite spices and swap in different oils to create a flavor profile that’s completely personalized—every dish becomes a reflection of your own taste.
We focus on techniques you can repeat. Brine or buttermilk for tenderness, starch for crunch, and steady oil temperature for even cooking. This way, you can enjoy restaurant-qualityHomemade Fried Chicken Recipe!
Essential Ingredients for Homemade Fried Chicken Recipe
We choose ingredients that make frying easy and reliable. A good shopping list helps you get crispy, juicy chicken every time. Here are the basics and some pro tips from our kitchen!

Chicken cuts:
- Wings — Quick to cook and great as an appetizer. They crisp up fast but cook small, so keep an eye on the time. For another delicious twist on wings, try our crispy Nashville hot mozzarella sticks.
- Drumsticks — Affordable and easy to work with. Dark meat stays juicy and takes bold flavors well.
- Thighs — Very forgiving and full of flavor. Bone-in, skin-on thighs offer the best texture and stay moist.
- Breasts — Lean and cook fast. Use bone-in, skin-on for better texture and moisture; if boneless, flatten and watch the temperature.
- Planning tip: aim for 4–8 ounces per piece to estimate frying times and servings.
Buttermilk and marinades for tender meat:
- Traditional soak: whole-milk or cultured buttermilk plus kosher salt. The acidity and enzymes tenderize and help the coating stick.
- Flavor add-ins: garlic powder, onion powder, smoked paprika, cayenne, or a splash of soy sauce for savory depth.
- Time-saving brine: water, salt, and a bit of sugar works when you’re short on time. Brine firms and seasons the meat quickly.
- For a Korean twist: add gochujang or a little soy sauce to the marinade for umami and color.
Dry coating components:
- Flours: all-purpose gives a classic crust; self-rising can add extra lift.
- Starches: mix 20–30% cornstarch or potato starch with flour to boost crunch.
- Panko or breadcrumbs: use for a lighter, flakier crust.
- Seasonings: kosher salt, freshly ground black pepper, smoked paprika, garlic powder, onion powder, cayenne, and dried thyme or oregano.
- Gluten-free option: substitute rice flour with tapioca or potato starch for a crisp shell.
Oil choices and health considerations:
- High smoke-point oils work best: peanut oil, canola, vegetable, or sunflower oil will handle hot fry temperatures safely. For tips on choosing and using cooking oils to maximize health and cooking performance, see Mayo Clinic’s guide on cooking oils.
- Peanut oil adds a mild, nutty flavor that complements Homemade Fried Chicken Recipe. Note allergy risks for guests.
- Reuse oil carefully: strain through a fine sieve or cheesecloth, cool fully, and store in a sealed jar in a cool, dark place. Discard after a few uses or if it smells off.
- Healthier swaps: air frying or oven-frying cuts oil use. Shallow frying with a blend of oil and clarified butter gives flavor with less fat than deep frying.
Keep your pantry stocked with these staples, and you’ll be ready to fry with confidence. Small choices—cut, soak, coating, and oil—make a big difference in texture and taste. Let’s get cooking!
Equipment and Tools for Perfect Homemade Fried Chicken Recipe
We love gear that makes frying easier and safer. The right tools give consistent results and cut stress in the kitchen. Below are the essentials and a few optional items we reach for when we want crisp, juicy chicken every time.

Must-have tools
- Instant-read thermometer — A reliable ThermoWorks or Lavatools instant-read tells you when the thickest part hits 165°F. It stops guessing and prevents dry meat.
- Deep-fry or candy thermometer — Use a Wharfedale-style clip-on or a Taylor candy thermometer to keep oil steady at 325–350°F for even browning.
- Heavy-bottomed pot or Dutch oven — Le Creuset or Lodge cast-iron gives steady heat and reduces hot spots that burn the crust.
- Wire rack and rimmed sheet pans — Raised racks let air circulate so crusts stay crisp while chicken rests. Sheet pans catch drips and make transfers simple.
- Tongs and slotted spoon — Long stainless-steel tongs and a slotted spoon move pieces safely and drain excess oil quickly.
Optional gadgets
- Electric deep fryer — A countertop fryer keeps temperature steady for large batches and takes the guesswork out of timing.
- Air fryer — Philips and Ninja models give a lower-oil option with good crisping for smaller portions.
- Oven setup — For oven-finished chicken, use a baking rack on a rimmed sheet pan and a convection setting if available. An oil spritzer helps brown the crust.
- Pros and cons — Deep frying yields the most authentic crunch. Air frying cuts fat and cleanup. Ovens are convenient for hands-off finishing and feeding a crowd.
Safety gear and cleanup essentials
- Long tongs and heat-resistant gloves — Protect hands when lowering and lifting food or lids near hot oil.
- Splatter screen and pot lid — A screen reduces oil spray. Keep a lid handy to smother flames if oil ignites.
- Oil filter funnel and glass jars — Strain used oil through a fine filter and store it in glass jars for reuse.
- Biodegradable degreaser — A plant-based cleaner cuts crusty oil from pans and counters without harsh fumes.
- Safe disposal — Never pour oil down the sink. Let it cool, strain, store, or take it to a recycling center.
- Fire extinguisher — Keep a Class K or multipurpose extinguisher rated for grease fires within reach.
With these tools on hand, we get steady temperatures, less mess, and safer frying. Equip yourself right, and each batch will taste better than the last.
Step-by-Step Preparation: Brining and Marinating Techniques
First, let’s talk about why a good soak is key for juicy, flavorful fried chicken. A proper brine or buttermilk soak changes the chicken’s texture. It boosts the flavor and helps the coating stick better. Always keep things cold while marinating and pat dry before dredging for the best crust.
Simple brine and buttermilk soak have different goals. A simple brine is just water and salt, with sugar optional. Use about 1/4 cup kosher salt per quart of water. It seasons quickly and works well for budget cuts or when you want even salt penetration.
Buttermilk soak uses cultured buttermilk with a little salt and optional hot sauce. It tenderizes while adding tang and helps the flour mix cling to the skin. Cover chicken so it’s fully submerged. Refrigerate during the soak.
Which to choose? Pick a brine for faster, even seasoning and for thin pieces. Choose buttermilk for thicker bone-in pieces or when you want tender meat and a richer coating base.
Timing matters. Follow these general soak windows to get great texture without overdoing it:
- Wings and small pieces: 2–6 hours.
- Thighs and drumsticks: 4–12 hours.
- Bone-in breasts: 6–12 hours; overnight (8–12 hours) often tastes best.
Watch out for over-brining. If left too long, chicken can turn too salty or develop a mealy, mushy texture. When in doubt, shorten the soak time and test a single piece. To ensure food safety and proper marinating risks, refer to the CDC’s guidelines on safe food handling.
Try these quick flavor variations to match the meal mood:
- Spicy: Buttermilk + 1–2 tsp cayenne + 1 tbsp hot sauce + 1 tsp garlic powder. Soak as usual.
- Southern: Buttermilk + 1 tbsp Worcestershire + 1 tsp smoked paprika + 1 tsp onion powder.
- Korean-inspired: For a short wet marinade, mix 3 tbsp soy sauce + 1 tbsp gochujang + 2 cloves minced garlic + 1 tsp sugar + 1 tbsp rice wine. Marinate briefly, then dry-coat and double-fry before finishing with a glaze of soy, honey, garlic, and gochujang.
Practical tips we follow every time:
- Keep chicken chilled while marinating to reduce bacteria risk.
- Cover containers tightly so flavors stay focused.
- Pat pieces dry on paper towels before dredging to help the coating adhere and to avoid oil splatter.
Coating Methods for Extra Crispy Homemade Fried Chicken Recipe
We want your Homemade Fried Chicken to be crunchy and delicious every time. Here are three coating methods to help you achieve that. These steps are easy to follow, and they’ll make your fried chicken as crispy as a bakery’s. Are you ready? Let’s get started!
- Season flour well with salt, black pepper, garlic powder, and a pinch of paprika.
- Dredge pieces from the buttermilk or brine into the flour, pressing lightly so the coating grips.
- Shake off excess flour; too much loose flour burns and makes a soggy crust.
- Rest coated pieces on a wire rack 15–30 minutes so the crust sets before frying.
- Use an egg or thin buttermilk wash when you need extra adhesion versus a straight dry-dredge off the soak.
Double-dredge and batter variations for maximum crunch
- Double-dredge method: first coat in seasoned flour, dip in egg or buttermilk wash, then toss in a flour–starch mix for a thicker shell.
- For extra crackle, swap the second flour for a blend with cornstarch or potato starch; this boosts shatter and color.
- Wet batter option: combine all-purpose flour, cornstarch, a pinch of baking powder, and cold beer or soda water for an airy, puffy crust.
- Use the double-fry technique: first fry at a lower temp to cook through, rest on a rack, then crisp at a higher temp for golden crunch.
Gluten-free Homemade Fried Chicken coating options
- Rice flour and sorghum flour give a fine, light crust that crisps quickly.
- Blend rice or sorghum with tapioca or potato starch to mimic the snap of wheat flour.
- Add a small pinch of xanthan gum if you need structure for batters or thicker coatings.
- Use trusted commercial blends like Bob’s Red Mill gluten-free all-purpose flour when you want a ready mix.
- Top with gluten-free panko for extra crunch and visible texture.
Start with one method and get good at it. Small changes can make a big difference. We love trying new things, and we encourage you to do the same. Your family will love it!
Frying Process for Golden, Crispy Homemade Fried Chicken
We’re about to make perfect Homemade Fried Chicken. We’ll control the oil temperature, fry each piece at the right time, and finish on a wire rack. Follow these steps for evenly cooked, juicy, and crispy chicken!
How to maintain proper oil temperature for even cooking
Use a thermometer to keep the oil at 325–350°F. When you add cold chicken, the oil will drop. Turn the heat up to get it back to the right temperature. Fry in small batches to keep the oil steady and the crust crispy.
Frying times for different cuts and sizes
- Wings: 8–10 minutes at 350°F. Cook until crisp and golden.
- Drumsticks: 12–15 minutes at 325–350°F. Thicker pieces need a bit more time.
- Thighs: 12–18 minutes depending on size. Aim for even browning.
- Bone-in breasts: 14–18 minutes. Check internal temperature for doneness.
Always check the internal temp at the thickest part without touching bone. Pull poultry at 165°F; many cooks aim for 170°F in dark meat for tenderness.
Draining, resting, and keeping chicken crispy after frying
Move fried pieces to a wire rack set over a sheet pan. Air must circulate to prevent steam from sogging the crust. Skip paper towels for draining.
Let the chicken rest 10–15 minutes so juices redistribute. If you’re holding batches, keep them warm on a rack in a 200°F oven for short periods. Finish with a light sprinkle of finishing salt or toss with a warm glaze after resting for the best flavor and texture.
Alternative Cooking Methods: Oven, Air Fryer, and Healthier Options
We all want our Homemade Fried Chicken to be crispy and juicy. But not everyone has a deep fryer or wants to use lots of oil. Here, we share oven and air fryer tips, and healthier swaps for a lighter taste. Let’s make it simple and delicious!
- Preheat the oven to 425°F and use convection if your oven has it. Convection moves hot air and helps mimic frying.
- Arrange pieces on a wire rack set over a rimmed sheet pan. The rack lets air circulate and keeps the bottom crisp.
- Brush or spray the coating with oil before baking. This small amount of fat browns the crust without deep frying.
- Bake 35–45 minutes depending on cut size. Flip once about halfway through to even the color and crispness.
- For extra crunch, use panko or double-bread the pieces, then finish with a quick broil for 1–2 minutes. Watch closely so it doesn’t burn.
Air fryer fried chicken tips for crispy results with less oil
- Preheat the air fryer to 375–400°F. Preheating gives a faster sear and better crust.
- Spray a light coat of oil on both sides of the coated chicken. A thin mist is enough to crisp the coating.
- Cook in a single layer. Crowding drops the temperature and makes the crust soft.
- Flip halfway through cooking to promote even browning. Typical times: wings 18–22 minutes, thighs 18–24 minutes, breasts 16–20 minutes. Adjust for your model. If you want other tasty air fryer ideas to complement your meal, check out our easy recipe for crispy chicken thighs in air fryer for a juicy, healthy addition.
- The air fryer uses far less oil and gives a satisfying crunch, though the texture can be a touch different from deep-fried chicken.
Adapting the recipe for deep-fry lovers and healthier swaps
- Shallow-fry in a skillet using 1/2–1 inch of oil to get a similar crust with less oil than a full deep fry. Turn pieces as needed for even color.
- Choose avocado oil for frying. It has a high smoke point and more monounsaturated fat than many vegetable oils.
- For the lowest fat option, bake with olive oil spray and use panko for texture. You will cut fat and still keep a crunchy bite.
- Practice portion control and pair the chicken with roasted vegetables, a crisp salad, or steamed greens to balance the meal.
- Prefer dark meat? Thighs hold moisture better and often feel richer while needing less added fat to avoid drying out.
We encourage you to test one method at a time. Small tweaks—oil type, rack placement, or a minute under the broiler—change the result. Enjoy the process and tweak until the crust and juiciness match your ideal fried chicken!
Flavor Twists and Regional Variations ofHomemade Fried Chicken Recipe
We love exploring bold flavors that turn simple Homemade Fried Chicken into something memorable. Below are three reliable directions you can take: a classic Southern seasoning, the fiery Nashville style, and the crunchy, saucy Korean approach. Each one has a clear technique so home cooks can get great results fast!
Southern seasoning blend
Start with this simple combination for rich, harmonious taste in every bite: 2 parts kosher salt, 1 part black pepper, 1 part paprika, 1/2 part garlic powder, 1/2 part onion powder, and a pinch of cayenne.
- Layer the seasoning for depth: dissolve half the salt in your brine or buttermilk soak.
- Add the remaining salt and the rest of the spice mix to the flour dredge.
- This split method seasons the meat inside and the crust outside for a well-rounded bite.
Nashville hot-style option
For that iconic spicy, glossy crust, fry the chicken as usual. While it rests briefly, make a spicy oil sauce.
- Heat neutral oil and mix in powdered cayenne, brown sugar, and garlic powder.
- Ladle or brush the hot spicy oil over the fresh-fried pieces so the spice sticks and glazes the crust.
- Serve with sliced white bread and dill pickles to balance the heat.
Korean double-fry and glaze
To achieve extreme crunch, use a two-step frying process. First, fry at a lower temperature to cook through. Let the chicken rest. Then fry again at a higher temperature for a super-crisp shell.
- For the glaze, whisk gochujang, soy sauce, honey, minced garlic, and rice vinegar until smooth.
- Toss the double-fried pieces in the warm glaze briefly so a thin, glossy layer clings without sogging the crust.
- This method keeps the outside shatter-crisp while adding savory, sweet, and tangy notes.
Serving Suggestions and Side Dishes for a Family Fried Chicken Dinner
We love a spread that feels warm and festive. A few simple sides make Homemade Fried Chicken unforgettable. Keep things easy so the kitchen stays calm and the table stays full of smiles!
Classic Southern sides
- Buttermilk biscuits — flaky and warm. Heat store-bought biscuits in a 375°F oven for 8–10 minutes to get that fresh-baked finish.
- Creamy mashed potatoes with gravy — use pan drippings or chicken stock for a quick stovetop gravy. Whip potatoes with butter and milk until smooth.
- Tangy coleslaw — a bright mix of shredded cabbage, carrot, vinegar, and a touch of sugar keeps the plate balanced.
- Collard greens — simmer with smoked ham hock or smoked turkey for deep flavor.
- Macaroni and cheese — creamy, baked, or stovetop; add a crunchy breadcrumb top for texture contrast.
- Cornbread — sweet or savory, cut into squares and serve warm with butter.
Sauce pairings to try
- Country gravy — make with pan drippings, flour, and milk for a savory pour-over that comforts every bite.
- Honey butter — soft butter mixed with local honey and a pinch of salt. Slather on biscuits or brush on warm chicken.
- Spicy mayo — combine mayonnaise, Sriracha, and a squeeze of lemon for a tangy kick.
- Ranch and honey mustard — crowd-pleasers that tame heat and add creaminess.
- Pair sauces intentionally: offer a rich gravy for the potatoes, honey butter for biscuits, and a spicy dip for adventurous eaters.
Presentation tips for family-style meals
- Serve on large platters lined with parchment for easy cleanup and rustic charm. To round out the meal, why not add some vibrant flavor with our spicy honey butter fried chicken? It’s a crowd-pleaser that brings a sweet and spicy kick to the table.
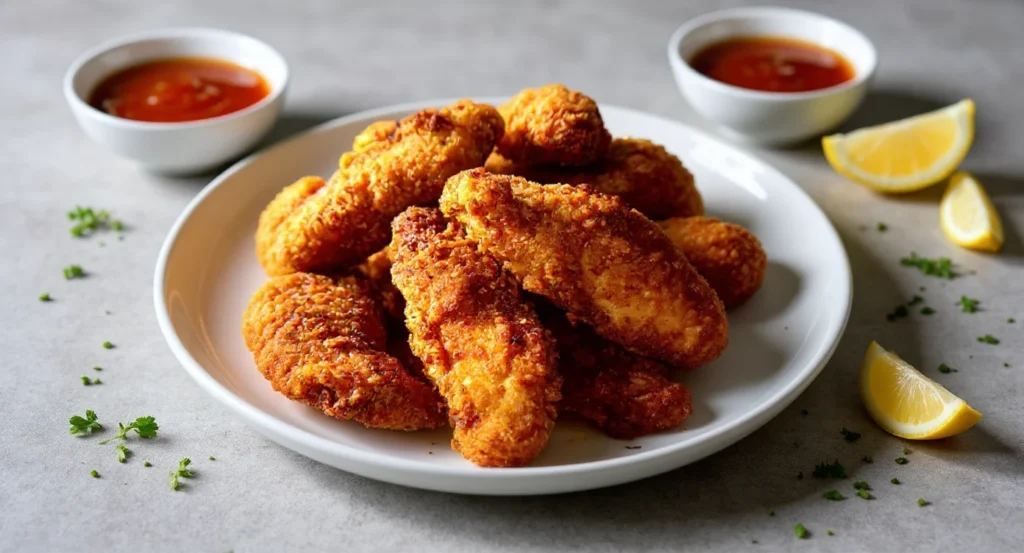
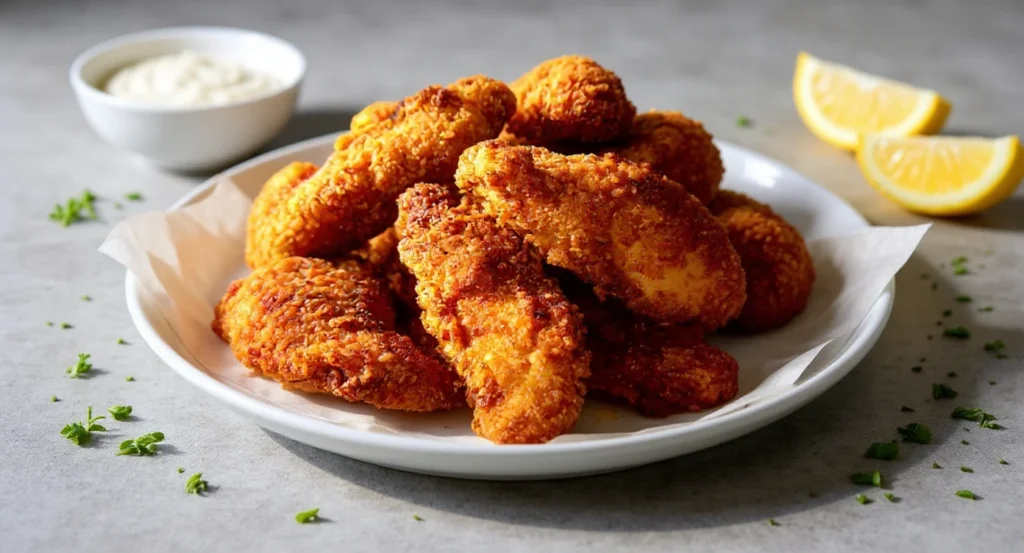
- Garnish with chopped parsley and scatter lemon wedges to brighten flavors.
- Arrange sides in bowls so everyone can reach them. Keep colors varied for visual appeal.
- Make-ahead tip: hold fried chicken on a wire rack in a 200°F oven to stay warm without losing crispness.
- If crust softens, a quick flash under the broiler for 1–2 minutes restores crunch.
We want your family dinner to be relaxed and joyful. Set the table, pour a drink, and let the food bring everyone together!
Troubleshooting Common Issues with Homemade Fried Chicken Recipe
When we fry at home, we often face the same problems. But, with a few tweaks, we can fix these issues. Here are steps to solve soggy crusts, check if chicken is done, and adjust seasoning and texture. Let’s make your Homemade Fried Chicken crispy and tasty!
Fixing soggy crust and preventing oil absorption
A soggy crust can be caused by several things. It might be because the oil is too cool, the pan is too full, or the coating is wet. Start by heating the oil to the right temperature before adding the chicken.
- Use an instant-read thermometer to keep oil steady at 325–350°F for most pieces.
- Fry in small batches so temperature recovers quickly.
- Let pieces rest on a wire rack, not on paper towels, to drain and stay crisp.
- Add 1–2 tablespoons of cornstarch to your flour mix for extra crunch.
- If crust is limp after frying, pop pieces into a 400°F oven for 5–8 minutes to crisp up.
How to tell when chicken is cooked through without overcooking
An instant-read thermometer is key for safe, juicy chicken. Aim for 165°F as the minimum safe temperature. Dark meat can handle higher temperatures for tender texture.
- Measure at the thickest part, avoiding contact with bone.
- For thighs and drumsticks, many cooks pull them at 170–175°F to keep them tender.
- Adjust frying time based on piece size; smaller wings need less time than bone-in breasts.
- For very large pieces, par-cook by baking at 350°F for 15–20 minutes or poaching briefly, then finish in hot oil to crisp the exterior.
Adjusting seasoning and texture for beginners
We want beginners to feel confident. Test your seasoning before coating to avoid bland chicken.
- Mix a teaspoon of the flour seasoning into warm water to taste the balance of salt, pepper, and spice.
- Start with mild heat and add cayenne in small increments until you like the kick.
- To alter crunch, increase the starch portion—cornstarch or rice flour adds crispness.
- If the crust puffs too much, reduce baking powder in the blend.
- Use an egg wash to help heavier coatings adhere when you want a thicker crust.
Conclusion
We’ve talked about how to make crispy homemade fried chicken. A good brine or buttermilk soak makes the meat juicy. A seasoned coating with starch adds crunch.
Choosing the right oil and keeping the temperature steady is key. Letting it rest on a wire rack helps keep the texture. Follow these steps for golden, crunchy chicken every time.
Feel free to try different flavors like Nashville spice or Korean glaze. You can also use the air fryer or oven for less oil. Small changes in spice blends or double-dredging can make a big difference.
We want you to try the recipe and make it your own. Share your photos so we can celebrate your success together!
Remember to stay safe while frying. Use a thermometer, tongs, and a wire rack. Dispose of used oil properly. Bookmark this guide and use the troubleshooting tips if you run into problems. With practice and creativity, we can all make delicious homemade fried chicken. Let’s get frying!
Homemade Fried Chicken Recipe
Short Description
Discover how to make crispy, juicy fried chicken at home with simple ingredients and easy steps. This recipe offers flavorful seasoning, a tenderizing buttermilk soak, and foolproof frying tips for a perfect golden crust every time. Whether you’re a beginner or seasoned cook, get ready for fried chicken that beats takeout!
Recipe Details
- Serving Size: 1 piece (4-8 ounces)
- Prep Time: 15 minutes + 4-12 hours soaking
- Cook Time: 12-18 minutes per batch
- Total Time: 4-13 hours including soaking
Ingredients per Serving
- 1 piece bone-in, skin-on chicken (thigh, drumstick, or breast)
- 1 cup buttermilk or simple brine water
- 1/2 cup all-purpose flour
- 1/4 cup cornstarch or potato starch
- 1 tsp kosher salt
- 1/2 tsp cracked black pepper
- 1/2 tsp garlic powder
- 1/2 tsp onion powder
- 1/4 tsp smoked paprika
- Pinch of cayenne pepper (optional)
- Peanut oil or vegetable oil for frying
Nutritional Facts
- Calories: ~300-400 per piece (depending on cut and frying method)
- Protein: 25-30 grams
- Carbohydrates: 10-12 grams
- Fats: 18-25 grams
- Fiber: 0-1 gram
- Sodium: 400-600 mg (varies by seasoning)
- Sugar: 0-1 gram
Instructions
Step 1: Prepare the Chicken
Start by soaking your chicken pieces in buttermilk seasoned with a pinch of salt and optional hot sauce or spices. Refrigerate for 4-12 hours depending on the cut — wings need less time, breasts benefit from overnight soaking.
Step 2: Mix the Coating
In a large bowl, combine all-purpose flour, cornstarch, salt, black pepper, garlic powder, onion powder, smoked paprika, and cayenne pepper. Mix well for a balanced seasoning blend.
Step 3: Dredge the Chicken
Remove the chicken from the soak, letting excess liquid drip off. Dredge each piece in the seasoned flour mix, pressing lightly to coat evenly. Shake off excess flour to avoid clumps.
Step 4: Rest the Coated Chicken
Place coated chicken pieces on a wire rack and let rest for 15-30 minutes. This sets the crust and helps it adhere better during frying.
Step 5: Heat the Oil
Heat peanut or vegetable oil in a heavy-bottomed pot or Dutch oven to 325–350°F (use a deep-fry thermometer for accuracy). Maintain this temperature throughout frying.
Step 6: Fry the Chicken
Fry chicken pieces in small batches to avoid overcrowding. Cook wings for 8-10 minutes, drumsticks and thighs for 12-18 minutes, and bone-in breasts for 14-18 minutes. Aim for an internal temperature of 165°F (170°F for dark meat).
Step 7: Drain and Rest
Transfer fried chicken to a wire rack over a rimmed pan to drain excess oil and keep the crust crispy. Let rest 10-15 minutes before serving to allow juices to redistribute.
Step 8: Serve and Enjoy
Serve your crispy fried chicken with classic sides like buttermilk biscuits, creamy mashed potatoes, or tangy coleslaw. Don’t forget a drizzle of honey butter or spicy mayo for extra flavor!