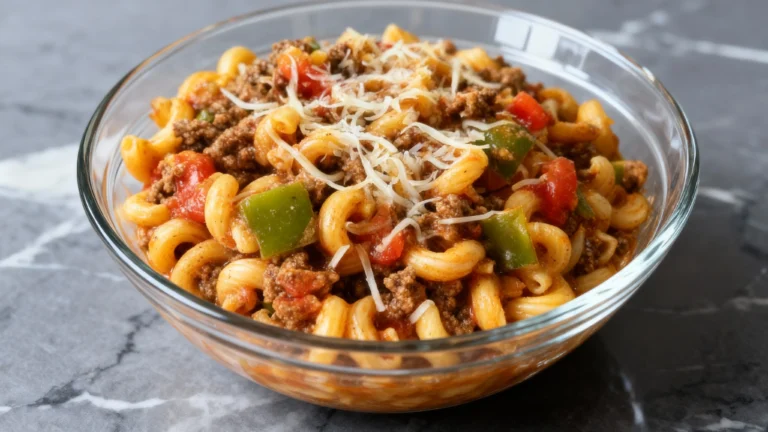
We first tasted broasted chicken at a backyard cookout. It was like a warm hug from the inside out. We wanted to make it at home, without the hassle of a commercial broaster. So, we learned to make it tender and crispy in our kitchen.
If the idea of golden, crispy chicken makes your mouth water, don’t miss our reader-favorite homemade fried chicken recipe for another delicious spin on classic comfort food.
In this guide, we teach you to make Homemade Broasted Chicken Recipe. It’s easy and fun, with clear steps and helpful tips. You can use a pressure cooker, an air fryer, or a skillet to get that perfect crunch and juicy meat.
We’ll talk about why broasted chicken is special, the ingredients you need, and the tools you can use. We’ll show you how to do it step by step and give you the full recipe. Plus, we have tips for extra crunch, marinade ideas, and how to make it for parties. Let’s make broasting simple, fun, and delicious!
Key Takeaways
- Broasting combines pressure cooking and frying for tender, juicy meat with a crispy crust.
- This guide makes broasted chicken accessible for home cooks using common kitchen tools.
- We cover pressure cooker and air fryer methods plus seasoning and serving ideas.
- Short, tested steps help you achieve consistent crunch and juicy texture.
- Recipes and tips scale easily for family dinners or parties.
Why Choose Homemade Broasted Chicken Recipe for Your Next Meal
We all love meals that are quick, easy, and full of flavor. Homemade broasted chicken recipe is a perfect example. It combines pressure cooking with a high-heat finish for a juicy inside and crispy outside. This method avoids the soggy or greasy results of long frying times.
Pair your broasted chicken with our simple crispy chicken thighs in oven recipe, which is perfect when you need an easy, oven-baked option to serve alongside or for weeknight variation.

What makes broasted chicken different from traditional frying
Broasting uses pressure to cook chicken fast and evenly. This pressure step keeps the meat juicy. Then, a quick shallow fry or high-heat finish adds a crispy crust. Unlike deep-frying, broasting uses less oil and cooks everything evenly.
Benefits of making broasted chicken at home
- It’s cheaper than buying from places like KFC or Popeyes.
- You can control the seasonings and oil used, like avocado or peanut oil.
- It’s easy to make it fit dietary needs, like lower-sodium or gluten-free options.
- It cooks fast, making it perfect for busy weeknights.
- It’s a crowd-pleaser that’s great for family meals or small gatherings.
For another crowd-pleasing dinner idea that’s quick, check out our comforting easy meatloaf recipe with ground beef, a meal that’s loved by both kids and adults and can be made ahead for busy evenings.
Occasions where broasted chicken shines
This recipe is great for game-day, backyard parties, and potlucks. It’s easy to take on the go and reheats well. For a quick, impressive meal on a busy weeknight, broasted chicken is the way to go.
Essential Ingredients for the Best Homemade Broasted Chicken Recipe
We love a short shopping list that yields big flavor. Choose bone-in pieces for moisture and depth: thighs, drumsticks, and split breasts carry flavor best. Aim for medium pieces around 4–6 oz so heat reaches the bone evenly. Reserve larger bone-in breasts for slower cooks or adjust timing. Wings make a fun party option when you want shareable bites!

Choice of chicken cuts and size recommendations
Choose bone-in, skin-on cuts to lock in juiciness. Thighs and drumsticks stay tender under pressure cooking and crisp well afterward. Split breasts give white meat lovers a satisfying bite while keeping some dark meat benefits.
For even cooking, pick pieces that weigh about 4–6 oz each. If your breasts are large, cut them in half or increase cook time slightly. For crowds, add wings; they fry up fast and stay popular with kids and adults alike.
Must-have spices and pantry staples
Stock your pantry with these reliable basics: all-purpose flour, cornstarch for extra crunch, kosher salt, freshly ground black pepper, garlic powder, onion powder, and paprika. Choose smoked paprika for a deeper note or sweet paprika for milder flavor.
Add baking powder to the dry mix to boost crispness. For the wet side, use buttermilk or plain yogurt to tenderize. Eggs make a sturdy dredge layer. Pick frying oils with high smoke points like peanut, canola, or avocado oil. Use a neutral oil spray when adapting the recipe for an air fryer.
Optional add-ins for extra flavor
- Hot sauce in the marinade for a spicy kick that melds with the batter.
- Lemon zest to brighten the crust and cut through richness.
- Fresh herbs such as thyme or rosemary tucked under the skin for aroma.
- Grated Parmesan blended into the coating for savory depth.
- Panko crumbs or rice flour for extra crunch and a gluten-free option.
These tweaks let us tailor the authentic broasted chicken recipe to our tastes. Learn more about how superfoods like broccoli and blueberries support health with tips from Mayo Clinic’s 10 great health foods list. Their expert reviews help boost nutrition in every meal. Try a classic broasted chicken marinade with buttermilk and a dash of hot sauce for juicy results every time!
Equipment Needed for Broasted Chicken at Home
We want you to feel confident picking the right gear for homemade broasted chicken recipe. The right tools change speed, safety, and final crunch. Below we compare home options and list essentials that speed prep and cleanup.

Pressure cooker vs. broaster machine vs. air fryer
- Commercial broaster machine: Delivers the most authentic pressure-fried texture restaurants achieve. It seals in juices and creates deep, even crusts. The downside is cost and space needs, so it suits serious home chefs with workshop-style kitchens.
- Electric pressure cooker plus heavy skillet: An Instant Pot with a metal insert or a stovetop pressure cooker paired with a cast-iron skillet is our top accessible combo. Use the cooker for fast, tendering, then brown in the skillet for crisp. This method balances speed, flavor, and budget. Search for tips under pressure cooker broasted chicken for technique ideas.
- Air fryer: Great for lower oil and easy cleanup. It gives a very crispy exterior when you adapt the coating and spray oil lightly. Expect slightly different mouthfeel than pressure-fried chicken. Look up air fryer broasted chicken recipes to tweak time and coating ratios.
Kitchen tools that speed up prep and cleanup
- Tongs with long handles for safe flipping and hot-oil handling.
- Instant-read thermometer to confirm safe internal temps quickly.
- Wire racks and baking sheets to drain and rest pieces so crust stays crisp.
- Shallow bowls for dredging and mixing bowls for batter or brine.
- Digital kitchen scale for accurate flour and spice measurements.
- Whisk for smooth batters and an oil thermometer if you deep-fry by hand.
- Splatter screen to keep stovetop oil under control and reduce cleanup time.
- Parchment or foil to line pans for easy washing and tidy counters.
Safety and cleanup tips
- Use long tongs and heat-resistant gloves when moving hot chicken or pans.
- Place pieces on a wire rack over a sheet pan to drain, not on paper towels, to keep crust crisp.
- To store and reuse frying oil, let it cool, filter through a fine mesh, and refrigerate in a sealed container. Label with date and discard after two uses or if it smells off.
- If you must dispose of oil, pour it into a sealed container and put it in trash. Avoid pouring oil down drains to prevent clogs.
How to Make Broasted Chicken at Home: Step-by-Step Overview
We’ll guide you through making juicy, crunchy broasted chicken at home. Start by prepping the bird, then build a sturdy coating. Finally, use the right pressure-cooking method to keep it moist and crispy. Taking it one step at a time makes a big difference!
Begin with clean, dry chicken. Remove excess fat and skin flaps. If you want even pieces, separate the joints. Dry each piece with paper towels to help the coating stick.
For extra juiciness, try a quick brine. Use 1/4 cup kosher salt per quart of water for 30–60 minutes. Rinse and dry well before moving on.
Next, prepare the coating and breading for crunch. Use a wet dip like buttermilk or an egg wash, then a seasoned dry dredge. For a double-dredge, flour, dip, then flour again. Press the mix onto the skin to seal gaps.
Finish with panko for extra texture. Mix a small amount of baking powder into the dry blend. This creates tiny air pockets that crisp during cooking. For a comforting, balanced dinner, browse these Nutrition.gov healthy chicken recipes. Government resources offer nourishing ways to enjoy home-cooked poultry.
While breading, work in batches and avoid overcrowding. Let coated pieces rest 10–15 minutes on a rack. This step helps the crust stick better and prevents it from falling off during cooking.
Proper pressure-cooking technique is key. Preheat your pressure cooker as directed. Choose a method that fits your gear: oil for searing or a trivet for steam.
If using a pressure-frying hybrid or a heavy skillet, brown pieces briefly in hot oil. This develops color. Follow the recommended pressure and timing in the recipe section.
For texture control, understand release methods. A natural release finishes carryover cooking and keeps meat tender. A quick release halts cooking fast and preserves a firmer crust. Always follow safety steps for pressure cooking poultry and check seals and valves before starting.
- Preparing the chicken: trim, pat dry, optional quick brine.
- Coating and breading: wet dip, dry dredge, double-dredge, press coating, use panko, add baking powder.
- Pressure-cooking technique: preheat, choose oil or trivet method, brown if possible, mind release method and safety.
We keep each step short and focused to help you reproduce great results. Use this broasted chicken step by step guide to gain confidence before you try the full recipe.
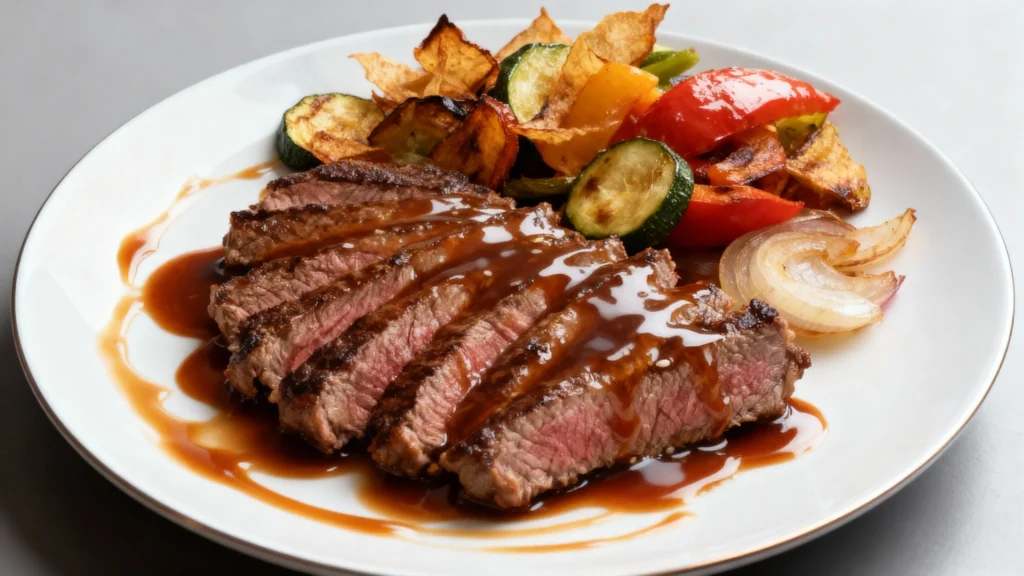
Homemade Broasted Chicken Recipe
We love making tasty meals from simple ingredients. Here’s a recipe for four servings of broasted chicken. It’s easy to follow and ensures juicy, crispy results every time.
- 3–4 pounds bone-in chicken (thighs and drumsticks)
- 2 cups buttermilk
- 2 cups all-purpose flour
- 1/2 cup cornstarch
- 2 teaspoons kosher salt
- 1 teaspoon black pepper
- 2 teaspoons garlic powder
- 2 teaspoons onion powder
- 1 teaspoon paprika
- 1/2 teaspoon cayenne pepper (optional)
- 1 teaspoon baking powder
- 2 large eggs
- 1–2 quarts frying oil (peanut or canola) or spray oil for air fryer
Variants
- Gluten-free: replace all-purpose flour with a 1:1 gluten-free flour blend and use a gluten-free cornstarch alternative if needed.
- Low-oil option: use an air fryer with spray oil or shallow fry then finish in the air fryer for crispness.
Exact step-by-step cooking instructions
- Marinate: combine chicken and buttermilk in a bowl or zip-top bag. Chill 1–4 hours. This tenderizes and seasons the meat.
- Prep stations: whisk eggs and a splash of water for the wet station. Mix flour, cornstarch, baking powder, salt, pepper, garlic powder, onion powder, paprika, and cayenne in a separate bowl for the dry station.
- Dry and dredge: remove chicken from buttermilk, let excess drip, then pat pieces dry with paper towels. Dip in egg wash, then press into the seasoned flour mixture until fully coated.
- Heat oil or preheat air fryer: for shallow frying, heat oil to 350–375°F. For air fryer, preheat to 400°F and lightly spray the basket.
- Optional pressure stage: briefly brown coated pieces 1–2 minutes per side in hot oil. Transfer to a pressure cooker with a cup of water or broth and cook at high pressure 8–12 minutes for bone-in pieces. Let a natural release sit 5 minutes, then quick-release remaining pressure.
- Finish crisping: if you used the pressure stage, shallow fry at 350–375°F 3–5 minutes per side to crisp the coating. For air fryer only, arrange pieces in a single layer, spray lightly, and cook at 400°F for the timing below, flipping halfway.
- Check doneness: use an instant-read thermometer inserted into the thickest part, avoiding the bone. Target internal temperature: 165°F.
- Rest and drain: place finished pieces on a wire rack over a sheet pan to drain. Rest 5–10 minutes before serving to let juices redistribute and the coating set.
Timing and temperature guidelines
- Buttermilk marinate: 1–4 hours. Longer gives more tender meat.
- Shallow fry finish after pressure stage: 3–5 minutes per side at 350–375°F for crisping.
- Air fryer only: 18–25 minutes at 400°F, flip halfway. Smaller pieces need less time.
- Pressure-cooker stage for bone-in pieces: 8–12 minutes at high pressure. Allow a 5-minute natural release before quick release.
- Target safe internal temp: 165°F measured in the thickest part, not touching bone.
Use an instant-read thermometer for accuracy. Following these steps will give you a delicious broasted chicken recipe every time. Enjoy it with sides like mashed potatoes or a crisp green salad!
For the most reliable food safety guidance, check out the Food Network about Right Internal Temperature for Cooked Chicken. Their science-backed recommendations help ensure poultry is always cooked to a safe 165°F
Crispy Broasted Chicken Tips for Extra Crunch
We all love a crispy crust! These quick tips will help keep your broasted chicken extra crunchy. Follow each tip to enhance your cooking experience.
- Mix cornstarch with flour and add a pinch of baking powder to the dredge. This airy mix creates a dryer, crunchier crust.
- Double-dredge for extra texture: flour, egg wash, then flour again. Light presses between steps help the coating stick.
- Cook hot and fast. Fry or air-fry at high heat for a short time to set the crust without overcooking the meat.
- Drain on a wire rack, not paper towels. Paper traps steam and makes the coating soggy.
- Avoid stacking pieces after cooking. Space keeps air flowing and the crust crisp.
How resting time affects texture
- Let chicken rest 5–10 minutes uncovered on a rack. Juices settle and the crust firms up for a better bite.
- Do not cover immediately. Covering traps steam and softens the coating within minutes.
- If you must hold the chicken before serving, place it in a 200°F oven on a rack for up to 20–30 minutes. This keeps heat without ruining crispness.
Reheating tips to maintain crunch
- Reheat in a 375–400°F oven or an air fryer for 6–10 minutes until the internal temp hits 165°F. Use a wire rack in the oven for even circulation.
- A hot, short cycle in the air fryer revives crispness fast. Flip once halfway through.
- Avoid microwaving when possible. Microwaves steam the coating and leave it limp.
Try these homemade broasted chicken tips next time you cook. Your family will love the extra crunch and flavor!
Broasted Chicken Marinade and Seasoning Ideas
We love bold marinades and smart seasoning tricks. They make every bite sing. Below, we share a classic buttermilk base, regional spice blends, and quick marinating times. Pick one, tweak the heat and salt, and enjoy a delicious broasted chicken recipe that feels homemade and special!
Classic marinade for juicy, flavorful chicken
Start with whole milk buttermilk and hot sauce as the base. Add 1 tsp kosher salt, 1 tsp black pepper, and 1 tsp garlic powder per quart of buttermilk. This mix tenderizes and adds tang while seasoning the meat.
Marinate pieces for at least 1 hour. For best tenderness, leave them overnight. If you like more heat, increase the hot sauce or add cayenne to taste.
Spice blends for regional flavor variations
Try one of these blends mixed into flour or the buttermilk for clear regional notes:
- Southern: smoked paprika, cayenne, garlic powder, onion powder, dried thyme.
- Cajun: paprika, cayenne, dried oregano, dried thyme, white pepper.
- Middle Eastern twist: ground sumac, cumin, coriander, garlic, lemon zest.
- Herb-forward: chopped fresh thyme, rosemary, and lemon zest folded into the buttermilk.
- Parmesan-garlic: grated Parmesan folded into the flour for a savory, crunchy crust.
Balance salt carefully. Start with 1 tsp kosher salt per pound of chicken if you plan to marinate. Taste any dry rub before applying. If a blend has high-sodium elements like Parmesan, cut back on added salt.
Marinating times and shortcuts
For real depth, marinate 6–12 hours. If short on time, 30–60 minutes still improves flavor uptake. A dry-brine is a great shortcut: sprinkle salt and your spice mix over the chicken and let it rest for 30 minutes.
When pressed for time, use a vacuum-seal bag or a resealable plastic bag. Massage the marinade into the meat. That speeds penetration and gives you tasty results in under an hour.
Keep these three phrases in mind as you prep: marinating times and shortcuts, broasted chicken marinade, and delicious Homemade Broasted Chicken Recipe. They guide your plan and help you hit the flavor you want every time!
Air Fryer Broasted Chicken Variation
We love making our easy Homemade Broasted Chicken Recipe even better with the air fryer. It keeps the same brine, marinade, and seasoned coating you know and love. We use less oil and a special mix of cornstarch and panko for crunch. The air fryer’s heat circulation crisps the crust perfectly.
Just a few simple changes make the recipe air fryer-friendly without losing flavor or juiciness. Follow these easy steps and tips for the best results.
Adapting the recipe for air frying
Keep the same brine and seasoning. For the coating, mix equal parts panko and cornstarch. Lightly spray each piece with an oil mister instead of oil. This makes the crust golden and cuts calories.
Recommended settings and basket loading tips
- Preheat the air fryer to 400°F for steady heat.
- Place pieces skin-side up in a single layer. Do not overcrowd; work in batches if needed.
- Cook 18–25 minutes depending on piece size. Flip halfway and mist lightly with oil.
- Use an instant-read thermometer to confirm 165°F internal temp before serving.
- For wings, aim for 16–20 minutes and check crispness early.
Comparing air fryer results to pressure-cooked broasting
Air fryer broasted chicken is great for less oil and easy cleanup. It offers excellent crisp and a satisfying crunch with minimal effort.
Pressure-cooked broasting gives a juicier interior and a crust like restaurant broasted chicken. Choose the air fryer for speed and convenience. Opt for pressure cooking for that classic broaster texture.
Broasted Chicken Pressure Cooker Method
We love how fast a pressure cooker cooks and the crunch of broasted chicken. It makes the meat tender and juicy. Then, high heat adds a golden crust. Just remember to follow safety tips, adjust the coating for steam, and crisp it up for that classic feel.
Safety tips for pressure cooking poultry
- Read your pressure cooker manual and follow the manufacturer’s safety essentials.
- Do not overfill; observe max fill lines for poultry and liquids.
- Keep lids, seals, and valves clean and correctly seated before sealing.
- Use enough liquid so the cooker can build and hold pressure safely.
- Use long-handled tools and heat-resistant gloves when removing hot chicken.
- Verify poultry reaches an internal temperature of 165°F with a probe thermometer.
- Avoid pressure-frying unless you own a pressure-fryer rated for hot oil; most electric pressure cookers are not suitable for deep frying under pressure.
How to adapt coating and oil for pressure use
For pressure cooking, a light coating works best. Try a thin flour and spice mix or panko pressed gently onto the skin. It holds better than a wet batter.
Par-cook the chicken in the pressure cooker to about 150–155°F. Then, finish it in a skillet, oven, or air fryer to crisp it up.
- If you want oil involvement, use a pressure-fryer designed for hot oil only.
- For home electric models, avoid adding large amounts of oil under pressure.
- Use neutral oils like canola or peanut for the final high-heat sear or shallow fry.
Recovering crispness after pressure cooking
Getting crisp again after pressure cooking is easy and quick. Place the chicken on a wire rack to let steam escape. Then, choose a hot finish.
- Oven method: 425°F for 3–6 minutes per side on a wire rack.
- Skillet: 2–4 minutes per side in a hot pan with a tablespoon of oil to re-sear.
- Air fryer: 400°F for 4–8 minutes, flip once for even browning.
- Rest briefly on a wire rack after crisping so the coating stays dry and crunchy.
These steps help us make broasted chicken in a pressure cooker that’s tender inside and crispy outside. Try small batches until you get the timing right for your equipment and taste!
Serving Suggestions and Best Broasted Chicken Sides
We love pairing broasted chicken with sides that highlight contrast. Crunchy coating meets creamy, tangy, and bright flavors. This makes each bite sing. Below we list easy, crowd-pleasing options and quick recipes you can toss together between batches.
Classic American side dishes to pair
Stick with familiar favorites for broad appeal. Creamy starches balance the crunch of the chicken.
- Mashed potatoes with gravy — make smooth Yukon Gold mash and warm a rich pan gravy.
- Macaroni and cheese — bake a cheddar-panko topping for texture contrast.
- Coleslaw — a tangy, vinegar slaw cuts the richness of the coating.
- Baked beans or cornbread — offer sweet, smoky depth that warms the plate.
- French fries or mashed sweet potatoes — pick fries for salt and crisp, sweet mash for contrast.
- Biscuits — flaky rounds absorb sauces and make the meal feel homey.
Fresh salads and vegetable sides for balance
Bright vegetables lighten the plate and refresh the palate.
- Mixed greens with lemon-Dijon vinaigrette — toss olive oil, lemon juice, Dijon, salt, and pepper.
- Cucumber-tomato salad — simple, chilled, and ready in five minutes.
- Roasted Brussels sprouts — caramelize on high heat with a splash of balsamic.
- Steamed green beans with garlic and lemon — quick steam, then toss with butter or olive oil and lemon zest.
- Charred corn salad — grill corn, cut off the cob, mix with cilantro, lime, and a pinch of chili.
Sauces and dips including garlic sauce
Sauces bring personality and let guests customize each bite. We recommend a lineup from creamy to spicy.
- Garlic sauce (quick formula): combine mayonnaise or Greek yogurt, minced garlic, lemon juice, a pinch of salt, and a splash of olive oil. Whisk until smooth.
- Honey mustard — mix equal parts honey and Dijon, add a touch of mayo for creaminess.
- Spicy buffalo — melt butter into hot sauce for a classic kick.
- Ranch and BBQ — familiar favorites that please kids and adults alike.
- Chimichurri — chopped parsley, cilantro, red wine vinegar, garlic, and olive oil for a herbaceous lift.
Pairing tip: serve a creamy starch, a vinegar-based slaw, and one bright vegetable to keep the plate balanced. Offer broasted chicken with garlic sauce on the side for dipping. Also, have a spicy or herb sauce for those who want extra zip. Enjoy experimenting and make it your go-to delicious broasted chicken recipe!
Broasted Chicken for Family Dinner and Parties
We love making broasted chicken a hit at gatherings! This part shows how to make more, plan ahead, and serve it fast. It keeps the chicken juicy and flavorful for everyone.
To feed a crowd, just multiply the ingredients. Choose thighs and drumsticks for big events. They’re cheaper, cook well, and easy to serve.
- Cook in batches to avoid crowding the pan or pressure cooker.
- Keep finished pieces warm on racks in a 200°F oven to protect the coating.
- Plan a cooking timeline so pieces spend minimal time waiting before serving.
Make-ahead steps and holding strategies
Brine or marinate the chicken a day before for more flavor. For a crispy coating, pre-dredge and refrigerate on trays, covered with plastic wrap.
- Re-crisp in a 400°F oven or air fryer for a few minutes just before serving.
- Use chafing dishes with racks and vented lids to reduce sogging during service.
- If needed, keep pieces in a warming oven on racks rather than piling them up.
Presentation and plating tips for gatherings
Serve broasted chicken on big platters with fresh garnishes. Add lemon wedges and parsley for color and freshness.
- Create a dipping station with small bowls of ranch, garlic sauce, and barbecue for variety.
- Label spice levels so guests can pick mild or spicy pieces with confidence.
- For buffet service, provide tongs and disposable liners to keep trays tidy and simple to change out.
Broasted Chicken vs Fried Chicken: Key Differences
We love comparing cooking methods so home cooks can choose with confidence. Broasting blends pressure cooking with a quick crisp finish. Traditional frying relies on full immersion in hot oil. Each approach gives a distinct bite, mouthfeel, and cooking rhythm.
Texture and flavor contrasts
Broasted pieces tend to be very juicy inside. The pressure step locks in moisture. A light crust forms when you finish with a short blast of oil or in an oven. The result feels less greasy and lets brine and spices shine.
Deep-fried chicken creates a thicker, crunchier crust from longer oil contact. That coating often tastes richer and more indulgent. Batter recipes and double-dredging change the flavor and crunch dramatically.
Health and nutrition considerations
Broasting can lower oil absorption because the pressure phase shortens frying time. Air-fryer variations cut oil even more. Calories and fat vary by cut, skin, and method.
- Skin-on, deep-fried pieces are highest in calories and fat.
- Skinless breasts and shorter fry times reduce calories.
- For exact numbers, check USDA nutrition databases for your cut and cooking method.
When to pick one for meals
Choose broasting when you want fast cook times and very juicy meat with a lighter finish. It works great for weeknight dinners and batch cooking for a crowd.
Pick traditional frying when you crave a robust, crunchy crust and a classic flavor profile for events or comfort meals. Use the best Homemade Broasted Chicken Recipe when you want less grease and simpler cleanup.
Conclusion
Broasted chicken makes restaurant-style food easy to make at home. We showed three ways to do it: using a pressure cooker, an air fryer, or a skillet. You can pick what works best for you.
Try different marinades and spices to make it your own!
Follow our recipe and tips for crispy chicken. You can make it for a small dinner or a big party. It’s fun to see how everyone makes it their own.
Don’t forget about food safety. Make sure the chicken is 165°F, let it rest, and store leftovers right. We want cooking to be fun and easy for everyone. Let’s get broasting and enjoy it together!

Homemade Broasted Chicken Recipe
Short Description
Make ultra-juicy, crispy broasted chicken right at home, using simple pantry ingredients and easy kitchen tools. This homemade method delivers golden crunch and moist chicken every time—whether you fry, pressure-cook, or air fry. It’s perfect for family dinners, parties, or a quick treat!
Recipe Details
- Serving Size: 4 servings
- Prep Time: 20 minutes (plus 1–4 hours marinating)
- Cook Time: 30 minutes
- Total Time: 1 hour 50 minutes (with marinating)
Ingredients per Serving
- 3–4 lb bone-in chicken (thighs and drumsticks)
- 2 cups buttermilk
- 2 cups all-purpose flour (substitute gluten-free if needed)
- 1/2 cup cornstarch
- 2 tsp kosher salt
- 1 tsp black pepper
- 2 tsp garlic powder
- 2 tsp onion powder
- 1 tsp paprika
- 1/2 tsp cayenne pepper (optional)
- 1 tsp baking powder
- 2 large eggs
- 1–2 quarts frying oil (peanut or canola), or oil spray for air fryer
Nutritional Facts
- Calories: ~500 per serving
- Protein: ~40g
- Carbs: ~30g
- Fats: ~26g
- Fiber: ~1g
- Sodium: ~980mg
- Sugar: ~3g
Instructions
Step 1
Marinate chicken pieces in buttermilk for 1–4 hours. Use a bowl or zip-top bag, and keep in the fridge for best tenderness and flavor.
Step 2
Whisk eggs with a splash of water in one bowl, and combine flour, cornstarch, baking powder, salt, pepper, garlic powder, onion powder, paprika, and cayenne in another bowl for the dry mix.
Step 3
Remove chicken from the marinade, let the excess drip off, and pat pieces dry. Dip each piece in egg wash, then press firmly into the seasoned flour mixture until fully coated.
Step 4
Heat oil to 350–375°F for frying, or preheat your air fryer to 400°F. If frying, use a deep skillet or Dutch oven with enough oil to submerge the pieces. For air frying, lightly spray the basket with oil.
Step 5
Optional: For extra-juicy meat, briefly brown coated chicken (1–2 minutes each side), then finish cooking in a pressure cooker at high pressure for 8–12 minutes. Let sit for 5 minutes, then release pressure.
Step 6
Return chicken to the hot oil for 3–5 minutes each side to crisp, or air fry 18–25 minutes at 400°F, flipping halfway. Smaller pieces may require less time.
Step 7
Check for doneness using an instant-read thermometer; the thickest parts should reach 165°F. Remove to a wire rack to drain and rest for 5–10 minutes before serving.
Step 8
Serve hot with your favorite sauces and sides. Store any leftovers in an airtight container for up to 3–4 days, and reheat in the oven or air fryer to keep them crisp!