How to Make Heavenly Hazelnut Chocolate Truffles at Home
Share this recipe
The first time I made homemade hazelnut chocolate truffles, my kitchen became a magical place. The smell of roasted hazelnuts and melting chocolate filled the air. It was a moment of pure joy!
Imagine surprising your loved ones with these elegant treats. They look like handcrafted delights you’d spot behind the glass at a premium chocolate store. Our guide shows you how easy it is to make these treats at home.
Key Takeaways
- Master the art of homemade hazelnut chocolate truffles
- Learn professional chocolate-making techniques
- Create gourmet desserts with minimal kitchen experience
- Understand the perfect balance of chocolate and hazelnuts
- Impress friends and family with stunning homemade treats
Understanding the Magic of Hazelnut Chocolate Truffles
Chocolate truffles are more than a sweet treat. They’re a journey of rich flavors and history. Our easy chocolate truffle recipe will show you how to make these tasty treats that have won hearts around the world.
Let’s dive into the world of these small but delicious treats. They mix art and flavor in every bite. Nutty chocolate truffles are a perfect mix of taste and texture, turning simple ingredients into amazing dishes.
The Delicious Journey of Chocolate Truffles
Chocolate truffles started in France in the late 19th century. They were named after their look, like truffle mushrooms. These treats quickly spread across Europe, becoming a sign of fine dining.
- First created in 1895 by French chocolatier
- Named for their mushroom-like appearance
- Rapidly became a global dessert sensation
Why Hazelnuts Complement Chocolate Perfectly
Hazelnuts add a nutty flavor that makes chocolate even better. Their creamy texture and earthy taste make every truffle a delight.
- Provides creamy, smooth texture
- Adds complex nutty flavor profile
- Increases nutritional value of truffles
Surprising Health Benefits
Dark chocolate and hazelnuts are not just tasty. They’re also good for you. They’re full of antioxidants and healthy fats, making our chocolate truffle recipe a treat that’s good for you too.
- Antioxidants from dark chocolate
- Heart-healthy monounsaturated fats
- Essential minerals and vitamins
Essential Ingredients for Perfect Homemade Truffles

Making delicious hazelnut truffles with cocoa needs the right ingredients. These ingredients turn simple parts into magical treats. Our no-bake chocolate truffles recipe calls for top-notch ingredients for the best taste.
Let’s look at the main ingredients for making irresistible truffles:
- High-quality dark chocolate (at least 60% cocoa content)
- Heavy cream with minimum 36% fat
- Fresh hazelnuts
- Pure vanilla extract
- Unsalted butter
- Cocoa powder for coating
Choosing the right chocolate is key for your hazelnut truffles with cocoa. Go for Belgian or Swiss chocolate for its rich, smooth texture. The chocolate’s quality greatly affects your truffles’ taste and feel.
Pro tip: Always use room temperature ingredients to ensure smooth ganache preparation!
Fresh hazelnuts are vital for deep, nutty flavors. Roasting them before adding to your truffles boosts their taste and adds crunch.
Remember, using the best ingredients is the secret to amazing homemade truffles. They will surely impress your family and friends!
Required Kitchen Tools and Equipment
Get ready to turn your kitchen into a chocolate dreamland! Making creamy hazelnut truffles and dark chocolate hazelnut truffles needs some key tools. These tools will make your truffle-making journey smooth and fun.
For truffle success, you need the right equipment. Let’s look at the essential tools for making professional-quality treats in your kitchen!
Basic Tools Every Home Chef Needs
- Digital kitchen scale for precise ingredient measurements
- Medium-sized mixing bowls
- Rubber spatula for smooth mixing
- Baking sheet lined with parchment paper
- Scoops or melon baller for shaping dark chocolate hazelnut truffles
- Candy thermometer to monitor chocolate temperatures
Optional Equipment for Professional Results
For those aiming for perfection, consider these professional tools:
- Chocolate dipping tools
- Silicone truffle molds
- Professional tempering machine
- Kitchen gloves for clean handling
- Decorative transfer sheets for intricate designs
Even without every tool, creativity and passion are key to making amazing homemade truffles! 🍫✨
Choosing the Right Chocolate for Your Truffles
Making the perfect holiday chocolate truffles begins with picking the right chocolate. Your chocolate hazelnut dessert recipe will only shine with the right chocolate. Not all chocolates are the same, and knowing their differences can make your truffles stand out.
When picking chocolate for your truffles, keep these points in mind:
- Cocoa Percentage: Higher percentages mean more intense chocolate flavor
- Quality of ingredients matters most for smooth, rich truffles
- Flavor complexity impacts your final chocolate hazelnut dessert recipe
Different chocolate types add unique qualities to your holiday chocolate truffles:
- Dark Chocolate: Rich, intense flavor with 70-85% cocoa content
- Milk Chocolate: Creamy and sweet, perfect for milder palates
- White Chocolate: Smooth and delicate, great for decorative touches
Pro tip: Always use high-quality chocolate for the most decadent truffles!
Experts say to choose chocolate with minimal additives. Opt for products where cocoa butter is listed near the top of the ingredients list. This ensures your homemade truffles are smooth and luxurious.
Preparing and Roasting Hazelnuts
Discover the secret to making amazing gourmet chocolate truffles with hazelnuts! Roasting and skinning these nuts turns them into flavor-packed gems. They make vegan hazelnut chocolate truffles even more delicious.
When making vegan hazelnut chocolate truffles, picking and preparing hazelnuts is key. Roasting them brings out their rich, nutty flavor. This adds depth to your gourmet chocolate truffles.
Skinning Techniques for Maximum Flavor
Removing hazelnut skins might seem hard, but we have easy methods:
- Oven Roasting Method: Spread hazelnuts on a baking sheet and roast at 350°F for 10-12 minutes
- Towel Technique: Wrap warm roasted nuts in a clean kitchen towel and rub vigorously
- Quick Skin Removal: Most skins will naturally flake off after roasting
Achieving the Perfect Roast
Roasting hazelnuts is an art for making top-notch gourmet chocolate truffles. Here are tips for perfect results:
- Check nuts every few minutes to prevent burning
- Listen for a subtle crackling sound indicating ideal roasting
- Cool nuts completely before using in your truffles
Pro tip: Freshly roasted hazelnuts will dramatically improve the depth of flavor in your vegan hazelnut chocolate truffles!
Creating the Perfect Ganache Base
Ganache is key to making decadent truffles that impress everyone. It’s the rich center of each truffle, turning simple ingredients into special chocolate gifts.
Making perfect ganache needs care and precision. The right mix of chocolate and cream is crucial for the truffle’s texture and taste. Choose high-quality dark chocolate for the best flavor.
“Ganache is the heart and soul of any remarkable truffle” – Chocolatier’s Secret
Here’s how to make smooth ganache:
- Chop chocolate into small, uniform pieces
- Heat cream until it just begins to simmer
- Pour hot cream over chocolate
- Let mixture stand for 2-3 minutes
- Stir until completely smooth and glossy
Keeping the temperature right is important. If it’s too hot, the chocolate will separate. If it’s too cool, it will be lumpy. You want a smooth, velvety texture for your truffles.
Pro tip: Let your ganache cool and set at room temperature for the best consistency when rolling your truffles.
Step-by-Step Truffle Rolling Technique
Making perfect desserts for chocolate lovers needs precision and patience. Our homemade treats require careful attention during the rolling process. Truffles might seem hard, but with the right technique, anyone can become a chocolate master!
Let’s break down the essential steps for turning your ganache into beautiful chocolate spheres:
- Chill the ganache until firm but moldable
- Use a small cookie scoop or spoon for consistent sizing
- Work quickly to prevent chocolate from melting
Proper Temperature Control
Temperature is key when rolling truffles. Cold hands = chocolate disaster! Here are some pro tips:
- Wear food-safe gloves to prevent heat transfer
- Periodically rinse hands in cold water
- Keep workspace cool (around 65-68°F)
Shaping Methods for Professional Results
To get bakery-quality truffles, focus on gentle, consistent movements. Roll each truffle between your palms using light pressure. This creates smooth, round shapes. Practice makes perfect in crafting these delectable desserts for chocolate lovers!
Pro tip: Less handling means smoother truffles!
Coating Options and Decorative Finishes
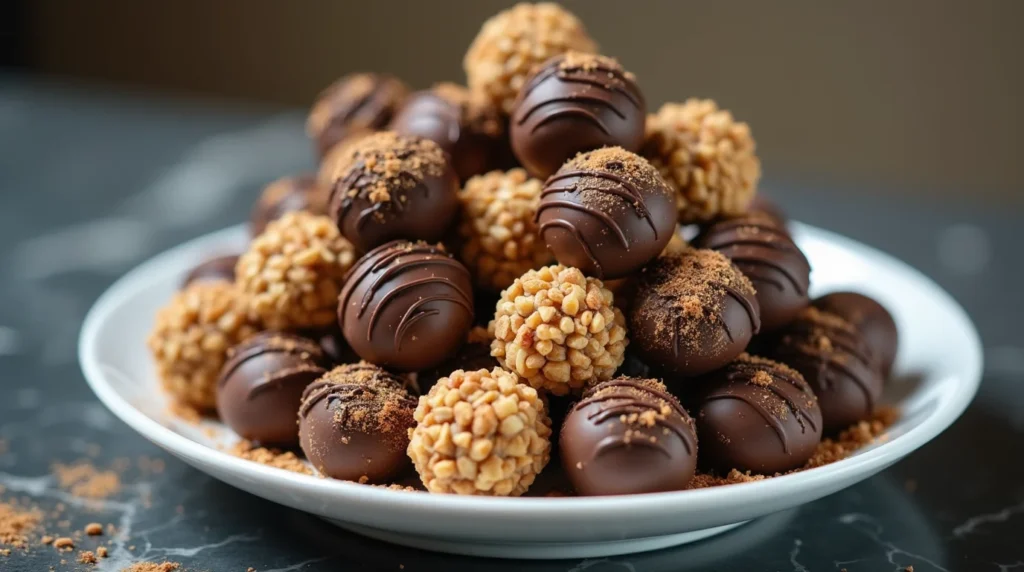
Turn your homemade hazelnut chocolate truffles into stunning treats with creative coatings! The right finish can make them go from tasty to truly amazing.
Classic coatings for hazelnut chocolate truffles include:
- Cocoa Powder: Traditional and elegant, providing a rich dark finish
- Chopped Roasted Hazelnuts: Adds crunch and extra nutty flavor
- Melted Dark Chocolate: Creates a smooth, glossy exterior
- Powdered Sugar: Gives a delicate, snow-like appearance
- Edible Gold Leaf: For truly luxurious homemade hazelnut chocolate truffles
Professional decorating techniques can make your truffles look like they came from a gourmet shop. Try using:
- Drizzling contrasting chocolate
- Sprinkling sea salt
- Creating geometric chocolate patterns
- Using colored cocoa butter for artistic designs
Pro tip: Always chill your truffles before coating to prevent melting and keep a perfect finish!
Troubleshooting Common Truffle-Making Issues
Making the perfect easy chocolate truffle recipe can be a delicate adventure. Don’t worry if your nutty chocolate truffles don’t turn out right. Kitchen mishaps are part of learning, and we’re here to help you solve common problems.
Texture Troubles: Solving Grainy Ganache
A smooth ganache is key to any great truffle. If your mixture looks grainy or separated, try these quick fixes:
- Make sure chocolate and cream are at the same temperature
- Stir gently and consistently while mixing
- Choose high-quality chocolate for the best results
- Let ganache cool slowly at room temperature
Preventing Chocolate Seizure
Chocolate can be tricky when moisture is involved. To avoid issues with your easy chocolate truffle recipe, follow these tips:
- Keep all utensils dry
- Use room temperature ingredients
- Melt chocolate slowly and carefully
- Avoid direct water contact
“Patience is the secret ingredient in any great chocolate truffle recipe!” – Professional Pastry Chef
Remember, practice makes perfect. Every batch of truffles brings you closer to mastering chocolate-making!
Storage Tips for Long-Lasting Freshness
Making delicious hazelnut truffles with cocoa is an art. But, storing them right is just as key! Our no-bake chocolate truffles need special care to keep their amazing taste and texture.
Preserving your homemade treats involves temperature and container choice. Here are key storage tips to keep your truffles fresh:
- Refrigerate your no-bake chocolate truffles in an airtight container
- Place parchment paper between truffle layers to prevent sticking
- Maintain a consistent temperature between 55-65°F
- Avoid direct sunlight or warm areas
The shelf life of hazelnut truffles with cocoa depends on the ingredients. Dairy-based truffles last 7-10 days. Vegan versions can last up to two weeks if stored right.
Pro tip: Always let truffles sit at room temperature for 10-15 minutes before serving to enhance their flavor and smooth texture!
Want to make your truffles last longer? Try freezing them! Wrap each truffle in plastic wrap, then store in a freezer-safe container for up to three months. Just thaw them slowly in the fridge to keep their delicate shape.
Creative Variations and Flavor Combinations
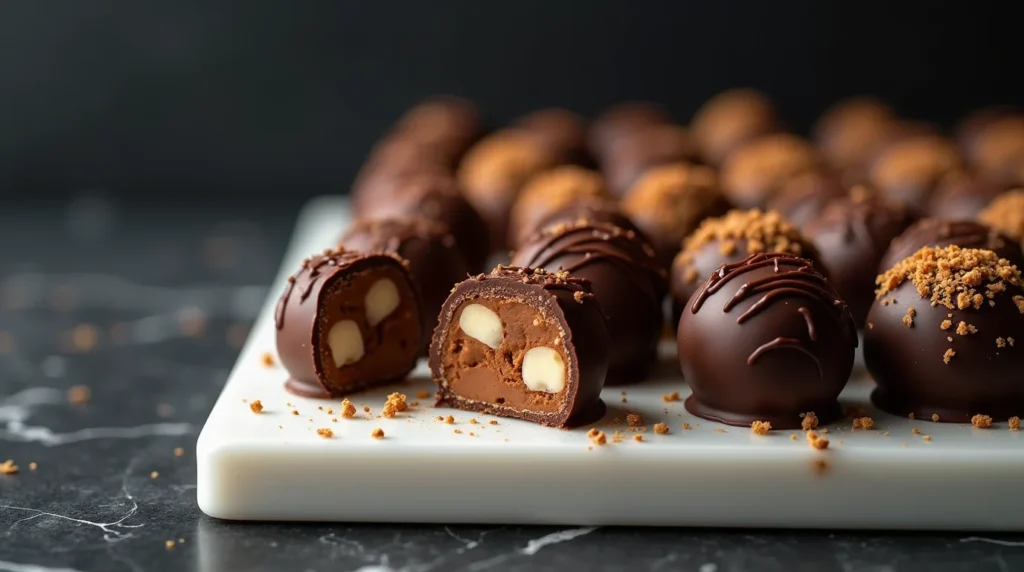
Ready to make your creamy hazelnut truffles even better? It’s easy to turn classic dark chocolate hazelnut truffles into something new and exciting. Let’s dive into some fun ways to spice up your truffle-making.
Begin by adding unique flavors that go well with the dark chocolate and hazelnut. Our top picks include:
- Sea Salt Caramel: Add a sprinkle of flaky sea salt for a fancy sweet-salty mix
- Lavender-Infused: Mix in dried lavender for a fancy herbal touch
- Spicy Chili Chocolate: Add a bit of cayenne pepper for a spicy kick
- Citrus Zest: Use orange or lemon zest for a zesty, fresh taste
Feel free to get creative with your coatings too! Try rolling your truffles in:
- Crushed pistachios
- Toasted coconut flakes
- Finely ground espresso beans
- Cocoa powder with a hint of cinnamon
Pro tip: Always taste your combinations before fully committing to ensure a balanced flavor profile!
The best part about making your own dark chocolate hazelnut truffles is the endless possibilities. Each batch can be a new culinary journey that shows off your creativity and taste.
Packaging Ideas for Gifting Your Truffles
Turning your homemade holiday chocolate truffles into beautiful gifts is an art. It can make your friends and family very happy. We’ll look at creative ways to package your truffles that will leave a lasting impression!
When you present your tasty truffles, think carefully. The right package can turn your treat into a special gift.
Eco-Friendly Packaging Alternatives
There are stylish and green packaging choices. Here are some eco-friendly options:
- Recyclable kraft paper boxes
- Biodegradable clear containers
- Reusable glass jars with decorative ribbons
- Bamboo gift boxes with natural twine
Professional Presentation Techniques
Making your holiday chocolate truffles look professional is easy. Follow these simple tips to make your gifts stand out:
- Layer truffles with parchment paper
- Use cupcake liners for individual separation
- Select coordinating color schemes
- Add personalized labels or gift tags
Your homemade chocolate gifts will impress with these presentation tips. Remember, how you present it matters as much as the truffles themselves!
Conclusion
Making vegan hazelnut chocolate truffles is a fun journey. It turns simple ingredients into rich treats. Our guide helps you make these confections with ease and flair.
Whether you’re new to baking or have experience, our recipe will improve your skills. Every batch of truffles is a chance to try new things, learn, and get better.
Practice and passion are key to making these treats. Each truffle shows your skill, patience, and creativity. Keep trying new things, stay curious, and enjoy making chocolate!
Your vegan hazelnut chocolate truffles will wow your loved ones and make you proud. Dive into the world of chocolate making and let your creativity flow!
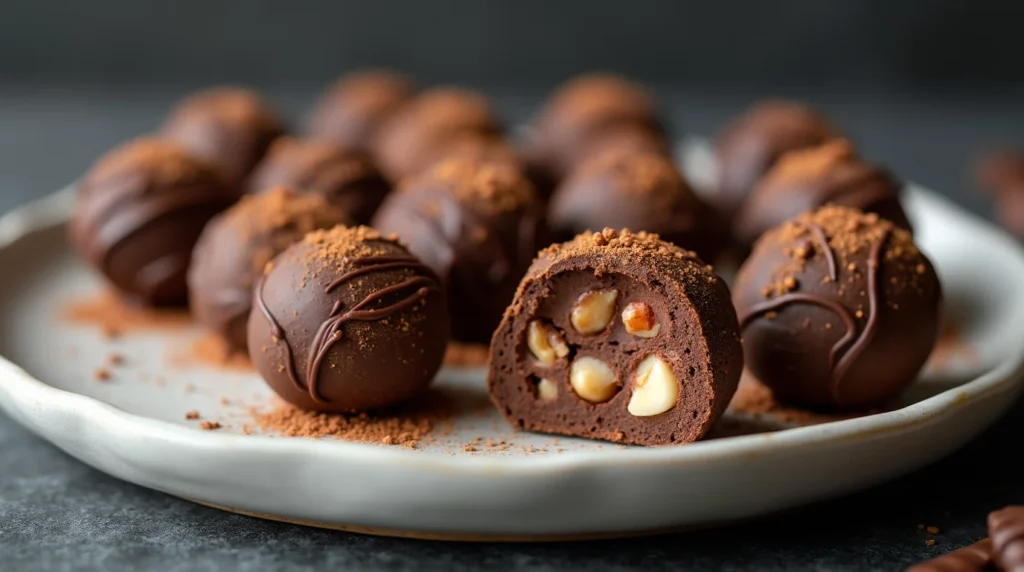
Hazelnut Chocolate Truffles Recipe
Indulge in the irresistible luxury of homemade Hazelnut Chocolate Truffles. These elegant bite-sized delights combine rich dark chocolate and roasted hazelnuts to create a gourmet experience right from your kitchen. Perfect for gifting or savoring yourself!
Recipe Details
- Serving Size: 1 truffle
- Prep Time: 25 minutes
- Cook Time: 10 minutes
- Total Time: 1 hour (including chilling)
Ingredients (Per Serving)
- 20g high-quality dark chocolate (60-70% cocoa)
- 10ml heavy cream (36% fat)
- 5g roasted hazelnuts (finely chopped)
- 2g unsalted butter (room temperature)
- 1/8 tsp pure vanilla extract
- Cocoa powder (for coating)
Nutritional Facts (Per Truffle)
- Calories: 105
- Protein: 1.4g
- Carbohydrates: 7.6g
- Total Fat: 8.4g
- Saturated Fat: 3.7g
- Fiber: 1.2g
- Sodium: 4mg
- Sugar: 5.4g
Instructions
- Roast the Hazelnuts: Preheat your oven to 350°F (175°C). Spread hazelnuts on a baking sheet and roast for 10-12 minutes. Let cool, then rub in a towel to remove skins. Chop finely.
- Make the Ganache: Chop the chocolate into small pieces and place in a bowl. Heat cream in a small saucepan until just simmering, then pour over the chocolate. Let sit for 2-3 minutes.
- Stir to Combine: Gently stir the chocolate and cream until smooth and glossy. Add butter and vanilla extract. Mix in chopped roasted hazelnuts. Let ganache cool to room temperature.
- Chill the Ganache: Cover the bowl and refrigerate for 30-40 minutes or until firm but scoopable.
- Roll the Truffles: Using a melon baller or small spoon, scoop out portions and roll into balls between your palms. Wear gloves or chill your hands to prevent melting.
- Coat the Truffles: Roll each truffle in cocoa powder until evenly coated. Alternatively, use melted chocolate, powdered sugar, or finely chopped nuts for different finishes.
- Chill and Serve: Place truffles on a parchment-lined tray and refrigerate for 10-15 minutes to set. Serve at room temperature for the best flavor and texture.
Storage Tips
- Refrigerate in an airtight container for up to 2 weeks.
- Layer with parchment paper to prevent sticking.
- Freeze for up to 3 months; thaw in fridge overnight before serving.
Optional Flavor Variations
- Sea Salt Caramel: Add a pinch of flaky sea salt before coating.
- Orange Zest: Mix in a little orange zest for a citrus twist.
- Spicy Chocolate: Add a pinch of cayenne pepper to the ganache.
- Espresso Kick: Stir in 1/4 tsp of instant espresso powder.
Pro Tips
- Use high-quality chocolate with cocoa butter listed as a main ingredient.
- Always work in a cool environment to prevent truffle melting.
- Let truffles sit out for 10-15 minutes before serving for optimal texture.