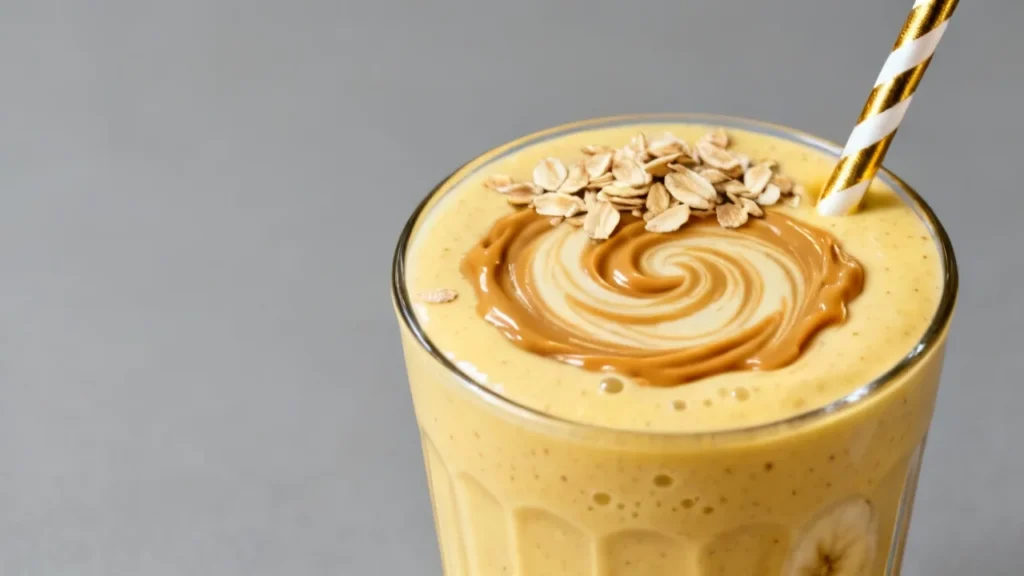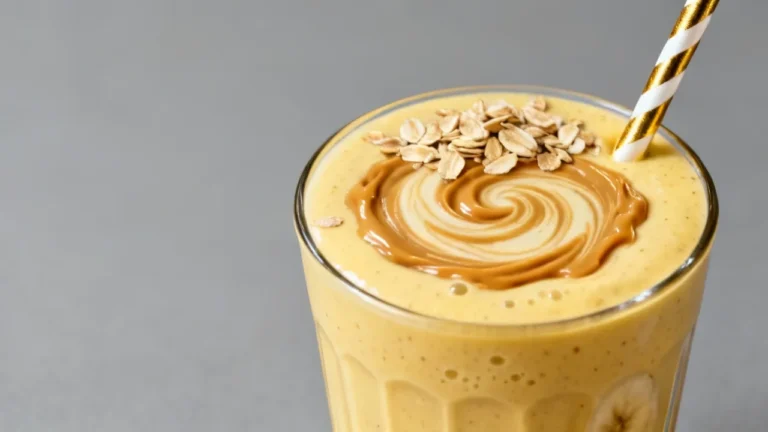
Summer memories come alive with the first bite of this homemade banana ice cream. Growing up in the South, banana pudding was more than a dessert. It was a family tradition that brought everyone together. Our banana pudding ice cream recipe turns those nostalgic flavors into a cool, creamy treat.
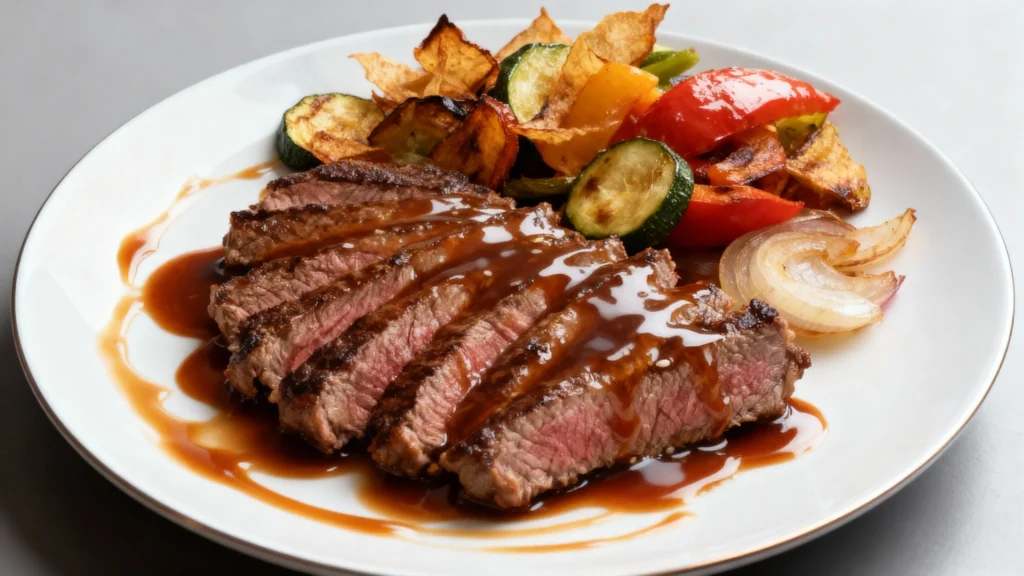
If you’re planning a summer gathering, why not balance your dessert with something savory like our popular smoked chicken breast recipe? The smoky, tender chicken pairs wonderfully with the sweet and creamy notes of the ice cream to create a memorable meal.
This recipe is ridiculously easy to make and impossible to resist. It’s perfect for both seasoned home cooks and kitchen newbies. Get ready for a mix of classic comfort and refreshing indulgence!
Key Takeaways
- Simple and delicious banana pudding ice cream recipe
- No complicated techniques required
- Perfect for summer gatherings and family desserts
- Combines classic banana pudding with creamy ice cream
- Can be made with or without an ice cream maker
Why This Banana Pudding Ice Cream Will Become Your New Favorite Dessert

Get ready to fall in love with our southern dessert recipes. They will make your summer treats unforgettable. Our vanilla wafer ice cream combines banana pudding’s comfort with homemade ice cream’s cool, creamy delight.
What makes this nilla wafer ice cream so special? Let’s break it down:
- A perfect fusion of traditional Southern dessert flavors
- Smooth, creamy texture that melts in your mouth
- Nostalgic taste that brings back childhood memories
- Easy to make with minimal ingredients
The Magic of Southern Dessert Traditions
Southern dessert recipes are all about creating moments of pure joy. This banana pudding ice cream captures the essence of family gatherings and sweet summer afternoons. The delicate crunch of vanilla wafers paired with rich, creamy banana base creates a texture experience that’s simply unmatched.
“A spoonful of this ice cream is like a warm hug from your favorite Southern grandma!” – Home Cook Magazine
A Delightful Culinary Reimagination
We’ve taken the beloved classic banana pudding and transformed it into a cool, refreshing treat. It will have everyone asking for seconds. The secret lies in balancing the creamy banana base with just the right amount of crunchy nilla wafer ice cream elements.
Whether you’re hosting a summer party or looking for a special dessert to share with loved ones, this recipe promises to be a crowd-pleaser. It celebrates the best of Southern culinary traditions!
Essential Ingredients for Perfect Banana Pudding Ice Cream
Making the best summer banana desserts starts with top-notch ingredients. Our easy ice cream recipes need quality parts to turn simple things into amazing treats.
Here are the main ingredients for a delicious banana pudding ice cream:
- Ripe Bananas: Pick bananas with brown spots for extra sweetness
- Heavy Cream: Makes the ice cream rich and creamy
- Whole Milk: Gives it a smooth feel
- Granulated Sugar: Balances the banana taste
- Pure Vanilla Extract: Adds depth and warmth
- Nilla Wafers: Adds a classic crunch and a nostalgic feel
- Pinch of Salt: Boosts the flavor
When picking ingredients for your summer banana desserts, quality is key! Fresh, high-grade parts make your ice cream go from good to amazing.
Pro tip: The ripeness of your bananas can make or break your ice cream’s flavor intensity!
It’s best to buy ingredients from local farmers markets or trusted stores for the freshest taste. Your taste buds will appreciate the extra care in choosing your ingredients!
Kitchen Tools and Equipment You'll Need
To make the perfect easy banana pudding ice cream, you need some basic kitchen tools. Don’t worry if you’re not a pro chef. Discover easy-to-use tips and tricks for whipping up delicious homemade banana pudding ice cream!

Ice Cream Maker Essentials
- Electric Ice Cream Makers: These machines do most of the hard work for you
- Manual hand-crank models for traditional ice cream making
- Compact countertop machines perfect for home cooks
No-Churn Alternative Equipment
No ice cream maker? No problem! You can still make a creamy treat with these basic tools:
- Large mixing bowl
- Hand mixer or whisk
- Loaf pan or freezer-safe container
- Plastic wrap
For another crowd-pleasing option that’s just as simple and fun, take a look at our recipe for vanilla Oreo ice cream. It’s a delicious twist combining cookies and cream flavors without needing fancy equipment.
Storage and Preparation Supplies
To keep your homemade banana pudding ice cream fresh and delicious, you’ll want to have these items on hand:
- Airtight freezer containers
- Rubber spatula for smooth mixing
- Measuring cups and spoons
- Freezer-safe storage bags
With these tools, you’re ready to turn your kitchen into an ice cream paradise! Whether you’re using an ice cream maker or going the no-churn route, we’ll guide you to create a creamy, dreamy dessert that’ll impress everyone.
Selecting and Preparing the Perfect Bananas
Choosing the right bananas is key for a great banana pudding ice cream. The secret to a fantastic banana pudding ice cream cake recipe is using perfectly ripe bananas. These bananas will add the most flavor and sweetness.
When looking for the perfect bananas, keep an eye out for these signs:
- Deep yellow skin with multiple brown spots
- Soft texture when gently pressed
- Sweet aroma indicating peak ripeness
- No green areas or hard green tips
The ripeness of your bananas affects the flavor in your ice cream. Overripe bananas are actually great for this recipe! Their sugars have developed, making them sweeter and caramel-like. This turns your banana pudding ice cream into a standout dessert.
Pro tip: If your bananas aren’t quite ripe enough, place them in a paper bag with an apple or tomato. The ethylene gas will speed up the ripening process!
To get the smoothest texture in your banana pudding ice cream, mash the bananas well. If you like a heartier texture,, leave some small banana pieces. This adds extra texture and looks great.
- Smooth method: Fully mash bananas with a fork
- Chunky method: Roughly chop bananas into small pieces
Your careful banana selection will make your banana pudding ice cream cake recipe go from good to amazing!
Banana Pudding Ice Cream Recipe
Get ready to make a delicious dessert that mixes banana pudding flavors with creamy ice cream. Our old fashioned banana pudding ice cream recipe will guide you through every step. You can use an ice cream maker or make a no churn version, we’ve got you covered!
Making the perfect banana pudding ice cream takes a few steps. These steps turn simple ingredients into a rich dessert. Let’s go through the process to make sure you succeed!
Base Mixture Preparation
To begin your banana pudding ice cream journey, you need to make a smooth base. Here’s what you’ll do:
- Select ripe, golden bananas for the best flavor
- Mash bananas until they’re smooth
- Combine with rich heavy cream and sweetened condensed milk
- Whisk until everything is well mixed
Churning Process
The churning stage is where the magic happens! If you have an ice cream maker, pour your base into it and churn as the instructions say. For the no churn method, whip the mixture until it’s light and fluffy.
Adding Mix-ins
The secret to amazing banana pudding ice cream is the mix-ins. Crush some Nilla wafers and fold them into your churned ice cream. This adds the classic banana pudding crunch everyone loves!
Pro tip: Add mix-ins at the very end to keep their texture and prevent soggy wafers.
No-Churn Version for Making Without an Ice Cream Maker
Want to make a tasty banana pudding ice cream with condensed milk but no ice cream maker? We’ve got you covered! Our no-churn method lets you make a creamy dessert in your kitchen with just a few tools.
The secret to our banana pudding ice cream recipe with Nilla wafers is simple. You’ll turn basic ingredients into a top-notch frozen treat. It’s so good, everyone will want more!
- No special equipment required
- Creamy texture guaranteed
- Quick and easy preparation
If you’re interested in trying other simple, no-churn frozen treats, check out our delightful homemade peach ice cream recipe. It’s a fresh, fruity dessert that’s as easy to make as this banana pudding ice cream, perfect for beating the summer heat.
Here’s what makes our no-churn method magical:
- Whipped cream creates air and volume
- Sweetened condensed milk provides rich sweetness
- Ripe bananas deliver authentic flavor
- Crushed Nilla wafers add classic crunch
Using whipped cream and condensed milk gives you a smooth, velvety texture. The best part? You can add your favorite mix-ins and toppings!
To better understand how dairy impacts nutrition and digestion, you might find this comprehensive guide on Dairy and Milk Nutrition from the USDA’s ChooseMyPlate very helpful for making informed ingredient choices.
Pro tip: Freeze your mixing bowl and whisk for 15 minutes before starting to help achieve peak whipped cream volume!
Get ready to wow your friends and family with this easy no-churn banana pudding ice cream. It’s perfect and requires no special equipment!
Tips for Incorporating Nilla Wafers Perfectly
Creating the ultimate banana pudding ice cream recipe using real bananas means mastering the art of adding Nilla wafers. These classic cookies are the secret weapon that transforms an ordinary dessert into a nostalgic treat everyone will love!
When crafting your banana pudding ice cream recipe without eggs, timing and technique are crucial for achieving that perfect crunch. Let’s dive into some pro tips that will elevate your homemade ice cream.
The Perfect Wafer Moment
Knowing exactly when to add Nilla wafers can make or break your ice cream texture. We recommend these strategic approaches:
- Wait until the last 2-3 minutes of churning to prevent soggy cookies
- Gently fold wafers into partially frozen ice cream
- Crush wafers into different sizes for varied texture
Maintaining That Signature Crunch
Want to keep your Nilla wafers crisp? Try these game-changing techniques:
- Reserve some whole and crushed wafers for topping
- Store extra wafers separately to add just before serving
- Layer wafers between ice cream layers for maximum crunch
By following these tips, you’ll create a banana pudding ice cream that captures the beloved classic dessert’s essence – creamy, crunchy, and absolutely delicious!
Storage Tips and Serving Suggestions
Making the perfect banana pudding ice cream is more than just cooking. It’s also about knowing how to store and serve it. Whether you use a Ninja Creami or a traditional ice cream maker, these tips will keep your vegan banana pudding ice cream delicious.
Storing your homemade ice cream right is key to keeping it creamy and flavorful. Here are some expert tips:
- Use an airtight container with a tight-fitting lid
- Place a piece of plastic wrap directly on the ice cream surface to prevent ice crystals
- Store in the coldest part of your freezer
- Consume within 1-2 weeks for optimal taste and texture
The CDC’s Freezing and Food Safety page offers important safety tips to ensure your ice cream stays fresh and safe for your family.
Serving your banana pudding ice cream can be fun and creative! Try these ideas:
- Create elegant parfaits with crumbled Nilla wafers
- Serve in chilled glasses for a restaurant-style presentation
- Pair with fresh banana slices for extra flavor
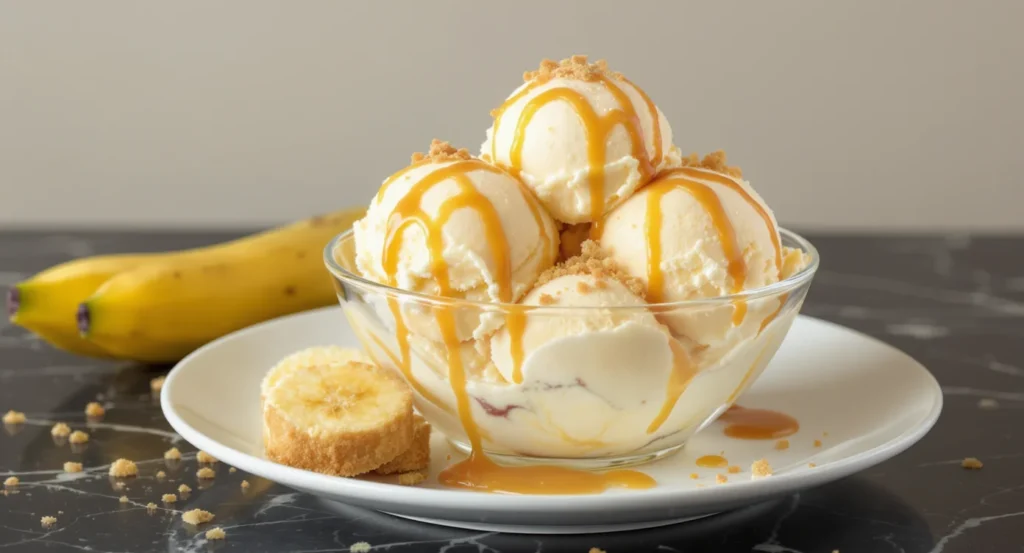
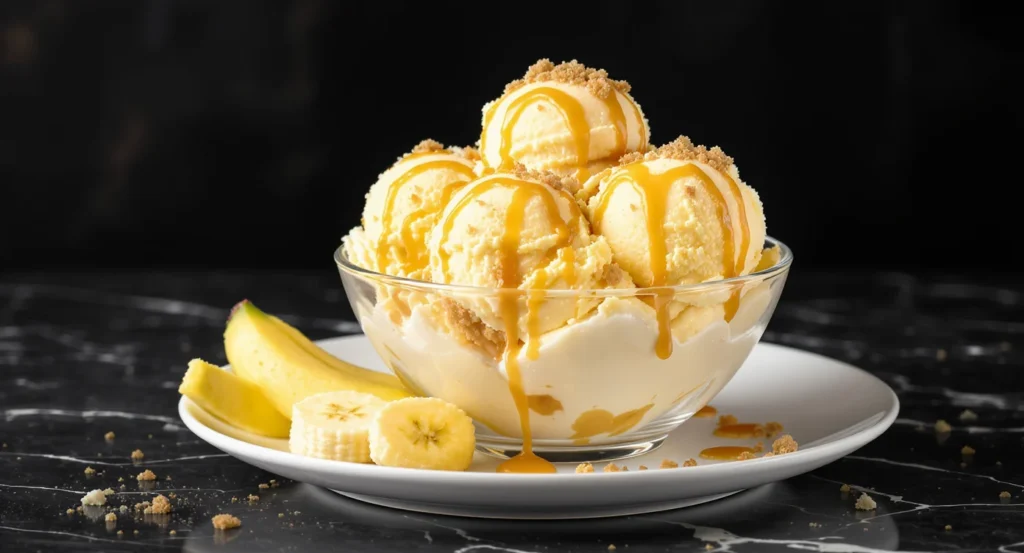
- Drizzle with caramel or chocolate sauce
Pro tip: Let your ice cream sit at room temperature for 3-5 minutes before serving. This makes it scoopable, perfect for both traditional and vegan banana pudding ice cream recipes!
The secret to great ice cream is not just in the making, but in the careful storage and creative serving!
Troubleshooting Common Issues
Making the perfect banana pudding ice cream can be tricky. Even skilled cooks face problems. But don’t worry, we’re here to guide you through common issues!
Understanding Texture Challenges
The texture of your ice cream is key. If it’s not right, here are some common problems:
- Icy Texture: Too much water can cause this
- Grainy Consistency: This might happen if sugar doesn’t dissolve well
- Too Soft: This could mean too much fat or churning issues
Solving Freezing and Storage Concerns
Freezing your ice cream right is important. Here are some tips:
- Keep it in an airtight container to avoid ice crystals
- Store it at a consistent temperature, between -5°F and 0°F
- Put plastic wrap directly on the ice cream
- Enjoy it within two weeks for the best taste
Remember, the more you make, the better you’ll get! Each batch is a chance to improve and make a dessert to remember.
Variations and Creative Twists
Ready to elevate your banana pudding ice cream recipe? We have some tasty twists to make it extraordinary!
Let’s dive into some exciting flavor variations to make your recipe shine:
- Caramel Swirl Sensation: Drizzle rich caramel sauce throughout the ice cream for a decadent upgrade
- Chocolate Lover’s Dream: Fold in chocolate chips or create a chocolate-banana fusion
- Nutty Crunch Edition: Mix in toasted pecans or chopped walnuts for extra texture
- Tropical Twist: Add coconut flakes or a splash of rum for a vacation-inspired treat
Our favorite twist is adding spices. A pinch of cinnamon or nutmeg can make your banana pudding ice cream incredible!
Pro tip: Always add mix-ins during the last few minutes of churning to maintain their texture and prevent sinking.
This recipe is all about being creative. Don’t be shy to make it your own. Each twist tells a unique story that your family will cherish!
Dietary Modifications and Substitutions
We know that dietary restrictions shouldn’t stop anyone from enjoying a delicious banana and cocoa ice cream recipe! Our goal is to make this classic dessert accessible to everyone, regardless of their dietary needs.
Ice cream lovers with special dietary requirements can still indulge in our creamy banana pudding ice cream with some simple modifications. Discover creative ways to modify this recipe for different dietary preferences and restrictions!
Vegan Transformation
Creating a vegan version of our banana and cocoa ice cream recipe is easier than you might think. Here are some key substitutions:
- Replace dairy milk with coconut milk or almond milk
- Use coconut cream instead of heavy cream
- Swap egg-based custard with cashew cream
- Choose dairy-free chocolate for cocoa elements
Gluten-Free Alternatives
Gluten-sensitive ice cream fans can still enjoy our recipe with these simple swaps:
- Use gluten-free vanilla wafers or graham crackers
- Check all ingredient labels carefully
- Consider making homemade gluten-free cookie crumbles
“Dietary restrictions are just opportunities for culinary creativity!” – Our Kitchen Motto
Experiment with these modifications to create a banana and cocoa ice cream recipe that fits your specific dietary needs. Remember, great taste knows no boundaries!
Make-Ahead and Party Serving Tips
Planning a summer banana dessert can be easy with the right tips! Our easy ice cream recipes are great for parties and can be made ahead.
Don’t stress about making banana pudding ice cream for a crowd. We’ve found some tips that will wow your guests.
- Pre-scoop ice cream into individual serving containers
- Freeze scoops on a parchment-lined baking sheet
- Store pre-scooped portions in freezer-safe containers
“The secret to great summer entertaining is preparation!” – Professional Chef
Create a DIY ice cream sundae station so guests can customize their own sweet creations. Offer toppings like crushed Nilla wafers, chocolate chips, and fresh fruit.
- Prepare toppings 1-2 days in advance
- Keep ice cream in the coldest part of your freezer
- Let ice cream soften for 2-3 minutes before serving
Pro tip: Always have extra easy ice cream recipes in your back pocket for unexpected gatherings! Your friends and family will be impressed by your dessert skills.
Conclusion
We’ve shown you how to make an amazing easy banana pudding ice cream recipe. It turns simple ingredients into a tasty dessert. Making this at home is not only possible but also very rewarding!
Whether you used an ice cream maker or the no-churn method, you’ve picked up valuable skills. This recipe is easy and can be made by anyone, whether you’re a pro or just starting out.
Remember, making great desserts is about passion, creativity, and sharing joy. Every scoop of your banana pudding ice cream is a special memory waiting to happen. Keep trying new things, stay curious, and enjoy the sweet results of your cooking!
Your skills in making desserts will keep getting better. Enjoy the journey, have fun, and add your own twist to this classic recipe. Happy cooking!
Banana Pudding Ice Cream Recipe
Short Description
Enjoy a nostalgic taste of Southern summer with this homemade banana pudding ice cream. Creamy, sweet, and studded with crunchy vanilla wafers, this recipe is super easy to make—no ice cream maker needed! Perfect for family gatherings or a refreshing homemade treat.
Recipe Details
- Serving Size: About 1 cup per serving
- Prep Time: 15 minutes
- Cook Time: No cooking required
- Total Time: 4-6 hours (including freezing)
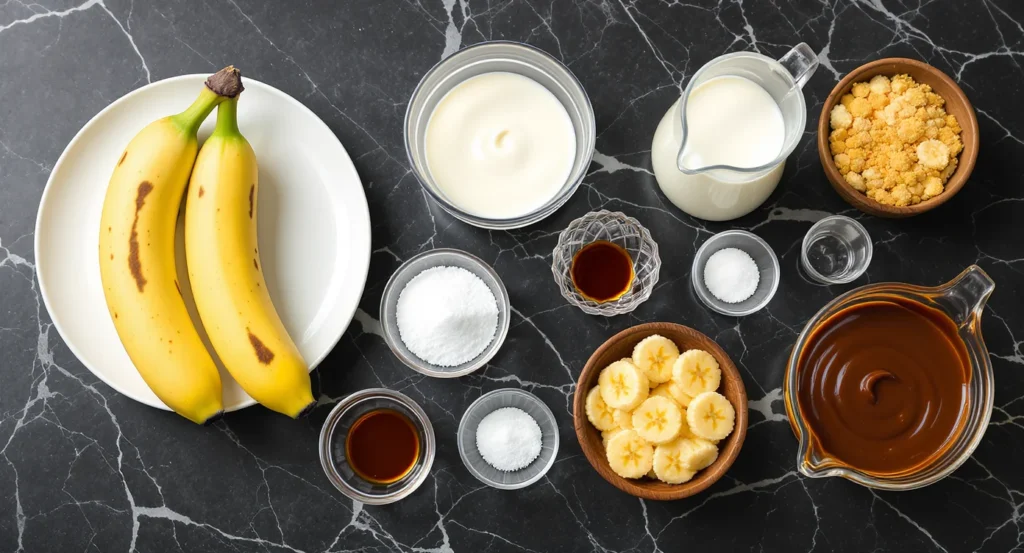
Ingredients per Serving
- 1 ripe banana (preferably with brown spots for extra sweetness)
- ⅓ cup heavy cream (or coconut cream for vegan option)
- ⅓ cup whole milk (or almond/coconut milk for vegan alternative)
- ¼ cup granulated sugar
- ½ teaspoon pure vanilla extract
- Pinch of salt
- ¼ cup crushed Nilla wafers
- Optional toppings: extra whole or crushed Nilla wafers, fresh banana slices, caramel or chocolate drizzle
Nutritional Facts (per serving, approximate)
- Calories: 210 kcal
- Protein: 2 g
- Carbohydrates: 27 g
- Fats: 10 g
- Fiber: 2 g
- Sodium: 80 mg
- Sugar: 20 g (natural and added)
Instructions
Step 1
Choose ripe bananas with deep yellow skin and brown spots for natural sweetness. Mash them fully with a fork for a smooth ice cream base or leave some small chunks if you prefer extra texture.
Step 2
In a mixing bowl, whisk together mashed bananas, heavy cream, whole milk, granulated sugar, vanilla extract, and a pinch of salt until the mixture is smooth and well combined.
Step 3
If using an ice cream maker, pour the mixture into the machine and churn according to the manufacturer’s instructions, usually about 20-30 minutes. If you don’t have an ice cream maker, proceed with the no-churn method: whip the mixture with a hand mixer until light and fluffy.
Step 4
Gently fold crushed Nilla wafers into the ice cream base during the last few minutes of churning or right after whipping in the no-churn method to keep them crunchy.
Step 5
Transfer the ice cream to an airtight, freezer-safe container. Press plastic wrap directly onto the surface to prevent ice crystals. Freeze for at least 4 hours or until firm.
Step 6
Before serving, let the ice cream sit at room temperature for 3-5 minutes to soften slightly for perfect scooping. Top with additional crushed wafers, fresh banana slices, or a drizzle of caramel or chocolate sauce if desired. Enjoy your homemade nostalgic banana pudding ice cream!