
We remember the first time we pulled a warm focaccia from the oven. It had a salty olive oil sheen, a pillowy crumb, and a rosemary scent that filled the kitchen. It felt like a small victory, showing that simple ingredients and patience can create something amazing. That’s the kind of win we want for you!
If you’re craving more easy homemade breads, don’t miss our cozy pumpkin chocolate chip bread—it’s a moist, flavorful treat that bakes up beautifully any time of year.
In this guide, we offer a beginner-friendly, no-fuss sourdough focaccia recipe. It has a fluffy interior and a golden, dimpled crust. We tested the method until it was reliable, so home bakers of all levels can follow along with confidence.
We’ll guide you through starter prep, dough handling, toppings, troubleshooting, and storage. Expect clear, no-knead techniques, an overnight option, and tips for rosemary focaccia, cheesy sourdough focaccia, and other tasty variations. Let’s make baking joyful and approachable — together!
Interested in trying more savory bakes? Our cheesy creamy pesto chicken is the perfect main course to pair with fresh focaccia for a cozy dinner. And if you’re a fan of sweet brunches, you’ll love these pumpkin chocolate chip muffins—they’re quick, delicious, and always a crowd-pleaser.
Key Takeaways
- Beginner-friendly sourdough focaccia with a fluffy crumb and golden crust.
- Reliable, tested steps for starter prep and no-knead dough handling.
- Includes overnight option and simple troubleshooting tips.
- Easy topping ideas: rosemary, garlic, cheese, and seasonal variations.
- Storage and reheating guidance to keep focaccia fresh and soft.
Why Choose This Easy Sourdough Focaccia Recipe
Home baking should be fun and easy. This sourdough focaccia recipe makes it simple. You can make it in a sheet pan or small tins. Add your favorite herbs, cheeses, or olives to make it unique.

Benefits of homemade sourdough focaccia
Homemade sourdough has a richer taste from natural fermentation. It lasts longer than many store-bought loaves. You can use extra-virgin olive oil, flaky sea salt, and fresh rosemary to control the flavor.
It’s also healthier. You avoid preservatives and can use whole-grain flour or less salt. This results in a delicious, tangy crumb that store-bought focaccia can’t match.
What makes this recipe beginner-friendly
This recipe is easy because it skips hard shaping and kneading. You’ll use a simple fermentation and folding method. Visual signs like a bubbly starter and a jiggly dough help you know when to stop.
There’s an optional overnight schedule for busy days. The no-knead steps and sensory checks make it perfect for beginners. They promise reliable results.
Flavor and texture you can expect
Expect a light, airy crumb with crisp edges and a chewy center. The dough’s high hydration and gentle folds create big holes. This is typical of Italian focaccia.
The olive oil adds a fruity flavor. The starter gives a mild sour taste that complements savory toppings. It’s great for dipping, sandwiches, or impressing guests!
Essential Ingredients for Fluffy & Easy Sourdough Focaccia Recipe
We love focaccia that makes your kitchen smell amazing. It has a golden crust and a soft, airy crumb. The right ingredients make this texture happen every time. Below, we explain the starter, flours, hydration, seasoning, and toppings that give you bakery-style focaccia at home.

Starter, flours, and hydration explained
Use a mature, active sourdough starter that is fed and bubbly. Measure starter and other ingredients by weight for steady results.
- Flours: All-purpose is easy and predictable. Bread flour gives stronger gluten and better lift. Try a blend: 70% all-purpose + 30% bread flour for a balance of tenderness and structure.
- Hydration: Aim for 70–80% hydration (water weight divided by total flour weight). Higher hydration yields an open crumb and pillowy feel. For example, with 500 g flour, use 350–400 g water.
- Starter amount: Use an active starter at about 15–25% of the flour weight depending on timing and fermentation speed you want.
Salt, olive oil, and flavor enhancers
Salt brings flavor and strengthens dough. Use fine sea salt or kosher salt at 4–6% of the flour weight. That range gives clear seasoning without slowing fermentation too much.
- Olive oil: Choose good-quality extra-virgin olive oil. Add some to the dough for tenderness and reserve a drizzle for the pan and topping to create a tender, crisp edge.
- Optional enhancers: Fresh garlic, crushed red pepper, a touch of honey for gentle sweetness, or a light sprinkle of grated Parmesan lift flavor. Add delicate ingredients just before baking to keep their aroma bright.
Topping options: herbs, cheese, and more
Classic and creative toppings change the mood of your focaccia. Keep in mind toppings can add moisture and may slightly change bake time.
- Classic: fresh rosemary, minced garlic, and flaky sea salt.
- Savory: olives, halved cherry tomatoes, caramelized onions, torn mozzarella, or grated Pecorino Romano.
- Sweet and seasonal: olive oil with honey, sliced figs, and a light dusting of flaky salt after baking.
- Tip: Press toppings gently into the dough dimples so they stay put and bake evenly.
Practical tips we use every bake: weigh ingredients, use room-temperature water to control fermentation, and coat the pan with oil to prevent sticking and boost crust color. These small steps keep the process friendly and the results reliably fluffy. Let’s get baking!
Tools and Equipment for Homemade Focaccia
We keep our tools simple and useful. A few key items make the process easier, saving time. They help achieve that perfect airy crumb and crisp edge. Choose what suits your kitchen and skill level.
Baking pans, bench scraper, and proofing containers
- A half-sheet pan (13×18 inches) is great for large, thin focaccia. A 9×13-inch pan is better for a thicker loaf.
- A rimmed baking sheet or cast iron skillet gives a great crust and browning for a rustic look.
- A bench scraper is handy for dividing dough and cleaning counters. A rubber spatula is a good substitute.
- A digital scale is best for consistent results. If you don’t have one, cup measures can work, but results may vary.
- A large mixing bowl is perfect for dough. Use a lidded plastic tub or covered bowl for proofing.
- A dough whisk or wooden spoon makes mixing easier. Use your hands to feel the dough when you don’t have these tools.
- A pastry brush or small drizzle bottle helps apply olive oil before baking.
- An oven thermometer ensures your oven is at the right temperature for even baking.
Easy substitutes if you lack specialty tools
- No scale? Use these conversions: 500g flour ≈ 4 cups, 375g water ≈ 1 2/3 cups. Still, a scale is best for accuracy.
- No half-sheet pan? A rimmed baking sheet or shallow casserole dish can work. For cast iron, a 10–12 inch skillet is good.
- No bench scraper? A wide spatula or off-set spatula can help lift and shape the dough.
- No silicone mat or nonstick sheet? Parchment paper or oiling the pan can prevent sticking.
- Small kitchens: stack proofing containers, use nested bowls, and bake in smaller pans to save space.
Here are some practical tips for every bake:
- Keep tools clean and dry for predictable dough behavior.
- Lightly oil the pan before transferring dough to prevent sticking and improve crust color.
- Use your fingers or a fork to dimple the dough when it’s ready; this is often faster than any tool.
Preparing Your Sourdough Starter for Success
We want your starter to be lively and predictable before baking. A healthy starter means your focaccia will rise well, taste great, and have a light crumb. The CDC has tips on safely handling raw dough and flour to help prevent foodborne illness in home kitchens. Here are simple steps we follow to keep our starter healthy and ready for baking day.
How to feed and revive a starter for baking
If your starter is quiet, it’s time to wake it up. Start by discarding most of the starter, leaving about 30–50 grams. Then, feed it with equal parts of flour and water at room temperature.
- Example: keep 40 g starter, add 40 g flour and 40 g water.
- Mix until smooth, cover loosely, and keep warm at 70–78°F (21–26°C).
- Repeat two to three times over 12–24 hours if it was neglected.
Timing your feed to match the Easy Sourdough Focaccia recipe schedule
Plan your feedings so your starter peaks when you mix the dough. A single feed 4–12 hours before mixing works for most starters. Warmer kitchens need less time, while cooler ones need more.
- Same-day bake: feed in the morning, watch for a domed, bubbly peak by afternoon or evening.
- Overnight build: feed and refrigerate for a slow, predictable rise; take out and warm before use.
- Levain option: build a small levain the night before by mixing a portion of starter with flour and water, then let it mature overnight.
Tips for assessing starter strength
Check if your starter is ready by looking and feeling. It should have doubled in size, have a domed peak, and lots of bubbles.
- Float test: drop a teaspoon of starter into water; if it floats, it’s likely airy enough to leaven dough. This test is helpful but not foolproof.
- Smell and texture: a bright, slightly tangy aroma and a spongy, airy texture mean strength.
- Keep a scale like the OXO or Escali for precise feeds and use clear glass jars such as Weck or Ball to watch rises.
For hobby bakers, store the starter in the fridge and refresh it 24–48 hours before baking. With predictable temps, a good scale, and routine feeds, sourdough focaccia becomes easy and fun. Let’s get that starter bubbly and ready to shine!
Step-by-Step How-to Guide for the Dough
We’ll guide you through making sourdough focaccia. It’s all about keeping it light and airy. Follow simple steps for mixing, folding, and placing the dough in the pan. These tips are easy for all levels of home bakers. Let’s get our hands a little floury and have fun!
Mixing and autolyse for simple bread recipe
First, mix flour and water together. Use room-temperature water and stir until there are no dry spots left.
Let the mix rest for 20–40 minutes. This step, called autolyse, helps gluten form naturally. It makes the dough easier to handle and results in a more open crumb in the focaccia.
After autolyse, add your active sourdough starter and salt. Mix gently until they’re well combined. Avoid kneading too hard to keep the dough hydrated and full of gas.
Folding and bulk fermentation tips for fluffy sourdough focaccia
Start the bulk fermentation in a warm room or longer in cooler temperatures. Every 30–45 minutes, do a gentle stretch-and-fold.
- Wet your hands, lift one side of the dough, stretch it up, then fold over.
- Rotate the bowl and repeat 3–4 times per session.
- Do 3–6 rounds over 2–4 hours, depending on temperature.
Check if the dough is ready by looking for signs. It should have grown in size, show bubbles, and feel relaxed and slightly jiggly. Folding strengthens the dough without losing gas, keeping it airy and hydrated.
Shaping and transferring to the pan without deflating
Make sure the pan is well-oiled with olive oil. This helps the dough slide in easily and get crispy at the edges.
Turn the dough onto a well-oiled surface. Use a bench scraper to lift and guide it, not to stretch too much. Wet hands help you gently place the dough in the pan.
- Lift dough with the scraper to avoid pressing out gas.
- Set dough in the center of the pan and let it relax for a minute.
- Use wet fingertips to spread the dough outward to the corners.
Create dimples with your fingertips, add toppings, and let the dough proof in the pan until it’s slightly risen. Practice gentle handling for the best airy crumb and an evenly textured focaccia every time.
Easy Sourdough Focaccia Recipe
We love a simple focaccia recipe for busy days or a relaxed weekend. Below, you’ll find precise ingredients and a clear timeline. The overnight option gives deeper flavor and a flexible schedule.
Full ingredient list for the recipe
Scale the recipe to your flour preference. Percentages are baker’s-percent of total flour weight.
- Flour: 100% total (use AP or bread flour; up to 20% whole wheat for flavor)
- Water: 70–80% hydration (70% for easier handling, 75–80% for more open crumb)
- Active sourdough starter: 15–25% of flour weight (use 100% hydration starter)
- Salt: 2–2.5% of flour weight
- Olive oil: 3–6% in the dough + generous oil for the pan (about 2–4 tbsp for a standard 9×13-inch pan)
- Optional toppings: fresh rosemary, thin garlic slices, olives, grated Parmesan or mozzarella
Detailed instructions with timings
Feed your starter so it peaks when you plan to mix. Aim for a lively, bubbly starter for best rise.
- Autolyse (20–40 minutes): Mix flour and water until no dry bits remain. Rest 20–40 minutes.
- Add starter and salt: Mix until cohesive. The dough will be tacky.
- Bulk ferment (3–5 hours at room temp): Perform stretch-and-folds every 30–45 minutes for the first 2 hours. Let dough rest between folds.
- Alternative overnight cold ferment: After initial mix, place dough in the fridge for 12–18 hours to deepen flavor and slow fermentation.
- Shape to pan: Gently transfer to a well-oiled 9×13-inch pan. Use fingertips to dimple the dough without deflating gas.
- Final proof (30–90 minutes at room temp): Let dough puff. For an overnight schedule, cold-proof in the fridge 8–12 hours and bake straight from cold or warm for 30–60 minutes on the counter before baking.
Tip: When using wet or heavy toppings like tomatoes or cheese, proof toward the shorter end to avoid collapse.
Baking temperature and how to test for doneness
Preheat oven to 450°F (232°C). Bake for 18–25 minutes depending on thickness and topping moisture. Thicker pans or extra cheese may push bake time toward 25 minutes or more.
- Bake until crust is deep golden-brown and edges show caramelization.
- Internal temperature target: ~200–205°F (93–96°C) for a fully baked crumb.
- Check bottom color for good caramelization. Rotate the pan halfway if your oven has hot spots.
After baking, move the focaccia to a cooling rack. Let it rest a few minutes before cutting. Slice once slightly cooled to preserve the airy interior and avoid squeezing out steam. Enjoy warm with olive oil and a sprinkle of flaky salt!
Topping Ideas and Variations for Delicious Italian Bread
We love topping focaccia with bold, simple flavors. These highlight the crumb and olive oil. Choose toppings that work well together and with heat. Use good extra virgin olive oil as a base and finish with flaky sea salt for crunch.
Try these easy combos and swaps. Small changes make a big difference. We include timing tips so toppings don’t burn and notes for dietary swaps like vegan cheese or gluten-free blends.
Sourdough focaccia with rosemary and garlic
Press fresh rosemary sprigs into the dough before the final rise for an aromatic finish. Scatter thin sliced garlic or spoon gentle garlic confit over the surface for mellow garlic flavor.
- Use fresh rosemary for bright, piney notes. Dried rosemary is more intense; use less.
- Drizzle extra virgin olive oil over the dough so herbs crisp without burning.
- Finish with flaky sea salt after baking to preserve texture and flavor.
Cheesy sourdough focaccia and other savory options
Layer grated Parmesan under toppings for a toasty base. Place fresh mozzarella pearls on top near the end of baking so they melt but don’t release too much moisture.
- Try caramelized onion and goat cheese for sweet-savory contrast.
- Spread olive tapenade and crumble feta for intense Mediterranean flavor.
- Roast cherry tomatoes first, then add basil after baking to keep freshness.
- Top with burrata after baking for a creamy center that stays lush.
Creative focaccia ideas: sweet and seasonal toppings
Sweet toppings make great appetizers or brunch bread. Pair honey with rosemary and sea salt for a refined sweet-salty finish. Add pears with gorgonzola or figs with ricotta for elegant bites.
- Spring idea: blanched asparagus, lemon zest, and a light sprinkle of Pecorino.
- Autumn idea: roasted butternut squash, sage, and a drizzle of browned butter or olive oil.
- Shorten bake time or add delicate sugars and fruit after baking to avoid burning.
Quick practical tips:
- Match topping moisture to baking time: wetter toppings may need a par-bake or placement after baking.
- Sprinkle fresh herbs after baking for bright flavor.
- Swap in vegan cheeses or a tested gluten-free flour blend and adjust hydration by a tablespoon at a time.
Troubleshooting Common Issues with Sourdough Focaccia
We love when a bake goes right, but sourdough focaccia can throw a few curveballs. Below we walk through the usual problems and give clear, kitchen-friendly fixes. Keep a simple log of what you change and the room temperature so your next loaf gets better each time!
- Weak starter: A sluggish starter gives less lift. Feed earlier, use a 1:1:1 or 1:2:2 ratio depending on activity, and wait until it’s bubbly and doubles.
- Low hydration: Too dry dough makes tight crumb. Increase water a few percent within the recipe limit to keep the dough soft and open.
- Too much flour while shaping: Dust lightly. Excess flour knocks out air and tightens the crumb.
- Insufficient folding: Folds build structure. Do several gentle folds during bulk fermentation to trap gas and improve volume.
- Overmixing: Tough handling can deflate dough. Mix until just combined and use gentle pulses with the scraper.
Dealing with overproofing and underproofing
- Signs of overproofing: Dough that collapses, spreads thin, or loses surface tension. If this happens, shape gently, let it rest 10–20 minutes, then bake at a slightly lower temp to salvage oven spring.
- Signs of underproofing: Little rise, tight crumb, and quick snap-back when poked. Give extra warm proofing time; aim for a slow spring back on the poke test.
- Poking test: Press your finger lightly. If the indent springs back slowly and partly remains, it’s ready. Rapid snap-back means underproofed.
- Warm spot tip: For slow proofers place the dough near a 80–85°F area, such as an oven with the light on or on top of a warm water bath.
Crust too hard or too soft: adjustments to baking
- Crust too hard: Lower oven temp by 10–20°F and reduce bake time slightly. Brush more olive oil over the dough just before baking for a softer, flavored crust.
- Crust too soft: Extend bake by a few minutes or raise the final oven temp for 3–5 minutes to crisp the surface. A brief broil works fast; watch it closely.
- Pan choice matters: Cast iron gives a crispier bottom and deeper color. A sheet pan yields a lighter, thinner crust. Match pan to the crust you want.
Practical troubleshooting habits
- Note starter feed times, hydration percentage, room temp, and proof times in a notebook.
- Make one change at a time so you know what helped.
- Accept small variations; sourdough is alive and learns with you. We tweak, taste, and celebrate each improvement!
Storage, Reheating, and Serving Suggestions
We love keeping sourdough focaccia fresh for family meals and parties. Here are some tips for storing, warming, and serving your bread. This way, it stays fluffy and looks great.
How to store sourdough focaccia bread to retain freshness
For short-term storage, wrap cooled focaccia in a clean tea towel or a bread box. This keeps the crust crisp and the crumb soft for 1–2 days.
For longer storage, cool it completely, then wrap it tightly in plastic and foil. Freeze whole or in slices for up to three months.
To thaw, leave it at room temperature or warm it gently in a low oven for 10–15 minutes.
Best reheating methods to restore fluffiness
Preheat the oven to 350°F (175°C). For soft results, cover the focaccia with foil and heat 8–12 minutes. For a crisper crust, heat uncovered 5–7 minutes. To explore more bread reheating and storage methods, Nutrition.gov has great tips for homemade bread.
Reheat single slices in a skillet over low heat with a lid. Add a small splash of water off to the side, cover briefly, and steam the crumb back to life.
When reheating cheese-topped focaccia, lower the heat and check frequently so the cheese melts without burning.
Serving pairings and presentation tips for entertaining
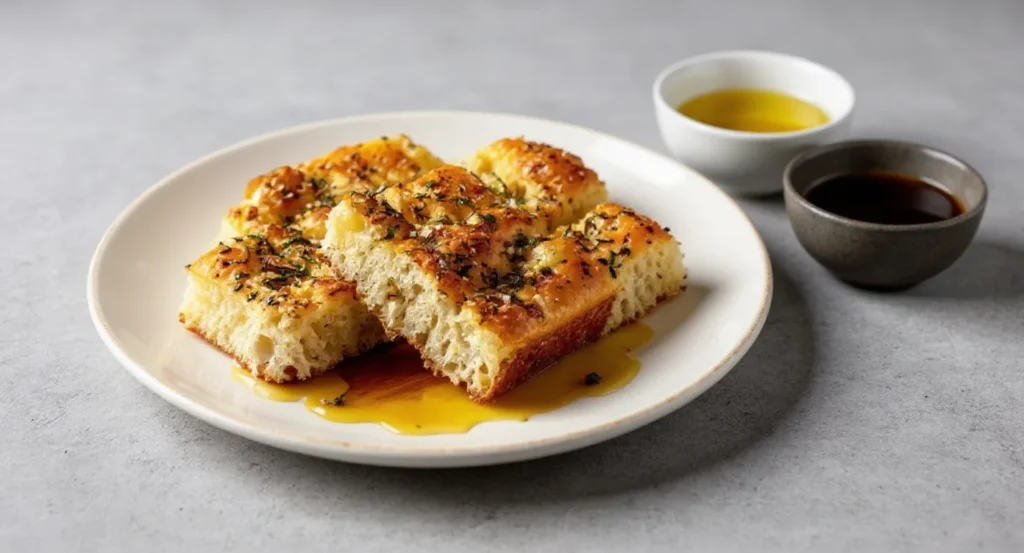
- Serve squares or strips with small bowls of extra-virgin olive oil and aged balsamic for dipping. Learn about the health benefits of olive oil and why it’s a delicious, heart-healthy staple in the Mediterranean diet.
- Pair with tomato bisque, Caprese salad, or a charcuterie board featuring prosciutto and Parmigiano-Reggiano.
- Use focaccia as sandwich bread for roasted porchetta or grilled vegetables.
For clean slices, use a serrated knife and a gentle sawing motion. Drizzle with olive oil, scatter fresh rosemary or flaky sea salt, and place on a wooden board for a rustic look.
We find these small touches make focaccia feel special and easy to share. Enjoy serving and experimenting with pairings!
Conclusion
This easy sourdough focaccia recipe makes fluffy, flavorful Italian bread. It has clear steps that are easy to follow. You can make it with optional overnight prep and many toppings, like rosemary and garlic, or cheesy ones.
With basic tools and a lively starter, you’ll get great crumb and crisp edges. Try the recipe, play with toppings, and keep a baking log. Note down hydration, fermentation times, and oven quirks to improve your dough.
Share your baking results with our community. Your photos and notes help others learn and inspire new recipes! Sourdough focaccia is forgiving and creative. Celebrate your small wins, learn from each bake, and remember our mission.
Make cooking accessible and joyful for everyone with simple, tested recipes. Keep practicing—each bake is a delicious experiment!

Easy Sourdough Focaccia Recipe
Short Description
Bake fluffy, flavorful sourdough focaccia at home with this beginner-friendly recipe. Featuring a simple, no-knead method, juicy olive oil crust, and endless topping ideas, you’ll enjoy bakery-style bread without the fuss!
Recipe Details
- Serving Size: 8 servings (one 9×13-inch pan)
- Prep Time: 30 minutes (active), plus 4–18 hours rise
- Cook Time: 20–25 minutes
- Total Time: 5–20 hours (includes fermentation and resting)
Ingredients per Serving
- 63 g (1/2 cup) all-purpose or bread flour
- 47 g (just over 3 tbsp) water
- 9 g (about 2 tsp) active sourdough starter (100% hydration)
- 1.5 g (scant 1/4 tsp) fine sea salt
- 4 g (just under 1 tsp) extra-virgin olive oil (plus more for pan and topping)
- Optional: Fresh rosemary, garlic, flaky sea salt, or your favorite toppings (herbs, cheese, etc.)
Nutritional Facts
- Calories: ~180
- Protein: ~4g
- Carbohydrates: ~32g
- Fat: ~4g
- Fiber: ~1g
- Sodium: ~220mg
- Sugar: <1g (naturally occurring)
Instructions
Step 1
Feed your sourdough starter 4–12 hours before mixing, making sure it’s bubbly and active for the best rise.
Step 2
Mix the measured flour and water in a large bowl until no dry spots remain. Cover and rest (autolyse) for 20–40 minutes.
Step 3
Add your active sourdough starter and sea salt to the dough. Mix gently until combined—the dough will be shaggy and sticky.
Step 4
Perform gentle stretch-and-folds every 30–45 minutes for about 2 hours. Let the dough rest covered between folds. Bulk ferment at room temperature (3–5 hours total) or in the fridge overnight to deepen flavor.
Step 5
Generously oil a 9×13-inch pan. Carefully transfer dough, handling gently to keep the air in. Use wet fingertips to stretch the dough toward the edges. Create dimples across the surface and drizzle more olive oil over the top.
Step 6
Add your favorite toppings—fresh rosemary, sliced garlic, flaky salt, cheese, or seasonal vegetables. Let dough proof until puffy (30–90 minutes at room temp or overnight in the fridge).
Step 7
Bake focaccia in a preheated oven at 450°F (232°C) for 20–25 minutes, until the crust is golden and edges are crisp. For an extra-crispy base, bake a few minutes longer or broil briefly.
Step 8
Cool slightly, then slice and enjoy warm with olive oil, soups, or as sandwich bread. Store leftovers wrapped at room temperature 1–2 days or freeze for longer freshness.