We still remember the first time we grilled a tomahawk ribeye. The taste of that deep, beefy richness against a charred crust was amazing. It felt like a small victory in the backyard.
This memory drives our guide. We’ll show you how to make Juicy Grilled Tomahawk Steak Recipe. We’ll use tested techniques like reverse sear and direct sear.
We’ll keep it simple and realistic. You’ll need a reliable thermometer, good tongs, and a kettle or gas grill. We promise a complete recipe with timing and temps for grilling with confidence.
Key Takeaways
- We will teach both reverse sear and direct sear methods for maximum juiciness.
- You’ll learn how to pick the best tomahawk by marbling, thickness, and grade.
- We use realistic tools: probe thermometer, tongs, and cast iron when needed.
- Clear temps and timing charts help you hit the exact doneness you want.
- Simple salt-and-pepper or bold marinades both work—choose what fits your taste.
- Finishing with butter and resting properly locks in juices and improves flavor.
Why Choose a Tomahawk Steak for the Juiciest Results
The tomahawk steak is loved for its taste and impressive look. It’s a bone-in ribeye with a long bone, weighing 18–32 oz or more. The thick muscle offers rich marbling and a tender bite.
Choosing a tomahawk steak means bold beef flavor and a stunning presentation. It’s perfect for impressing your guests! 🎉

What makes a tomahawk ribeye different from other steaks
The tomahawk steak keeps the full ribeye eye intact. This means more marbling and beefy fat than other cuts. The extra fat melts into the meat, enhancing flavor and texture.
The thick cut cooks evenly, and the bone adds to the presentation. It makes the dining experience unforgettable.
Benefits of cooking bone-in cuts for flavor and moisture
Cooking bone-in steaks has two main advantages. The bone acts as a heat sink, ensuring even cooking. The fat and marbling render into the meat, boosting moisture and juiciness.
Large tomahawks hold temperature better, allowing for a longer cooking time. This prevents drying out. Carving thicker slices after resting keeps juices in, ensuring a satisfying mouthfeel.
Occasions and serving ideas for a show-stopping steak
Tomahawk steaks are perfect for any occasion. They’re great for birthdays, Father’s Day, BBQs, and date nights. They make a stunning centerpiece.
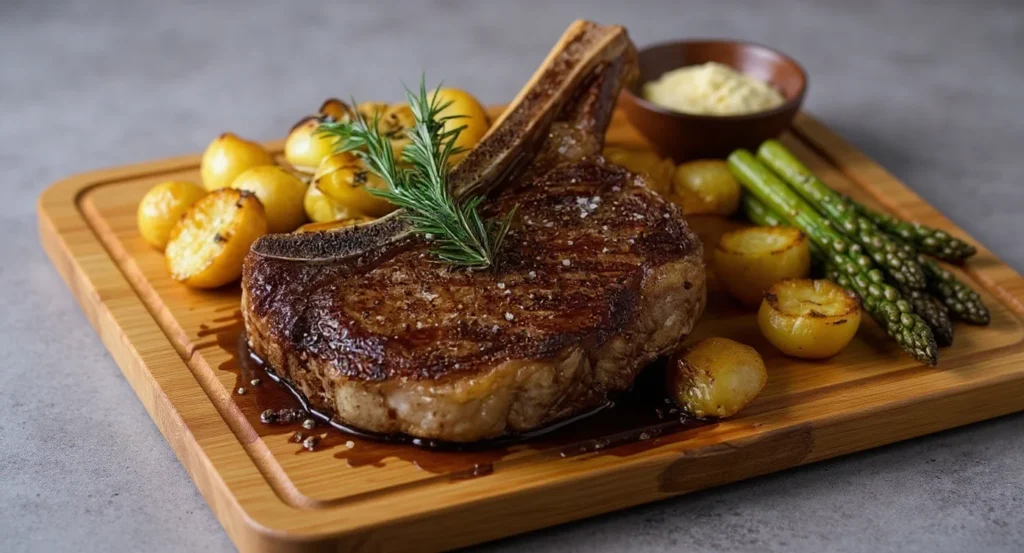
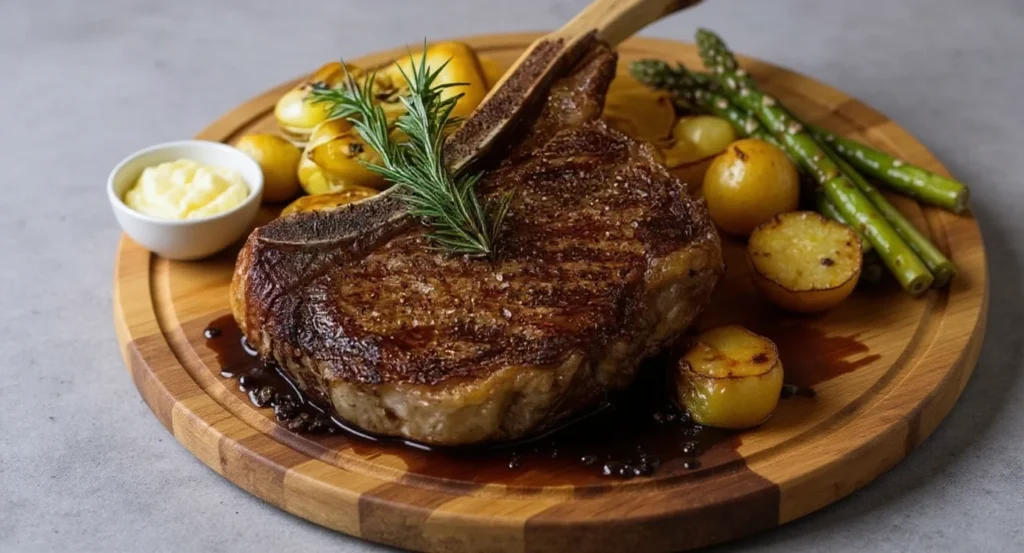
- Carve on a wooden board and leave the bone for drama.
- Pair with simple sides: roasted potatoes, charred asparagus, or a fresh green salad. For a Southern-inspired twist, serve your tomahawk steak alongside our crispy fried green tomatoes—they’re crunchy, tangy, and a crowd favorite for BBQ spreads.
- Finish with a pat of garlic butter or a sprig of rosemary to brighten the plate.
Choose a tomahawk steak for flavor, texture, and a wow factor. Invite friends, fire up the grill, and impress them all!
If you love vibrant sauces, try drizzling some homemade chimichurri—our easy chimichurri steak recipe adds a burst of fresh herbs and tang that pairs perfectly with any grilled steak.
Selecting the Best Tomahawk Steak at the Butcher or Grocery
Choosing the right tomahawk steak is key to a juicy, impressive dish. We look for cuts that grill evenly and stay tender. Here’s a quick guide for shopping at Whole Foods, local butchers, or ButcherBox to find the perfect cut.

How to read marbling and grade for tenderness
- First, check the USDA grade. USDA Prime is top for marbling and juiciness. USDA Choice is a good, more affordable choice. Want to know exactly what USDA Prime, Choice, and Select grades mean for steak marbling and tenderness? Find a clear breakdown right from the USDA.
- Look at the meat’s appearance. Fine, white fat streaks mean tenderness and flavor. Avoid big, uneven fat clumps.
- Check the color and texture. A bright red muscle with fine marbling looks fresh. Steer clear of dull or wet packages.
Choosing thickness and weight for optimal grilling
- Tomahawks should be thick, at least 1.5–2 inches. This allows for a reverse sear and precise doneness.
- Choose the right size for your guests. A 28–36 ounce tomahawk feeds two to three. Go bigger for bigger groups or special events.
- Thicker cuts handle high heat better, avoiding overcooking. They also get a better crust while staying juicy inside.
Questions to ask your butcher for the best cut
- Ask for USDA Prime or high-end Choice when available.
- Find out when the steak was cut. Fresher cuts grill better.
- Decide between dry-aged or wet-aged. Dry-aged has a nuttier flavor, while wet-aged stays juicy.
- Confirm if the bone is frenched for the long handled look.
- Get tips on packing. Keep the steak cold and use an ice chest for long trips.
- Buy from trusted places like Whole Foods, local butchers, or ButcherBox for quality.
Essential Tools for Grilling a Tomahawk Steak
We love a big tomahawk for its drama and flavor. Before you fire up the grill, gather a compact kit. It should cover heat control, accurate temps, and safe handling. A few well-chosen items cut stress and boost results!

Grill types: gas, charcoal, and hybrid pros and cons
Gas grills shine for convenience. They heat fast and hold steady temps, making two-zone setups easy. This is great for sear-first or reverse sear methods.
Charcoal brings classic smoke and higher sear potential. Use a chimney starter and lump charcoal for cleaner ignition. This creates stronger heat for crust building.
Hybrid and pellet grills, like Traeger and Big Green Egg, let you move from low-and-slow to blast heat. They work great when you want precise smoke then a hot finish.
Thermometers, tongs, cast iron, and other must-haves
Start with a top-tier instant-read thermometer. The ThermoWorks Thermapen is an industry favorite for quick, accurate reads. Add a probe thermometer to track carryover while the steak rests.
- Long stainless tongs for flipping without piercing the meat
- Heatproof gloves to manage hot grates and cast iron safely
- A heavy cast-iron skillet or griddle for a controlled sear if the grill is uneven
- Chimney starter, lump charcoal, and wood chunks like hickory or oak for extra smoke
- Aluminum foil, a sturdy cutting board, and a sharp carving knife for finishing
Preparing a two-zone fire for reverse sear and direct grilling
Two-zone cooking gives you both sear and patience. Set up a hot side for crust and a cool side to finish the interior slowly.
- For gas: light burners on one side high, leave the opposite side off or low. Preheat both zones.
- For charcoal: pile coals on one side of the grate and leave the other side clear for indirect heat.
- Use the hot zone for quick sears and the cool zone for gentle, even cooking or reverse sear staging.
Keep a spray bottle or drip pan handy to tame flare-ups. Monitor temps closely and move the steak between zones as needed. This ensures a juicy, evenly cooked result!
Preparing the Steak: Thawing, Trimming, and Tempering
We want every tomahawk to hit the grill with confidence. Start with safe thawing, trim only what helps the cook, then temper and dry the meat so the crust forms beautifully.
Safe thawing methods
- Refrigerator thawing is best. Plan 24–48 hours for a thick tomahawk to defrost evenly.
- If you need it faster, seal the steak and submerge in cold water. Change the water every 30 minutes. Expect 1–3 hours, depending on thickness.
- Avoid microwave thawing. It creates hot spots and ruins texture.
Trimming guidance
- Leave most of the fat cap; it adds flavor and moisture during grilling.
- Trim only excess, ragged fat and any thick silver skin. A light tidy preserves the steak’s integrity.
- If the frenched bone looks jagged, ask your butcher to clean it for a neater presentation.
Tempering and surface prep
- Bring the steak to room temperature for 30–60 minutes before grilling. Very thick cuts may need up to 90 minutes.
- Pat the steak dry with paper towels. A dry surface promotes a deep brown crust and Maillard reaction.
- If there’s a fat cap, make shallow crosshatch scores. Keep cuts shallow to avoid slicing into the meat while helping fat render evenly.
With careful thawing, restrained trimming, and patient tempering, we set the stage for even cooking and maximum juiciness. Let’s get seasoning next and build that perfect sear!
Tomahawk Steak Seasoning: Simple and Flavorful Options
We want your tomahawk to be full of flavor and juicy. Start with simple recipes, find what you like, and then adjust. Below are some proven methods for seasoning thicker bone-in ribeyes.
Classic salt-and-pepper
- Use coarse kosher salt like Diamond Crystal or Morton for even coverage.
- Freshly cracked black pepper gives a bright, peppery bite.
- Apply liberally; salt pulls moisture then reabsorbs, carrying seasoning into the meat.
Herb and spice rub ideas
- Everyday rub: garlic powder, smoked paprika, onion powder, coarse black pepper, chopped rosemary, and thyme. Rub into the fat and surface.
- Bold BBQ profile: brown sugar, chipotle powder, smoked paprika, and garlic for sweet-smoky crusts that caramelize nicely.
- Steakhouse finish: a pinch of finely ground coffee or espresso with kosher salt adds depth to the crust without bitterness.
Timing for rubs and dry brines
- Quick seasoning: 30–60 minutes before grilling is fine for immediate flavor and surface crust.
- Short dry-brine: salt and rest for 1–2 hours to improve moisture retention and crust development.
- Long dry-brine: salt and refrigerate uncovered up to 24 hours for deeper seasoning and a drier surface that sears beautifully. We love a long dry-brine for flavor and crust!
Experiment with small batches. Try the salt-and-pepper baseline, then add one new element at a time. We guide you through every step so your tomahawk becomes the star of the grill.
Tomahawk Steak Marinade Ideas for Maximum Flavor
We love using marinades for tomahawk steaks because they add depth without covering up the beefy taste. Begin with a mix of oil, acid, aromatics, herbs, and salt. This keeps the meat tender and juicy.
Easy grilled marinades with oil, acid, and aromatics
Start with a simple mix: olive oil for fat, lemon juice or red wine vinegar for brightness, garlic or shallot for a kick, and fresh rosemary or thyme for smell. Salt ties it all together.
- Quick example: olive oil + Worcestershire sauce + minced garlic + chopped rosemary + lemon zest.
- Use kosher salt or sea salt for even seasoning.
- Lightly crush herbs to release oils before adding them.
Bold marinades for smoky, BBQ-style profiles
For a smoky crust, use soy sauce or tamari for umami, brown sugar for sweetness, and chipotle or smoked paprika for smokiness. A splash of bourbon adds warmth and depth.
- Try adding molasses or a drop of liquid smoke for deep BBQ notes.
- Toasted cumin or ground coriander gives a roasted edge.
- Balance sweet and salty so the surface caramelizes without burning.
Marinating time guidelines and safety tips
Thin marinades work fast. For a large tomahawk, aim for 30 minutes to 2 hours. We usually keep marinades under 4 hours for big steaks—more is not always better!
- Refrigerate while marinating and never reuse raw marinade unless you boil it first.
- Avoid overly acidic blends for long times; they can break down texture.
- Pat the steak dry before grilling to ensure a proper sear.
How to Cook Tomahawk Steak on the Grill: Techniques Compared
We love a big tomahawk for its show and its flavor. Choosing the right grill technique shapes juiciness, crust, and doneness. Below we break down the top methods so we can pick the best approach for the steak and the crowd. Let’s keep it simple and useful!
Sear-first vs reverse sear
- Sear-first: Start over high heat for a quick crust, then move the steak to a cooler zone to finish cooking. Great when we want a fast char and smoky flavor.
- Reverse sear: Cook low and slow on the indirect side until the steak is nearly at target, then blast it over high heat for a final crust. This method gives even doneness edge-to-edge and holds juices better for thick cuts.
- Pick sear-first for thinner steaks under high heat. Pick reverse sear for thick tomahawks when consistent pink through the center matters most.
Indirect grilling and finishing tips
- Set the grill so one side is low (225–275°F) and the other side is hot for searing.
- For gas grills, light burners on one side and leave the other side off. For charcoal, bank coals to one side or make a two-zone bed.
- Cook the steak on the cool side until it is 10–15°F below your final target, then move it to the hot side for a quick sear.
- Use a probe thermometer to track internal temp. This keeps us from overcooking and helps manage carryover.
Adding smoke with a smoke box or wood chips
- Use a stainless steel smoke box or a foil pouch filled with soaked wood chips. Place it over the heat during the low-temp phase.
- Choose mild woods like apple or cherry for a touch of sweetness, oak for steady smoke, or hickory for a bolder profile.
- Smoke for 15–30 minutes while indirect cooking. A little smoke goes a long way!
Quick checklist before cooking
- Set up two zones: indirect low heat and direct high heat.
- Decide on sear-first or reverse sear based on thickness.
- Add a smoke box or wood chips early if we want smoky notes.
- Use a reliable probe thermometer for steady results.
We find reverse sear is the best bet for thick tomahawks when juiciness and even doneness matter most. For a faster, char-forward steak, sear-first works great. Either way, a short smoke session lifts flavor without stealing the beef’s voice.
Reverse Sear Tomahawk Steak Method
We love the slow-build drama of the reverse sear—so forgiving and delicious! This method lets us control temperature, protect juices, and finish with a restaurant-quality crust. Follow these clear steps and you’ll get consistent results every time.
Step-by-step reverse sear guide for consistent temperature
Preheat the grill for indirect heat to 225–275°F. Place the seasoned tomahawk on the cool side. Insert a probe into the thickest part and close the lid. Cook slowly until the steak is 10–15°F below your final target.
- Use a Weber or Traeger for steady indirect heat.
- Keep the lid closed to maintain even cooking.
- Check the probe every 10–15 minutes to track progress.
When the steak hits the pull temperature, move it to the hot zone. Sear 1–2 minutes per side over high heat or in a preheated cast-iron pan until a deep crust forms.
Internal temperature targets for perfect doneness
Know your final temps before you start. Aim to pull the steak slightly below the desired finish to allow carryover cooking.
- Rare: Pull at ~115–120°F; final 120–125°F.
- Medium-rare: Pull at ~120–125°F; final 130–135°F.
- Medium: Pull at ~130–135°F; final 140–145°F.
We avoid pushing tomahawks to medium-well or well-done. Those ranges dry the meat and mask the ribeye’s flavor. If guests request higher doneness, warn that juiciness will decline.
Timing, resting, and finishing sear tips
Carryover cooking adds roughly 5–10°F after you remove the steak. Rest for 10–15 minutes, tented loosely with foil to let juices redistribute. This step saves moisture and improves slicing.
- Finish with a pat of compound butter—garlic-herb melts into the crust and adds richness.
- Sear only long enough to form a crust; over-searing can overcook the center.
- Use tongs to turn the steak, not a fork, so juices stay locked in.
We find the reverse sear ideal for big cuts like tomahawk ribeyes. It gives predictable doneness and a glossy, flavorful finish that wows every time!
Direct Grilling and Searing for a Crispy Crust
We love the thrill of intense heat and a sizzling crust! Direct grilling gives that caramelized exterior fast. We keep the approach simple, repeatable, and safe so home cooks get a steak that looks and tastes like a steakhouse winner.
Build a true high-heat zone. For gas grills, turn the sear-side burners to high. For charcoal, bank the coals densely on one side. Let grates preheat so the meat meets heat, not a cold bar. Oil tongs or use a light brush of oil on the steak to cut sticking. Keep a spray bottle of water handy to tame flare-ups.
How to build high-heat zones and manage flare-ups
- Gas grills: open vents and fire the sear burners to high for 10–15 minutes.
- Charcoal: pile coals thick at one end for direct searing and fewer coals for indirect finish.
- Flare-up control: trim any long, flapping fat. Move steak to cooler zone when flames spike.
- Safety tip: keep a spray bottle nearby and wear heat-resistant gloves when shifting meat.
Timing and flipping strategy for a perfect char
Sear fast. Aim for 1–3 minutes per side depending on how hot the grill is and how dark you want the crust. Use 45° turns midway through a side to get cross-hatch grill marks that scream professional.
- Flip sparingly. One to two flips total helps the crust form. Avoid constant flipping.
- Watch edges and bone for hot spots. Rotate the steak as needed to keep color even.
Avoiding overcooking while achieving a crusty exterior
High heat equals a sexy crust, but we watch temps closely to keep juiciness! Use an instant-read thermometer to check the center during and after searing.
- Sear to develop color, then move the steak to indirect heat to finish to target temp.
- Let fat render slowly. If flare-ups get out of hand, shift the steak away until flames die down.
- Rest the steak 8–12 minutes after cooking so juices redistribute before slicing.
Juicy Grilled Tomahawk Steak Recipe
We love the drama of a tomahawk on the grill and the reward of a juicy, tender ribeye. Below you’ll find a clear ingredients list, two friendly cooking paths, and a timing chart so we can nail doneness every time. Grab your thermometer and let’s cook!
Ingredients list for the best tomahawk steak recipe
- 1 tomahawk ribeye steak (28–36 oz, 1.5–2.5” thick)
- Kosher salt (Diamond Crystal or Morton)
- Freshly ground black pepper
- 2 tbsp olive oil
- 3 tbsp unsalted butter
- 2 garlic cloves, smashed
- Fresh rosemary and thyme sprigs
- Optional: 1 tsp smoked paprika or brown sugar for a light rub
Complete step-by-step cooking instructions
- Thaw steak in the fridge if frozen. Pat dry with paper towels. Trim only excess fat.
- Dry-brine with kosher salt anywhere from 1 hour to 12 hours for deeper seasoning.
- Bring steak to room temperature 45–60 minutes before grilling.
- Lightly coat the steak with olive oil and finish with freshly ground black pepper just before cooking.
Option A — Reverse sear (recommended for even doneness)
- Set up two-zone fire on the grill. Preheat indirect zone to 225–275°F.
- Place steak on indirect heat. Use a probe thermometer and pull when it reads 10–15°F below your target.
- Move steak to hot zone. Sear 1–2 minutes per side over high heat to build crust.
- Finish by resting 10–15 minutes with garlic-herb butter on top. Carve against the grain. For another way to boost flavor, discover our creamy garlic butter steak recipe—this version showers every juicy bite with a rich, velvety sauce that steak lovers rave about.
Option B — Sear-first (faster crust, still juicy)
- Preheat the hot zone to maximum heat. Sear steak 2–3 minutes per side to create a strong crust.
- Move steak to indirect zone and finish to the desired internal temperature using a probe thermometer.
- Rest with butter and herbs for 10–15 minutes before slicing.
Timing chart based on thickness and grill type
- 1.5” thick: Reverse sear indirect time ~20–30 minutes to pull temp. Sear 1–2 minutes per side.
- 2.0”–2.5” thick: Indirect time ~30–45 minutes. Sear 1–3 minutes per side for crust.
- Charcoal grills: Allow extra indirect time. Hot spots vary more than on gas grills.
- Gas grills: Times are more consistent, use probe temperature rather than the clock.
Use a reliable thermometer and target internal temps for your preferred doneness. Resting preserves juices and helps carryover cooking finish the steak to perfection. Let’s fire up the grill and enjoy a restaurant-worthy tomahawk at home!
Tomahawk Steak Temperature and Doneness Guide
We aim for the perfect doneness with every tomahawk steak. This guide helps you find the right temperature, place your probe correctly, and plan for carryover. This way, your steak stays juicy and full of flavor. Medium-rare is the best for a great balance of texture and taste!
Recommended internal temps from rare to well-done
- Rare: 120–125°F
- Medium-rare: 130–135°F — our top pick for juiciness
- Medium: 140–145°F
- Medium-well: 150–155°F
- Well-done: 160°F+
How to place the probe and monitor temperature
Put the probe in the thickest part of the meat, in the center. Don’t touch the bone because it reads hotter. For long tomahawks, push the probe straight into the meat, avoiding the bone.
Use a leave-in probe for a reverse sear. It helps you not open the lid too much and lose heat. Wireless probes from brands like ThermoWorks are great for monitoring the grill.
Carryover cooking and pulling temps
Carryover cooking increases the internal temperature by 5–10°F after removing the steak. Pull the steak 5–10°F below your target doneness to account for this.
Tent the steak loosely with foil while it rests. This keeps the temperature stable and lets juices spread evenly. Every slice will then be moist and full of flavor.
Finishing Touches: Butter, Herbs, and Resting Techniques
After grilling, the tomahawk steak rests, and the kitchen fills with amazing smells. A few simple steps can make the steak unforgettable. These steps are easy and fun for everyone to follow! 🍽️
Garlic butter blends add a lot of flavor. Mix softened unsalted butter with minced garlic, parsley, thyme, lemon zest, and a bit of kosher salt. Shape into a log, chill, then slice to melt over the steak.
Try different butters to match your mood and guests:
- Blue cheese butter for a bold, creamy taste.
- Smoked paprika butter for a smoky flavor.
- Chimichurri-swirl butter for a bright, herbal taste.
Resting the steak is as important as the sear. For 1.5–3″ steaks, rest for 10–15 minutes. Bigger cuts need 15–20 minutes. Use foil to keep the heat in and prevent steam from softening the crust.
Resting the steak lets the meat relax and reabsorb juices. This simple step keeps the meat juicy and flavorful.
Carving the steak is a showstopper. Slice against the grain into 1/2″–3/4″ pieces for tenderness. You can carve the bone first or present the whole tomahawk for a dramatic effect.
- Spoon softened butter over slices as you plate.
- Serve on a warmed board or platter to keep heat.
- Pass family-style to encourage sharing and fun!
These finishing touches—compound butters, proper resting, and confident carving—make a great tomahawk steak unforgettable. We can’t wait to see how you present yours!
Side Dishes, Sauces, and BBQ Steak Ideas to Serve
We love making a plate that makes a tomahawk steak feel like a big celebration. Choose sides that mix rich and bright flavors. Keep things simple so the beef can shine.
Classic sides that complement a tomahawk ribeye steak
- Roasted potatoes or smashed potatoes with rosemary and coarse salt for crisp edges and creamy centers.
- Grilled asparagus or charred broccolini tossed with lemon and olive oil to cut the steak’s richness.
- Creamed spinach or a classic Caesar salad for a silky, savory contrast.
- Simple herbed rice pilaf when you want a neutral, comforting base.
Sauce pairings: chimichurri, steak sauce, and pan jus
Chimichurri adds bright acidity and fresh herbs. Mix parsley, oregano, garlic, red wine vinegar, and olive oil for a zesty topper. Compound butters melt over hot meat for instant gloss and richness.
Use a pan jus made from drippings, red wine, and beef stock reduced until glossy for deep, savory flavor. Classic steak sauce works when you need a familiar, tangy option that guests love.
Wine and beverage pairings for a memorable meal
- Full-bodied reds: Cabernet Sauvignon or Malbec for bold tannins that stand up to the fat.
- Syrah or Zinfandel when you use smoky rubs; fruit-forward wines match char and spice.
- For beer, pick robust ales or a stout to mirror the steak’s depth.
- Non-alcoholic: sparkling water with citrus or iced tea keeps the palate fresh between bites.
We recommend matching sauces and drinks to the steak’s seasoning. A simple salt-and-pepper tomahawk pairs best with a bold Cabernet. For those curious about how protein fits into a balanced diet and the benefits of choosing quality cuts, the Harvard T.H. Chan School of Public Health offers excellent insights on protein and health. Smoky BBQ rubs beg for a fruit-forward Syrah or a rich porter. Small choices make a big difference—have fun experimenting!
Conclusion
We’ve covered all you need to know for a perfect grilled tomahawk steak. This includes choosing the right cut, using the right tools, and how to season and marinate. We also looked at different cooking methods and how to keep the steak juicy.
Remember, practice is key! Pay attention to thickness, temperature, and rest time. Use a probe thermometer to check the internal temperature. Being patient during the sear and rest is crucial for a great steak.
Now it’s your turn to try the recipe and make it your own. Share your creations with friends and family. Keep this guide handy for your next cookout. Let’s get grilling and make something amazing together!
Juicy Grilled Tomahawk Steak Recipe
Short Description
Experience the ultimate indulgence with this juicy grilled tomahawk steak recipe. Thick, flavorful, and beautifully marbled, the tomahawk steak is perfect for impressing guests or a special dinner. Learn simple grilling techniques including reverse sear and direct sear to achieve that perfect crust and tender, juicy interior every time.
Recipe Details
- Serving Size: 1 steak (approx. 28-36 oz)
- Prep Time: 30-60 minutes (including tempering and seasoning)
- Cook Time: 45-60 minutes (depends on thickness and method)
- Total Time: 1 hour 15 minutes – 2 hours
Ingredients per Serving
- 1 large tomahawk ribeye steak (28-36 oz, 1.5-2.5 inches thick)
- 2 tbsp olive oil
- Coarse kosher salt (e.g., Diamond Crystal)
- Freshly cracked black pepper
- 3 tbsp unsalted butter
- 2 garlic cloves, smashed
- Fresh rosemary and thyme sprigs
- Optional: 1 tsp smoked paprika or brown sugar for a flavorful rub
Nutritional Facts
- Calories: Approx. 1300-1400 kcal
- Protein: 110-120 g
- Carbohydrates: 0-2 g
- Fats: 90-100 g
- Fiber: 0 g
- Sodium: Depends on salt quantity (approx. 1000 mg)
- Sugar: 0 g
Instructions
Step 1: Prepare the Steak
Start by thawing your tomahawk steak in the refrigerator for 24-48 hours if frozen. Take it out 30-60 minutes before cooking to bring to room temperature. Pat the steak dry with paper towels, then season generously with kosher salt and cracked black pepper. Optionally, apply smoked paprika or brown sugar for an extra flavor boost.
Step 2: Set Up Your Grill
Prepare your grill for two-zone cooking: one side with high direct heat and the other side for indirect low heat (225-275°F). If using charcoal, bank coals to one side; for gas, light only one side of burners.
Step 3: Cook the Steak (Reverse Sear Method Recommended)
Place the steak on the cooler indirect side of the grill. Insert a probe thermometer into the thickest part of the steak and close the lid. Cook slowly until the internal temperature reads 10-15°F below your desired doneness (115-125°F for rare to medium-rare).
Step 4: Sear for Crust
Move the steak to the hot direct heat zone. Sear each side for 1-2 minutes until a rich brown crust forms. Use tongs to flip and avoid piercing the meat.
Step 5: Rest and Serve
Transfer the steak to a cutting board and lightly tent with foil. Let it rest for 10-15 minutes to allow juices to redistribute. Finish by topping with a pat of garlic-herb butter and slice against the grain into ½-¾ inch pieces. Enjoy!