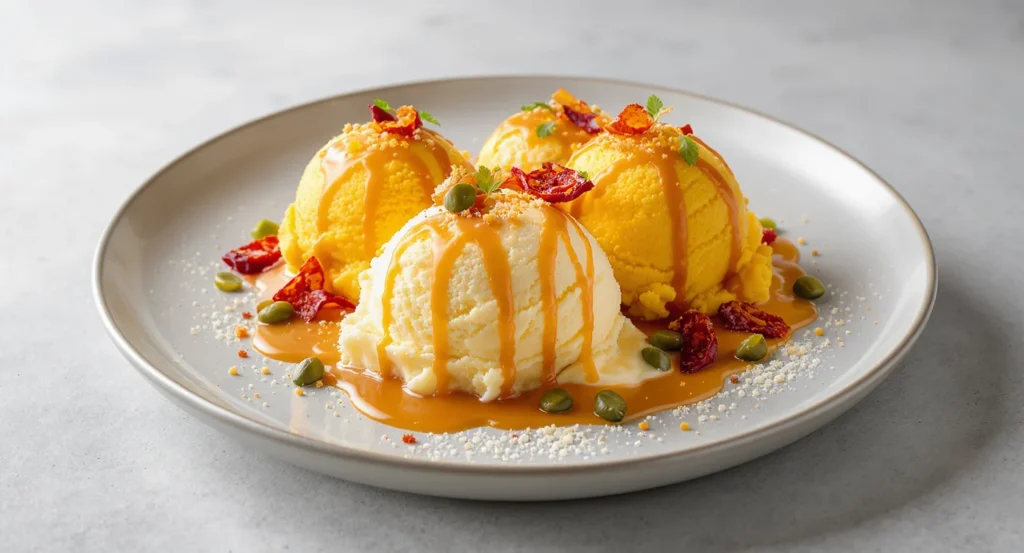
We still remember the first time we tasted true Mexican helado under a bright market stall. The scoop melted on our tongue with warm cinnamon, caramel notes, and a creamy finish. It felt like a tiny celebration.
In this Homemade Mexican Ice Cream Recipe guide, we invite you to make authentic mexican ice cream at home. We’ll demystify traditional flavors and guide you through simple techniques. Whether you’re new to churning or have handled tempering before, we’re here to help.
We believe cooking should be accessible, fun, and creative. This homemade dessert recipe is for home cooks of all skill levels. We’ll show vegan and lactose-free swaps, flavor variations, and troubleshooting tips for creamy results every time.
o keep things exciting in your kitchen, you might also enjoy our easy and flavorful Honey Sriracha Chicken Bites Recipe that bring a perfect balance of sweet and spicy to your dinner table.
Here’s what to expect next: ingredients and variations, equipment choices (ice cream maker vs. no-churn), step-by-step preparation and churning, creative flavor ideas, serving and pairing suggestions, storage and troubleshooting, and inspiration from top Mexican ice cream shops like La Michoacana. Let’s scoop into something delicious!
Key Takeaways
- This guide teaches an easy Homemade Mexican Ice Cream Recipe for home cooks.
- We cover authentic mexican ice cream flavors and simple techniques for creamy texture.
- Options include vegan and lactose-free variations for wider accessibility.
- We explain equipment choices: ice cream maker versus no-churn methods.
- Expect step-by-step instructions, flavor ideas, and troubleshooting tips.
Why You’ll Love This Homemade Mexican Ice Cream Recipe
This recipe is like a memory in your kitchen. It brings authentic Mexican ice cream flavors with simple steps. You’ll enjoy bold spices, bright fruits, and rich dairy traditions. If you love exploring bold flavors, our Chipotle Honey Chicken Recipe might be a great savory complement to your sweet ice cream adventures.

Authentic Mexican ice cream flavors that stand out
- Cajeta: caramelized goat’s milk adds a deep, toffee-like sweetness. It pairs well with nuts or sea salt.
- Horchata: it’s cinnamon-forward and fragrant, tasting like spiced rice milk in frozen form.
- Tamarind: it’s tart and sweet, offering a bright tang that wakes your taste buds.
- Mango chile: ripe mango meets a chili kick for a lively sweet-spicy contrast.
Creamy homemade ice cream texture made simple
- Goal: smooth, scoopable, silky mouthfeel that melts evenly.
- Science in plain words: fat from cream, sugar, and stabilizers fight ice crystals.
- Choices that help: egg-yolk custards give richness; cornstarch or a small amount of gelatin steadies texture for quicker bases.
Easy homemade ice cream method for home cooks
- Custard base: richer and classic—heat, temper, and chill before churning.
- No-churn method: condensed milk plus whipped cream makes luscious, effortless results.
- Dairy-free option: full-fat coconut milk yields creamy texture with a coconut note that plays well with fruit or spice flavors.
- Prep tips: read the recipe, measure ahead, and chill your base before churning for best results.
We promise clear step-by-step instructions later in the guide. You’ll get timing cues and troubleshooting tips. This recipe turns pantry staples into creamy homemade ice cream. It shows how easy homemade ice cream can be with a few smart steps!
Ingredients for Authentic Mexican Ice Cream and Variations
We love creating a rich base that brings out classic tastes. We also enjoy adding fun twists. Below, you’ll find the core ingredients, easy swaps for dietary needs, and bold mix-ins. These tips help you adapt any mexican ice cream recipe to your taste and what your guests will enjoy.
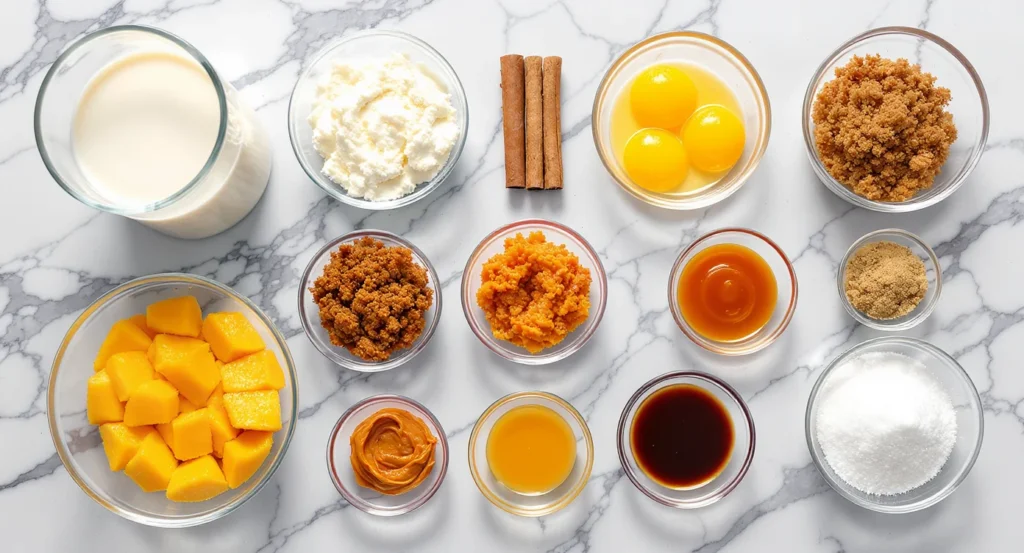
Traditional ingredients for classic flavors (vanilla, cajeta, and more)
- Whole milk and heavy cream for a creamy texture.
- Egg yolks for a custard base; cook to 170–175°F for safety and thickness.
- Sugar or a mix with agave or honey to reduce iciness and add richness.
- Mexican vanilla or pure vanilla extract and cinnamon sticks for warmth.
- Piloncillo or dark brown sugar for a deep caramel flavor in cajeta-style recipes.
- Specialty additions: cajeta (goat’s milk caramel), dulce de leche, toasted coconut, tamarind paste, horchata infusions, and fresh mango or guava.
- Quantity tip: for 1 quart, use about 2 cups whole milk, 1 cup heavy cream, 4–5 egg yolks, and 3/4–1 cup sweetener depending on sweetness level.
Options for lactose-free and vegan Mexican ice cream
- Use full-fat canned coconut milk or oat cream for a lactose-free base.
- Swap egg yolks for cornstarch or tapioca starch to thicken a vegan base.
- Try aquafaba or stabilized whipped coconut cream in no-churn vegan mexican ice cream recipes.
- Sweetener ideas: maple syrup, coconut sugar, or brown rice syrup to keep flavors balanced.
- For a condensed-milk style base, simmer reduced coconut milk with sugar until thick, or buy a commercial dairy-free condensed milk.
- Storage note: label containers clearly with “vegan” or “lactose-free” and a date. Most dairy-free bases keep well for 2–3 weeks in airtight containers.
Suggested mix-ins and unique Mexican ice cream toppings
- Mix-ins: chopped candied chile (chile de árbol in sugar), toasted pepitas, tamarind candy pieces, and chopped fresh mango.
- Swirls: ribbons of cajeta or dulce de leche folded in during the last minutes of churning create pockets of caramel joy.
- Toppings: ground cinnamon, chili-lime salt, churro crumbs, crushed polvorones, marcona almonds, and toasted coconut flakes.
- Allergen tip: keep nuts and gluten toppings in separate bowls to avoid cross-contact when serving guests.
- Practical storage: homemade cajeta or dulce de leche lasts up to 2 weeks refrigerated. Freeze any large-batch mix-ins in portions to keep textures fresh.
Essential Equipment and Tools for Homemade Frozen Treats
We love making homemade frozen treats and want you to feel confident picking gear that fits your kitchen and budget. A few smart tools deliver big texture gains.
- Compressor machines and bowl-style makers give the best aeration and silky texture. Pre-freeze bowls overnight or choose a self-contained compressor for convenience.
- No-churn recipes use whipped cream plus sweetened condensed milk or coconut alternatives. They are beginner-friendly and produce denser, rich results.
- Hand-churn, food processor, or periodic-stirring methods work if you freeze in batches and break up forming ice crystals between cycles.
Best utensils and storage containers
- Heavy saucepan and sturdy whisk for custards and infusions.
- Immersion blender for smooth fruit purées and a fine sieve to strain any seeds or spices.
- Candy thermometer when you temper eggs or hit a custard finish point.
- Scoops: warmed metal scoops for clean scoops and silicone spatulas to fold in nuts, cajeta, or fruit.
- Storage: shallow, airtight containers like metal loaf pans work well. Press plastic wrap directly on the surface before sealing to limit air exposure.
- Label freezer-safe containers with dates so you track freshness of mexican frozen desserts and any homemade mix-ins.
Tips for creamy texture and fewer ice crystals
- Chill your base fully before churning so it freezes faster and forms smaller crystals.
Proper chilling helps maintain a smooth texture, and for more on food safety and temperatures, visit the CDC’s guidelines on food refrigeration.
- Use sugar or invert sugars such as corn syrup or honey to lower the freezing point and keep a soft scoop.
- Add a small stabilizer dose: cornstarch slurry, a bloom of gelatin, or commercial stabilizer will improve scoopability without changing flavor.
- Pack ice cream into shallow containers and press plastic wrap on the surface. Store in the coldest part of the freezer to protect mexican ice cream bars and other treats.
We don’t need expensive gear to make standout mexican frozen desserts inspired by trips to the best mexican ice cream shops. Start simple, learn a couple of techniques, and scale up as you go—your homemade frozen treats will shine! 🍨
Step-by-Step Homemade Mexican Ice Cream Recipe
We’ll guide you through making a homemade Mexican ice cream recipe. It’s rich, bright, and has the perfect texture. Follow each step, choose custard or no-churn, and add your favorite flavors. Let’s start!
Preparing a custard base
- Warm 2 cups whole milk and 1 cup heavy cream with 1–2 cinnamon sticks and 1 teaspoon vanilla in a saucepan over medium heat until steaming, not boiling.
- Whisk 5 egg yolks with 3/4 cup sugar until pale. Temper yolks by adding a ladle of the hot milk mixture while whisking.
- Return tempered yolks to the pan and cook, stirring constantly, to 170–175°F until the custard coats a spoon and thickens slightly.
- Strain to remove spices, cool in an ice bath, then chill several hours or overnight before churning.
No-churn alternative
- Whip 2 cups heavy cream to soft peaks.
- Fold in 1 can sweetened condensed milk (or dairy-free condensed alternative) and your flavorings gently to keep air in the mixture.
- Chill briefly before moving to final freezing for best structure.
Infusing authentic mexican ice cream flavors
- For cinnamon and piloncillo: simmer broken piloncillo or brown sugar with milk and a cinnamon stick, then strain and cool.
- For cajeta ribbons: warm store-bought cajeta or dulce de leche to pourable consistency. Swirl into the churned base for ribbons just before transfer.
- For fruit purées: cook or macerate mango or tamarind, reduce to concentrate flavor, strain for a smooth finish, and fold in near the end of churning.
- Toast whole spices like star anise briefly to bloom aroma, then steep in milk while it heats.
Churning, freezing, finishing
- Chill the base fully; cold mix churns faster and traps air better.
- Churn according to your ice cream maker’s instructions until a soft-serve consistency forms.
- Add mix-ins in the last minutes of churning to avoid soggy textures and broken chunks.
- Transfer to pre-chilled shallow containers, press plastic wrap to the surface, and freeze at least 4 hours or overnight for firm scoops.
- For serving, let rest 5–10 minutes at room temperature or warm a scoop tool under hot water for clean scoops.
Troubleshooting quick tips
- Overcooked custard can feel grainy. Blend gently and chill well before re-churning to smooth texture.
- Under-churned mix becomes icy. Remix in the freezer bowl or use a high-speed blender, then refreeze in a shallow pan.
- If texture is too hard, let the pint sit at room temperature a few minutes before scooping for best mouthfeel.
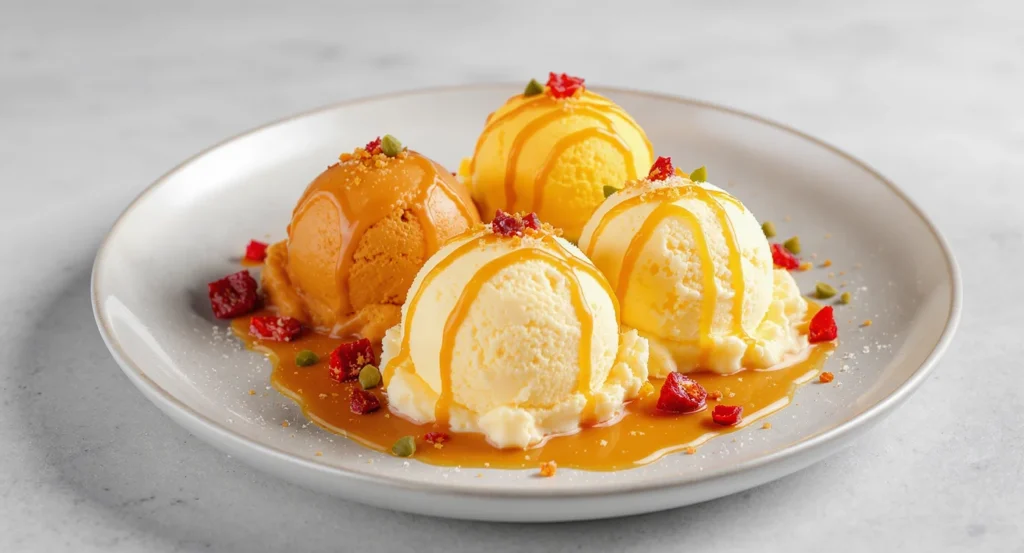
Creative Homemade Ice Cream Flavors Inspired by Mexico
We love making frozen treats that show off bold Mexican tastes. Try these easy spins on classic recipes and fun new ideas. Making small batches is great for testing flavors with friends.
Traditional favorites
- Horchata ice cream: steep long-grain rice with cinnamon and vanilla. Strain, sweeten with condensed milk or cane sugar, then churn for a fragrant, creamy base that tastes like the drink.
- Tamarind sorbet or ice cream: soften tamarind paste in warm water, add sugar and a splash of lime. Freeze as a sorbet for bright tartness or stir into a milk base for a silky twist.
- Coconut: use canned coconut milk and fold in toasted shredded coconut. Chill well before churning to keep texture smooth and add tropical depth.
Modern twists to excite home cooks
- Spicy chocolate: melt dark chocolate with cream, then add ground chipotle or chile de árbol for warmth. Taste as you go to balance heat and chocolate. This spicy chocolate ice cream pairs well with sea salt.
- Mango chile: puree ripe mango with a little lime zest. Stir in chile powder or Tajín for a citrusy, spicy pop. Use as a creamy paleta or churned ice cream.
- Tres leches: blend evaporated and condensed milk into a custard base. Fold in rum-soaked cake crumbs for texture. For dairy-free, swap coconut equivalents and keep the same richness.
Paletas and popsicle alternatives
- Fruit-based paletas: mix mango, guava, or lime with a simple syrup and a pinch of salt. Pour into wooden molds for classic mexian paletas flavors that are bright and refreshing.
- Creamy paletas: combine fruit purée with condensed milk or coconut milk. Freeze in silicone molds for smooth, handheld treats that echo traditional mexican popsicles.
- Mold tips: use wooden sticks or flexible silicone molds. Add whole fruit pieces, a chile-sugar rim, or a swirl of cajeta before freezing to elevate presentation.
We encourage you to experiment with these homemade ice cream flavors. Mix classic and modern elements, taste as you go, and share your creations with friends and family!
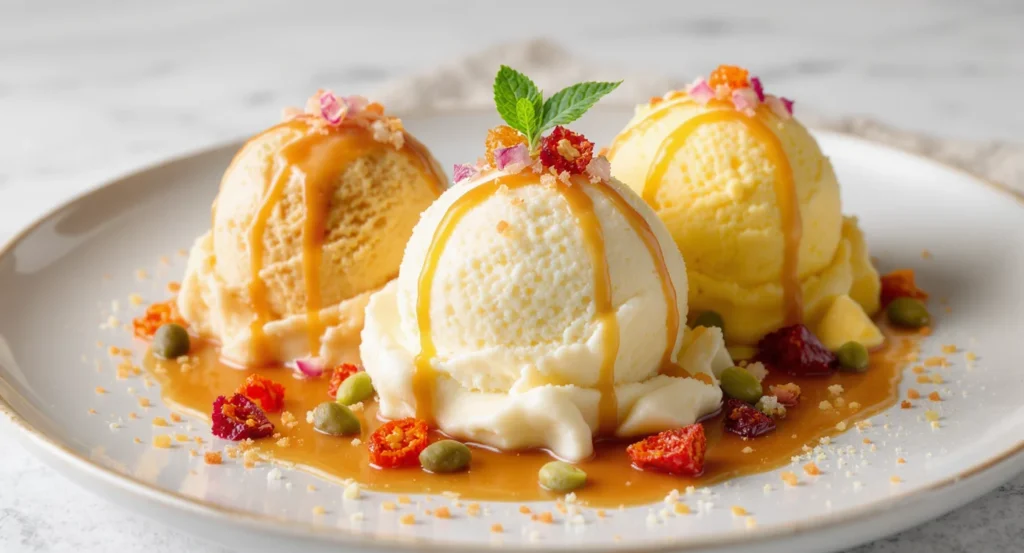
Serving Suggestions and Pairings for Mexican Dessert Recipes
We love to serve homemade mexican ice cream in festive ways. Small servings are perfect for tasting menus. Larger scoops go well with warm pastries for a nice contrast.
Keep notes on portion sizes and any allergies when serving a big group.
Every bite can be special with the right presentation. Try using chilled bowls with churro crumbs or crushed polvorones for crunch. For a casual look, serve in crisp waffle or sugar cones.
For a fancy touch, layer ice cream in tall glasses with cajeta ribbons and toasted pepitas. This pairs beautifully with warm, comforting treats like our Easy Healthy Banana Bread Recipe, which brings wholesome flavor and texture alongside your homemade ice cream.
Make mexican ice cream bars by dipping scoops in melted chocolate and freezing. These are perfect for kids’ parties and summer picnics. They work well with both classic and modern flavors.
Pairing ice cream with baked goods brings out native flavors. Try it with churros, conchas, or a slice of tres leches cake. A warm buñuelo with cool ice cream is a great hot-and-cold contrast.
Beverage pairings are bold and simple. Strong coffee or Mexican hot chocolate with cinnamon and chile is rich, and for health-conscious coffee lovers, the Mayo Clinic’s overview on coffee and health is very insightful.
Unique toppings add depth and surprise. Try chile-lime salt, tajín, and toasted pepitas for crunch and heat. Sweet finishes include cajeta drizzle, dulce de leche, and caramelized banana slices. Brighten rich flavors with lime zest or fresh mint.
For stunning plating, mix textures and heights. Use fruit compote or cajeta under the scoop. Add sea salt to enhance flavors. Small garnishes can make simple ice cream into a memorable dessert.
- Serving suggestions: single scoops for tasting, bars for fun, parfaits for elegance.
- Pair with Mexican pastries like churros and conchas, or beverages like horchata.
- Try unique mexican ice cream toppings: tajín, pepitas, and candied citrus.
Storage, Shelf Life, and Troubleshooting Homemade Ice Cream
We love sharing tips to keep your ice cream fresh. Follow simple habits for great results with Mexican-style ice cream. These small steps help avoid problems and save time.
Best practices for freezing and thawing
- Use shallow, airtight containers to reduce air space. Press a sheet of plastic wrap directly on the surface before sealing the lid.
- Label containers with the date. For peak flavor and texture, treat the storage shelf life homemade ice cream as two to four weeks.
- Place tubs in the coldest part of the freezer, not the door. That minimizes temperature swings and preserves creaminess.
- When thawing, move the tub to the refrigerator for 10–20 minutes for easier scooping. Quick, even thawing keeps texture stable.
How to fix icy texture or overly hard ice cream
- Icy texture often comes from low fat, low sugar, under-churning, or slow freezing. To learn how to fix icy texture, try one of these fixes.
- Reblend icy ice cream in a food processor with a splash of heavy cream. Spread into a shallow pan and refreeze quickly for a smoother finish.
- Add a tablespoon of corn syrup or a small amount of alcohol, like rum, to the base when remaking a batch. That lowers the freezing point and reduces ice crystals.
- If the ice cream is too hard, let it sit at room temperature for 5–10 minutes before scooping. For persistent hardness, set your freezer a touch warmer or use shallower containers.
Refrigeration tips for pre-made mix-ins and bases
- Store custard bases refrigerated up to 48 hours. Label jars with the date so you don’t lose track.
- Keep prepared mix-ins—candied chilies, toasted nuts, fruit compotes—in sealed containers in the fridge for up to a week. Freeze them for longer storage.
- For cajeta or dulce de leche, refrigerate after opening and follow jar guidelines. Homemade caramel sauces keep well chilled for several weeks.
We promise most hiccups are easy to fix. Try these best practices freezing homemade mexican ice cream and refrigeration tips, and your next scoop will be worth celebrating!
Where to Find Inspiration: Best Mexican Ice Cream Shops and Regional Flavors
We love visiting local paleterías and heladerías for new ideas. We taste to learn what makes top shops special. They have bright displays, bold fruit, and creamy textures.
Spotlight on La Michoacana culture and paleta shops
La Michoacana brought colorful paletas and helados to the U.S. Their shops offer fruity and creamy options. We study their balance of fruit, dairy, and sweetness to bring that community feel home.
Regional specialties to seek out and replicate
- Michoacán-style: avocado, zapote, and cajeta make silky, rich profiles for custard-like bases.
- Oaxaca: look for chocolate with heirloom cacao and toasted spices for deep flavor.
- Yucatán: tropical fruits and coconut add bright acids and warm allspice.
- Northern Mexico: milk-based caramels and dulce de leche teach about slow-cooked sweetness.
How tasting at top shops can inspire your homemade recipes
When tasting, we quickly note texture, spice balance, and temperature. This helps us match fruit to dairy in our kitchen. We also note mix-ins and sugar levels.
Practical ways to expand your repertoire:
- Visit local paleterías and compare mexican paletas flavors side by side.
- Read regional Mexican cookbooks for authentic mexican ice cream flavors and techniques.
- Follow chefs and food writers who document regional specialties mexican ice cream so you can adapt ideas for your freezer.
Use these visits as a tasting lab. We turn notes into tests, tweak ratios, and arrive at authentic, scoopable results. These reflect the best mexican ice cream shops and treasured regional traditions.
Conclusion
We aimed to guide you through making a homemade Mexican ice cream recipe. It’s easy, fun, and creative. You can do it at home.
We showed you how to get a creamy texture and bold flavors. You can choose between a custard base or a no-churn method. Follow our tips on chilling, churning, and storing to make delicious treats.
Remember a few key points. Choose the right base for your skill level. Add authentic flavors like cajeta, horchata, and tamarind. Try different mix-ins and toppings for a true Mexican ice cream taste.
Follow our storage tips to keep your ice cream smooth and scoopable. Now, it’s time to get creative!
Try the recipe, adjust the spices or fruit, and share your creations. Small changes and practice lead to amazing results. Have fun, be creative, and enjoy every scoop of your homemade ice cream!
Homemade Mexican Ice Cream recipe
Short Description
Enjoy this Irresistible Homemade Mexican Ice Cream recipe featuring authentic Mexican flavors like cajeta, horchata, tamarind, and mango chile. Easy to make with both custard and no-churn options, this creamy frozen dessert is perfect for every skill level and sure to delight your taste buds.
Recipe Details
- Serving Size: About 4 servings (1 quart)
- Prep Time: 20 minutes
- Cook Time: 30 minutes
- Total Time: 50 minutes
Ingredients per Serving
- 2 cups whole milk
- 1 cup heavy cream
- 4-5 large egg yolks
- 3/4 to 1 cup sugar (or substitute with agave or honey)
- 1-2 cinnamon sticks
- 1 teaspoon vanilla extract or Mexican vanilla
- Optional: piloncillo or dark brown sugar for a deep caramel flavor
- Cajeta for swirling ribbons
- Optional mix-ins: tamarind paste, mango puree, chopped candied chiles, toasted pepitas, toasted coconut flakes
- Pinch of salt
Nutritional Facts
- Calories: 250 kcal (approximate per serving)
- Protein: 4 g
- Carbohydrates: 28 g
- Fats: 14 g
- Fiber: 1 g
- Sodium: 50 mg
- Sugar: 20 g
Instructions
Step 1
Warm the whole milk, heavy cream, cinnamon sticks, and vanilla in a saucepan over medium heat until steaming but not boiling.
Step 2
In a separate bowl, whisk the egg yolks and sugar together until pale and creamy.
Step 3
Slowly temper the egg yolks by adding a ladle of the hot milk mixture while whisking constantly, then return the full mixture to the saucepan.
Step 4
Cook gently, stirring constantly, until the custard thickens and reaches 170-175°F. Remove from heat and strain to remove the cinnamon sticks and any lumps.
Step 5
Cool the custard base thoroughly by placing the saucepan in an ice bath, then chill in the refrigerator for several hours or overnight.
Step 6
Alternatively, for a no-cook method, whip the heavy cream to soft peaks, then gently fold in sweetened condensed milk and your choice of flavorings for a creamy base.
Step 7
Once chilled, churn the custard or no-churn base in your ice cream machine according to the manufacturer’s instructions until soft-serve consistency is reached.
Step 8
Add mix-ins such as cajeta ribbons, mango puree, or tamarind paste during the last minutes of churning for extra flavor and texture.
Step 9
Transfer the ice cream to a shallow container, press plastic wrap directly on the surface to prevent ice crystals, and freeze for at least 4 hours or overnight until firm.
Step 10
Before serving, let the ice cream sit at room temperature for 5-10 minutes to soften for easy scooping. Enjoy your creamy, authentic Mexican ice cream!